Any integration can be setup as Custom App and they function similarly to other pre-built integrations available in Refold.Documentation Index
Fetch the complete documentation index at: https://docs.refold.ai/llms.txt
Use this file to discover all available pages before exploring further.
Creating Custom Apps
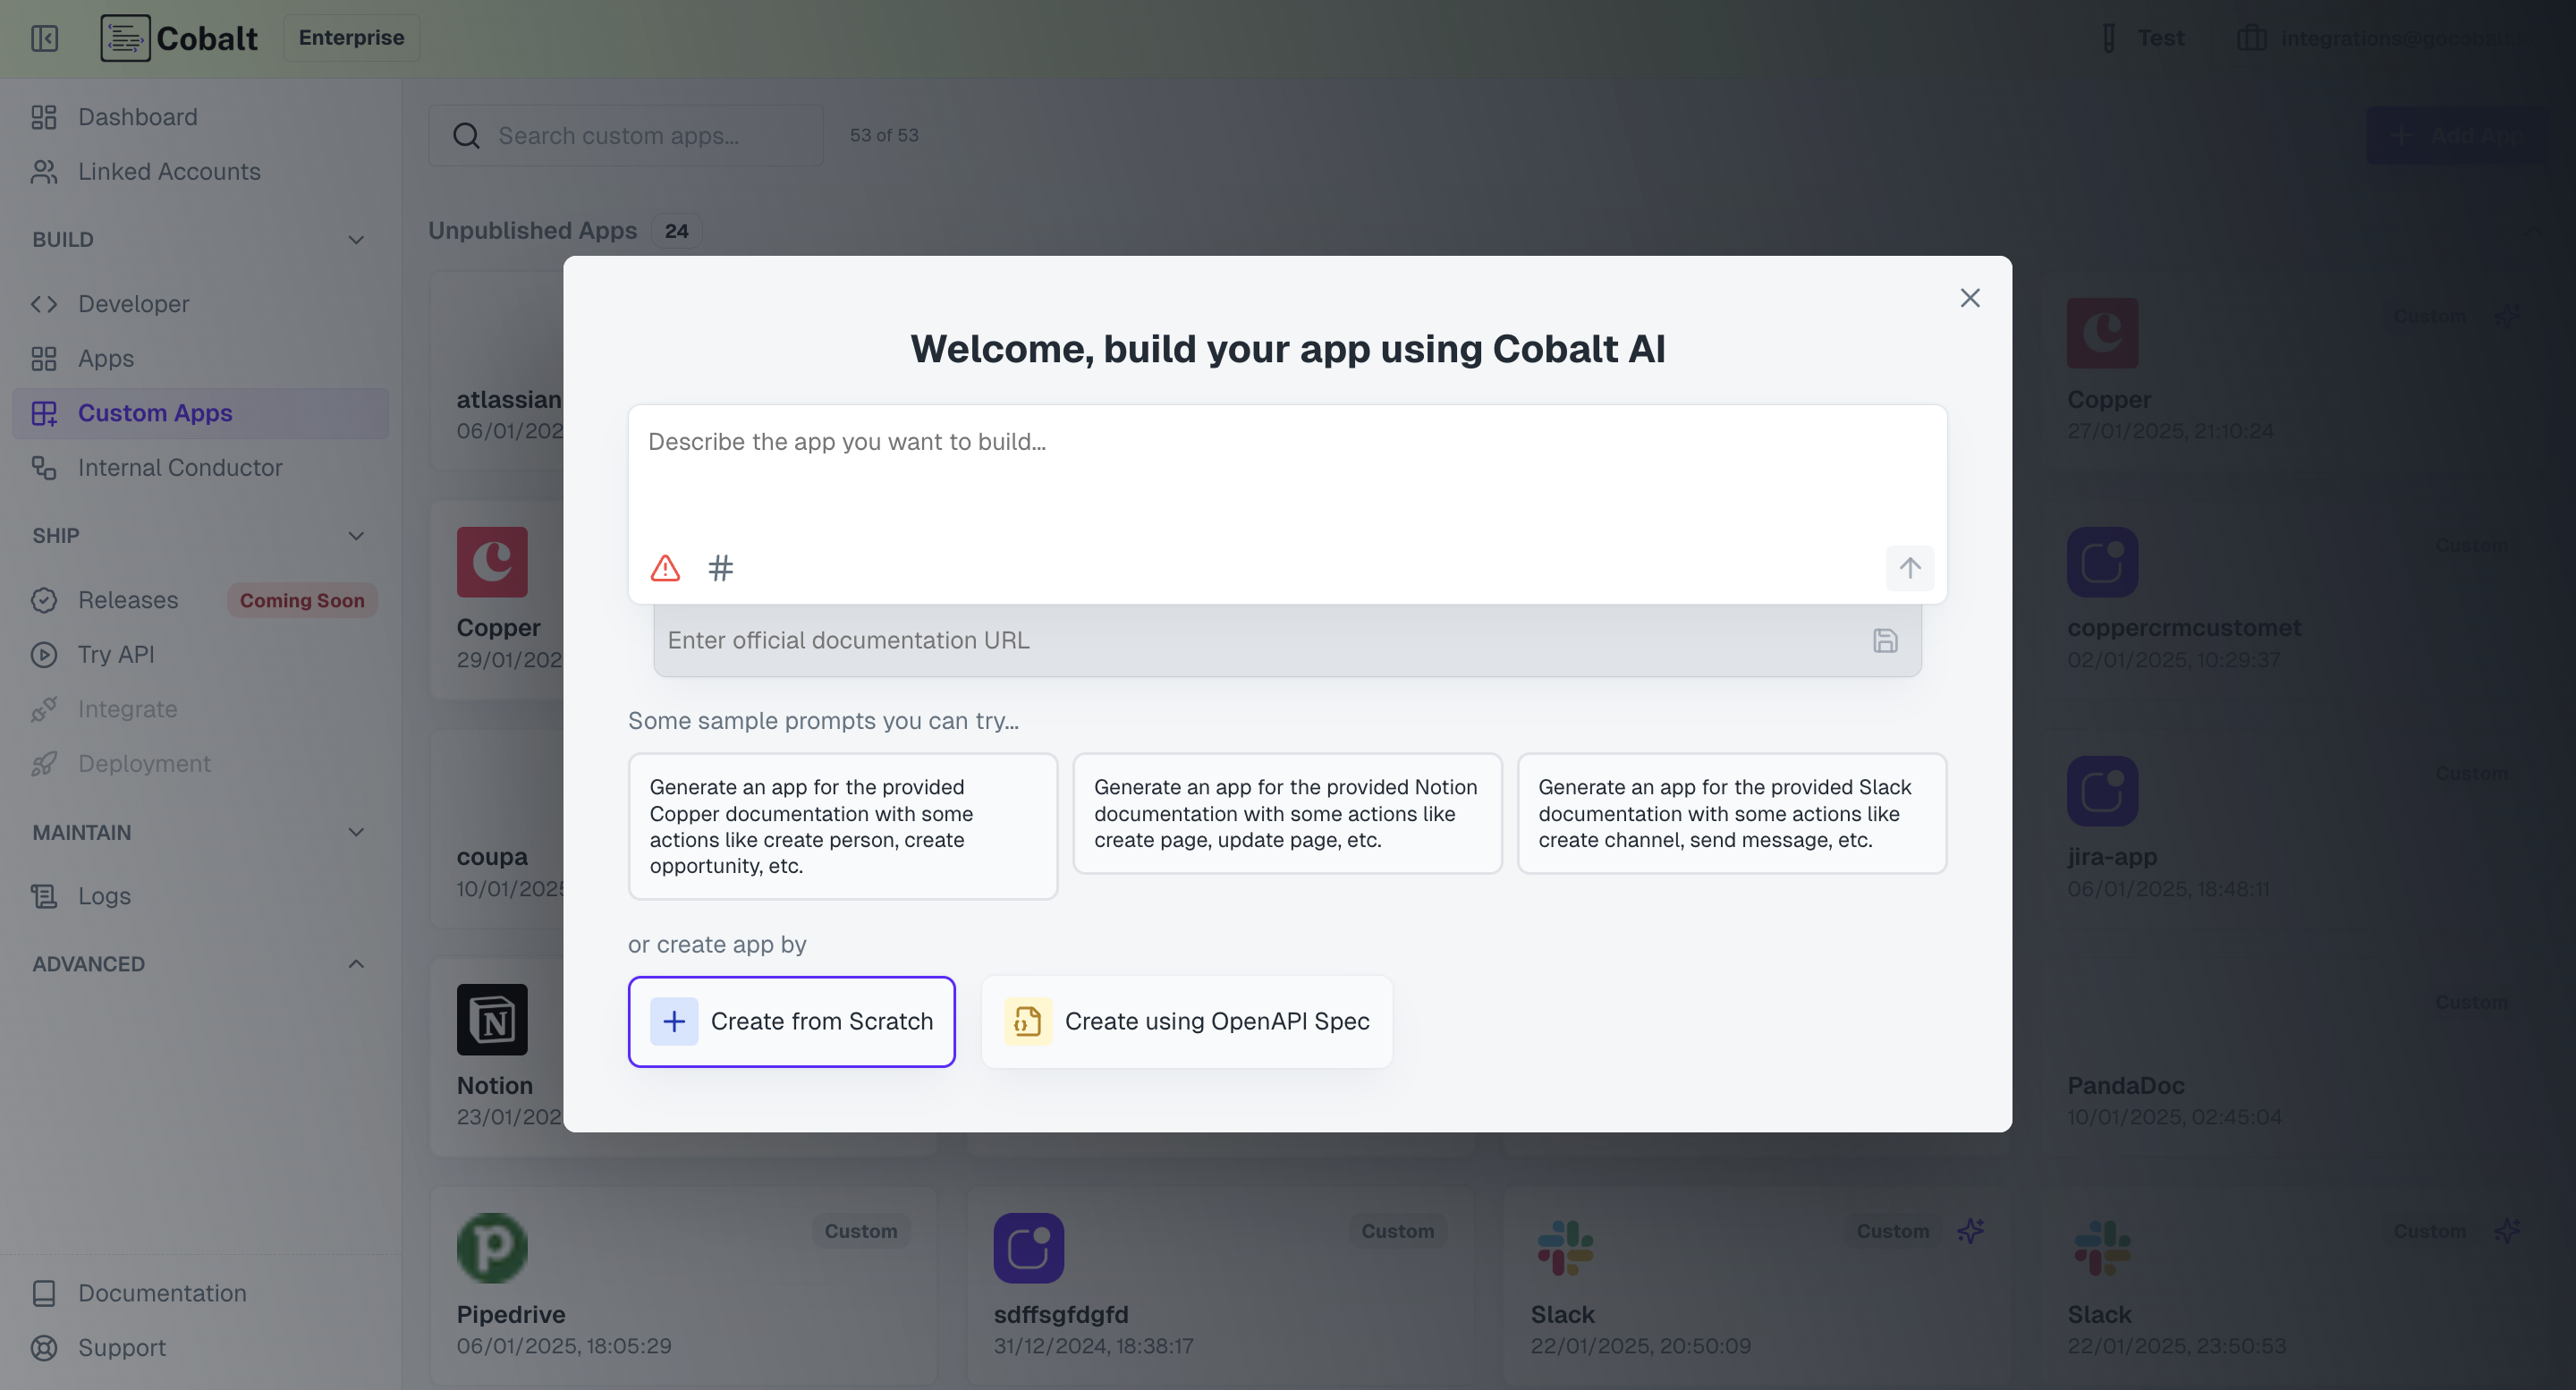
To create a custom app, click on+ Add App in the Apps section and specify Name, Description and Slug to identify the app within the Refold platform and click on Create
Authentication Methods
Custom Apps support multiple authentication methods. To setup the Authorization for the Custom App, navigate toAuthorization in the App and choose the desired method.
The methods of Authorization are:
Key Based
Key Based
If the Custom App requires API Key based authentication, select 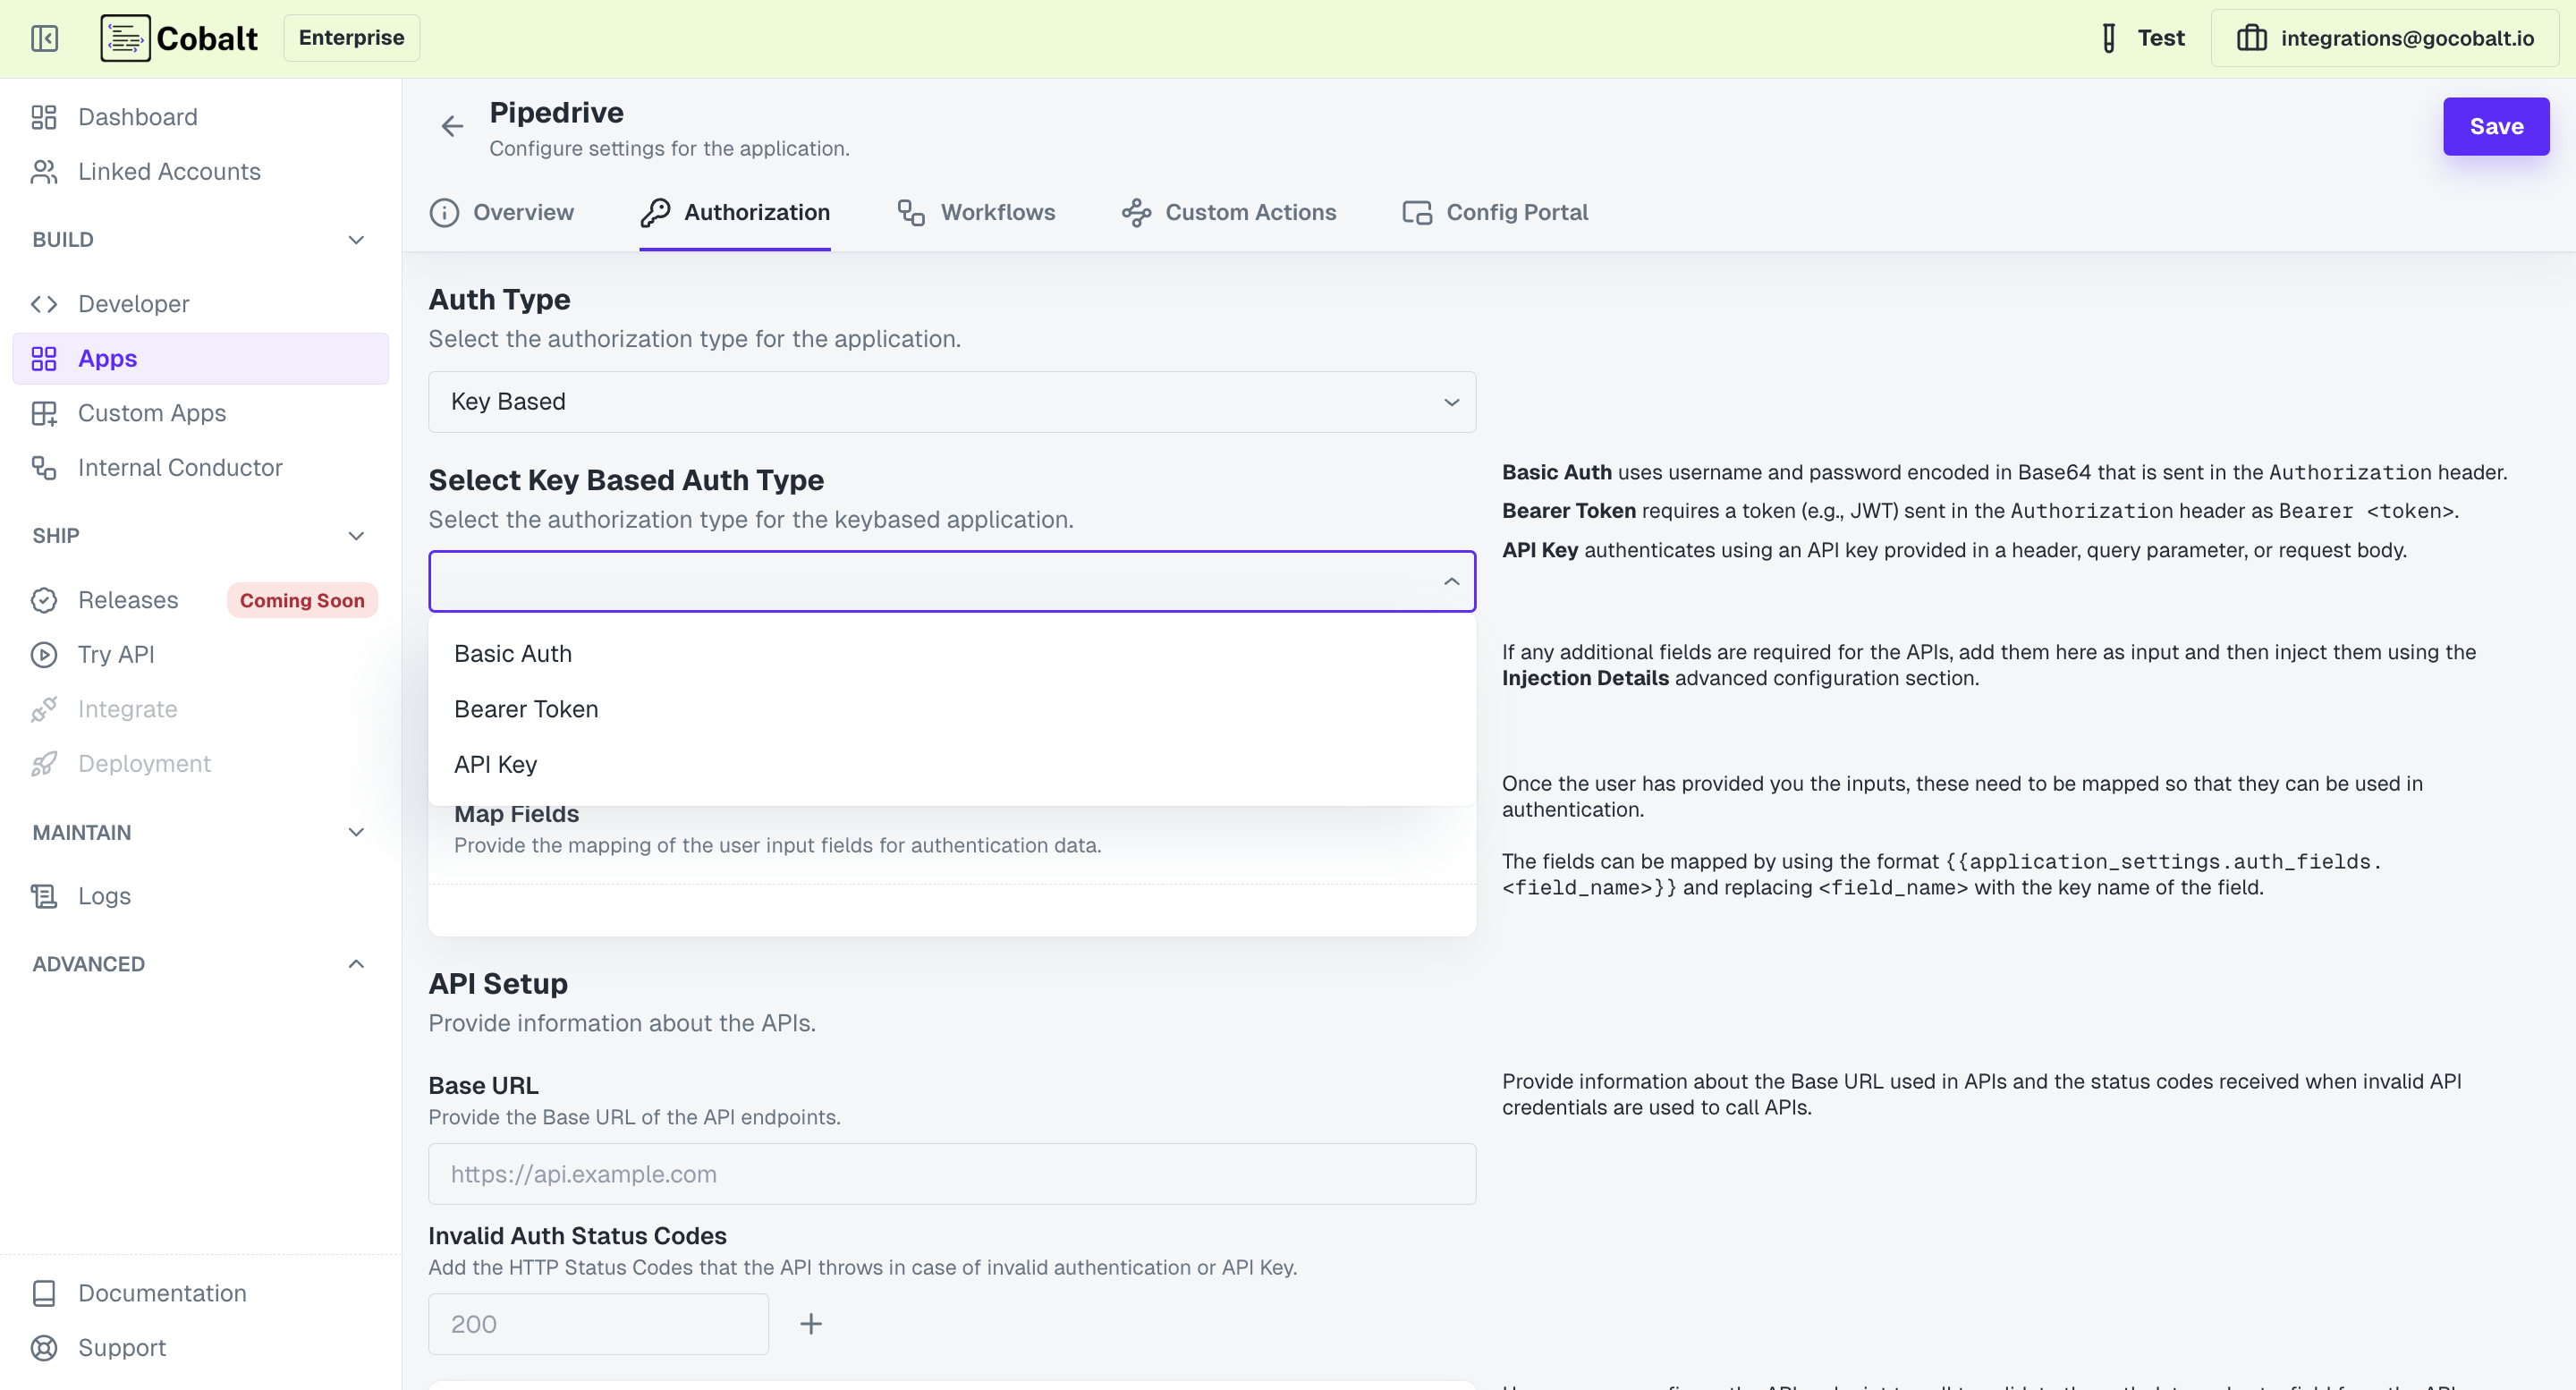
Key Based. It requires users to set up an API for generating access tokens.Configure User Input Fields
Add the input fields that will be visible to your users asking for the required API credentials and click on
Save.Map Auth fields
Once you have added the required user input fields, map those fields now to setup auth data.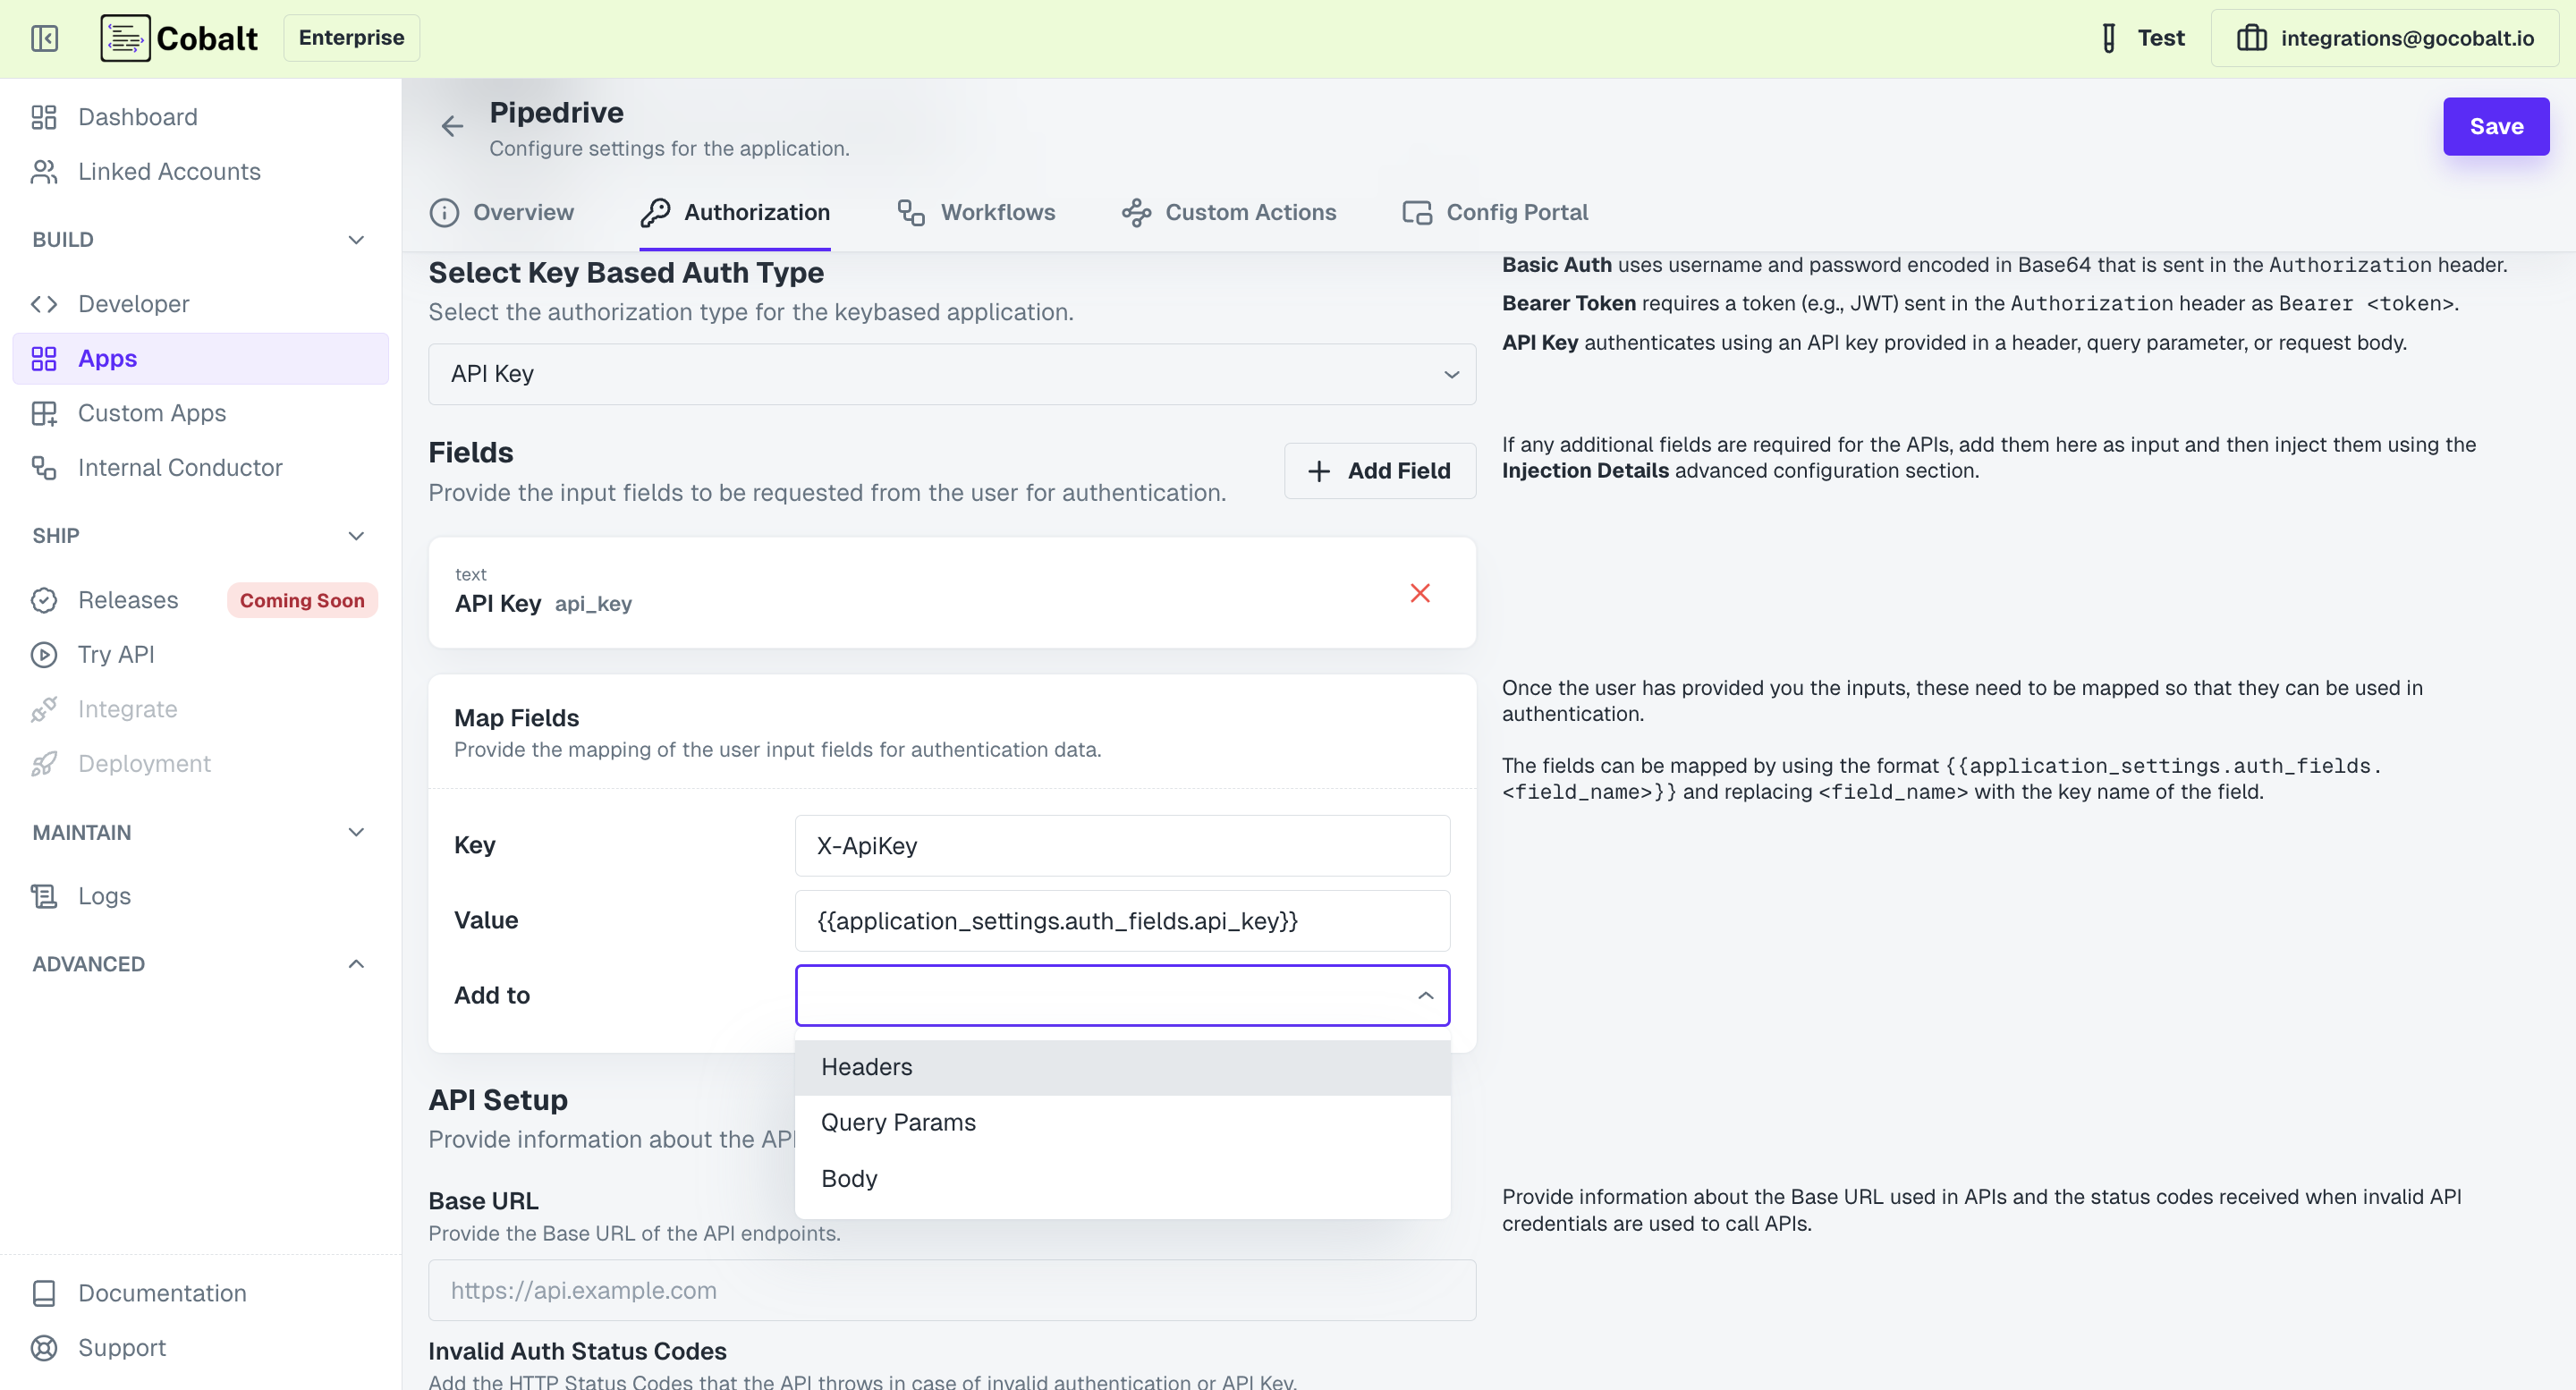
Add Base URL
Provide the Base URL of the API endpoints for the custom app and the key code for Invalid API Credentials.
Congratulations!You have successfully setup a Key based Custom Application in Refold.
OAuth 2.0
OAuth 2.0
If you want to provide OAuth 2.0 type authorization, select 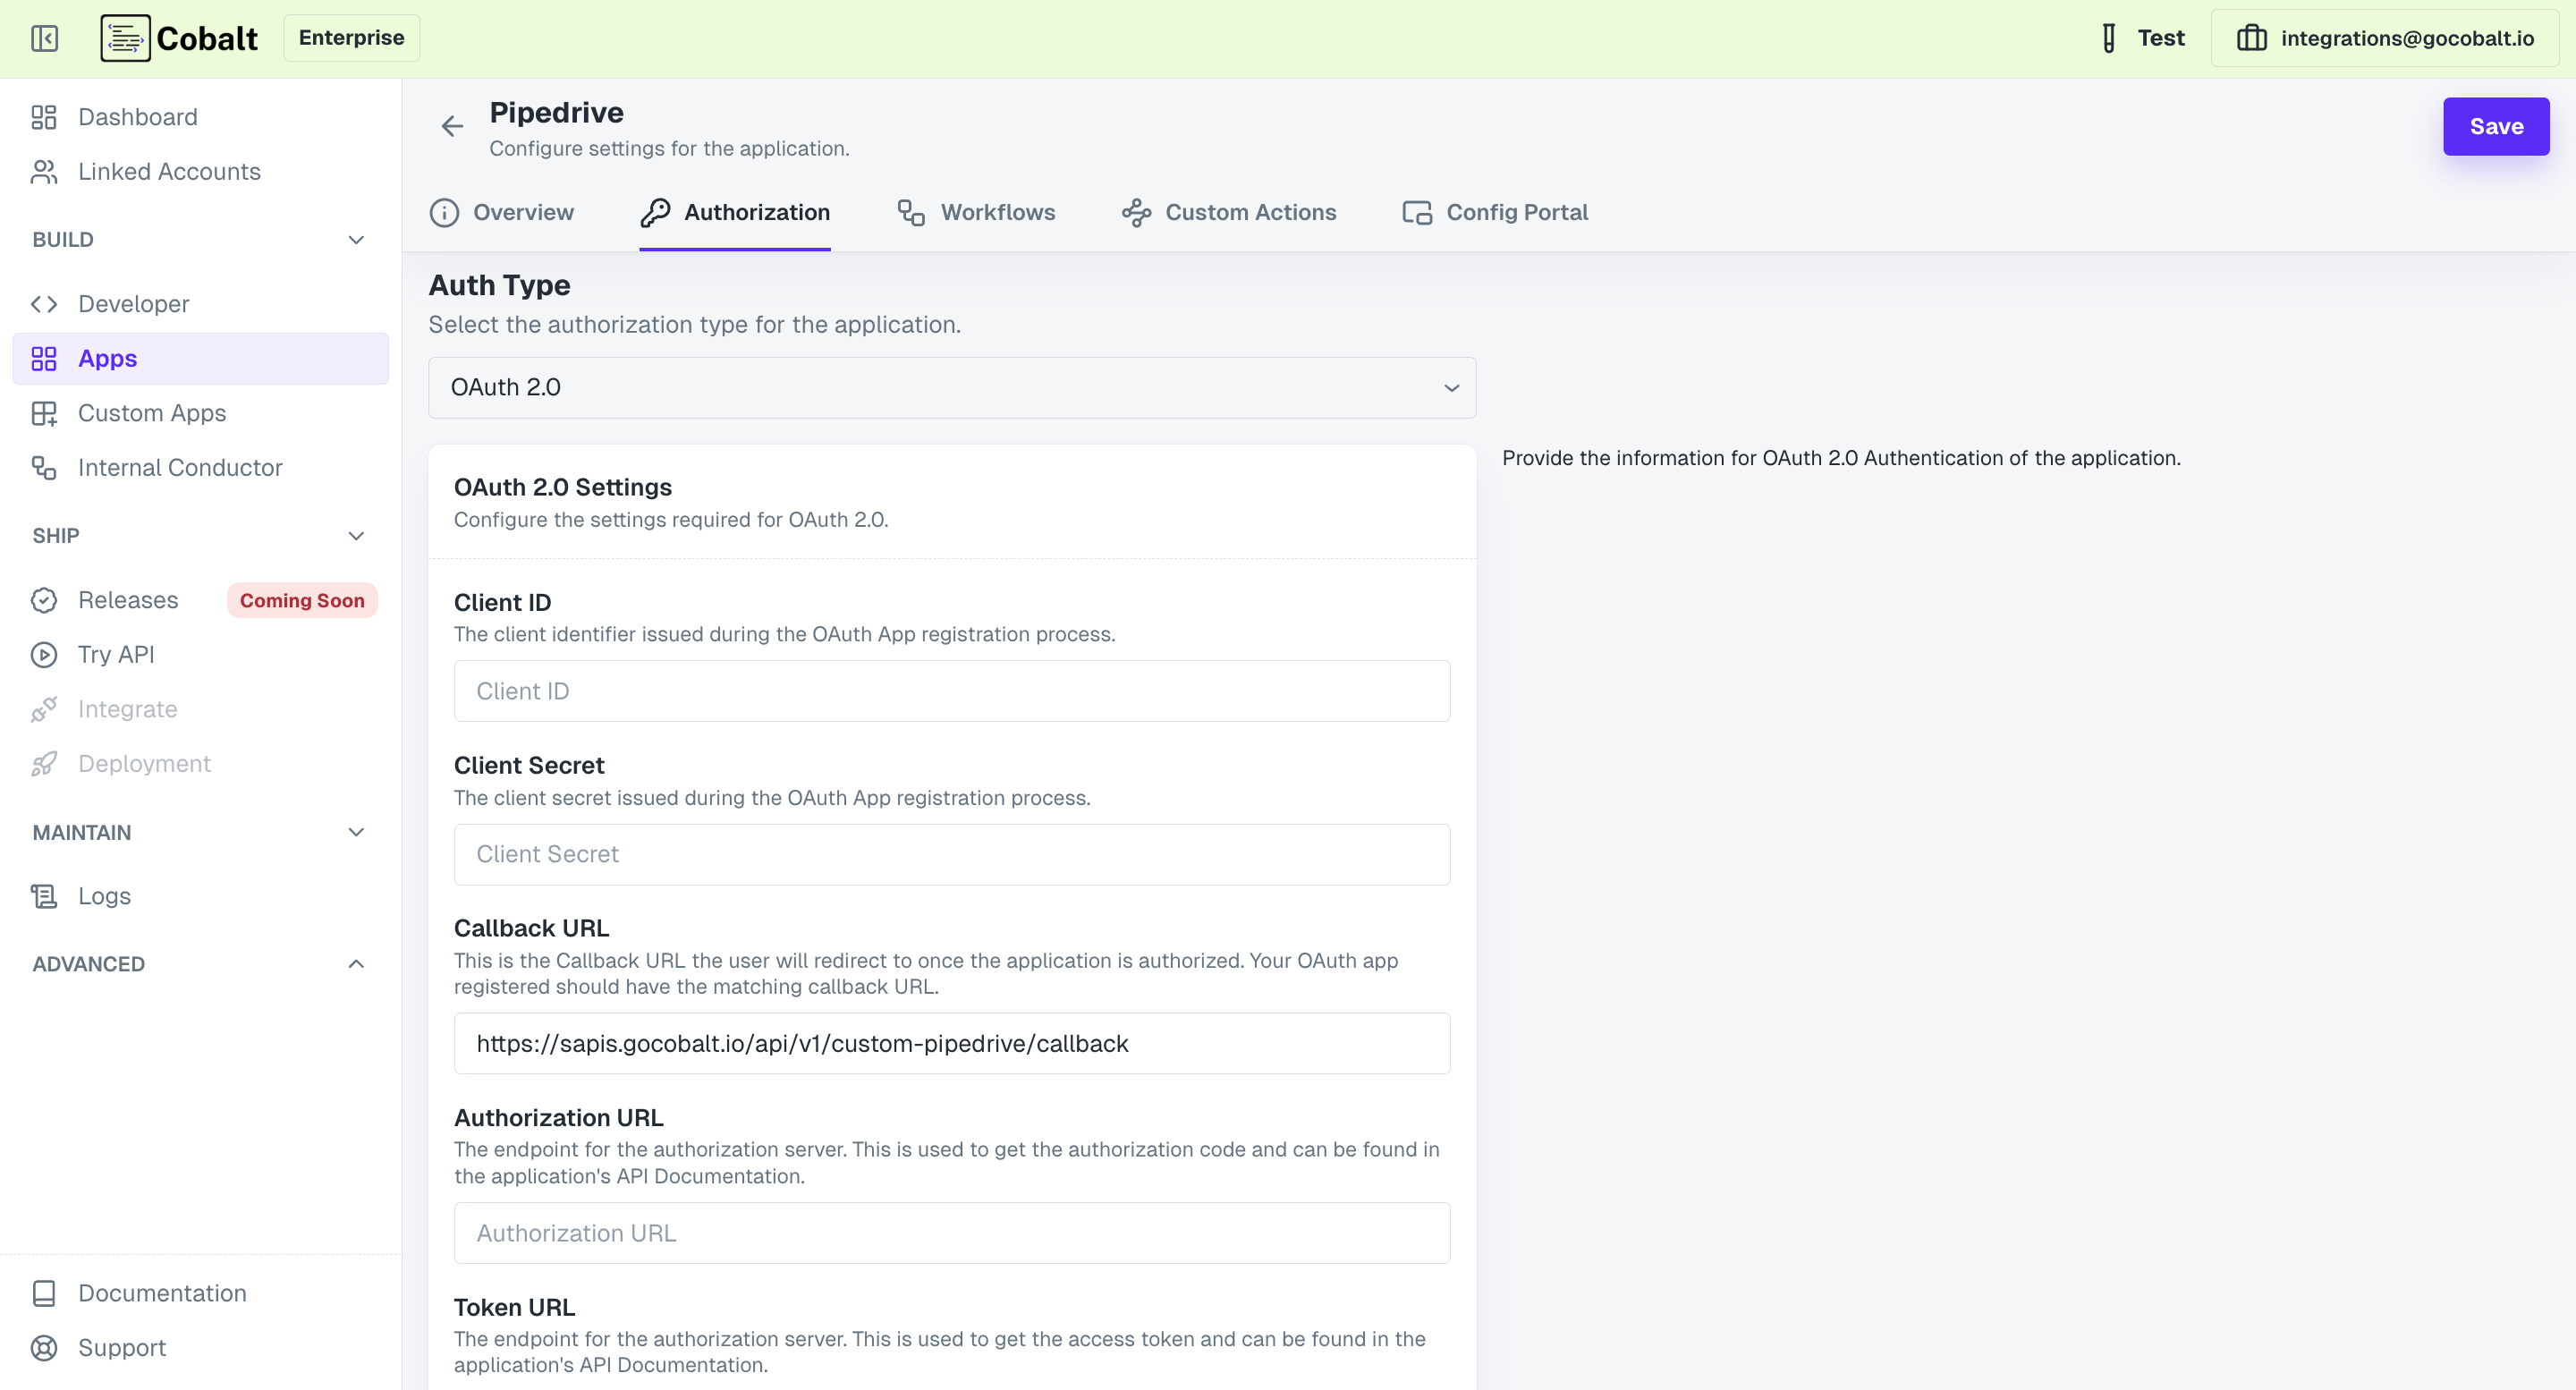
OAuth 2.0 in the methods.Provide OAuth Credentials
Add the Client ID, Client Secret and the Scopes of the developer OAuth 2.0 app that you have created.
Add Authorization and Token URL
Add the Authorization and Token URL required for OAuth authentication in the provided fields, select
Client Authentication type and Save.You can find both the URLs from the Authentication documentation of the custom app that you are setting up.
Setup Refresh Mechanism and API Base URL
In the 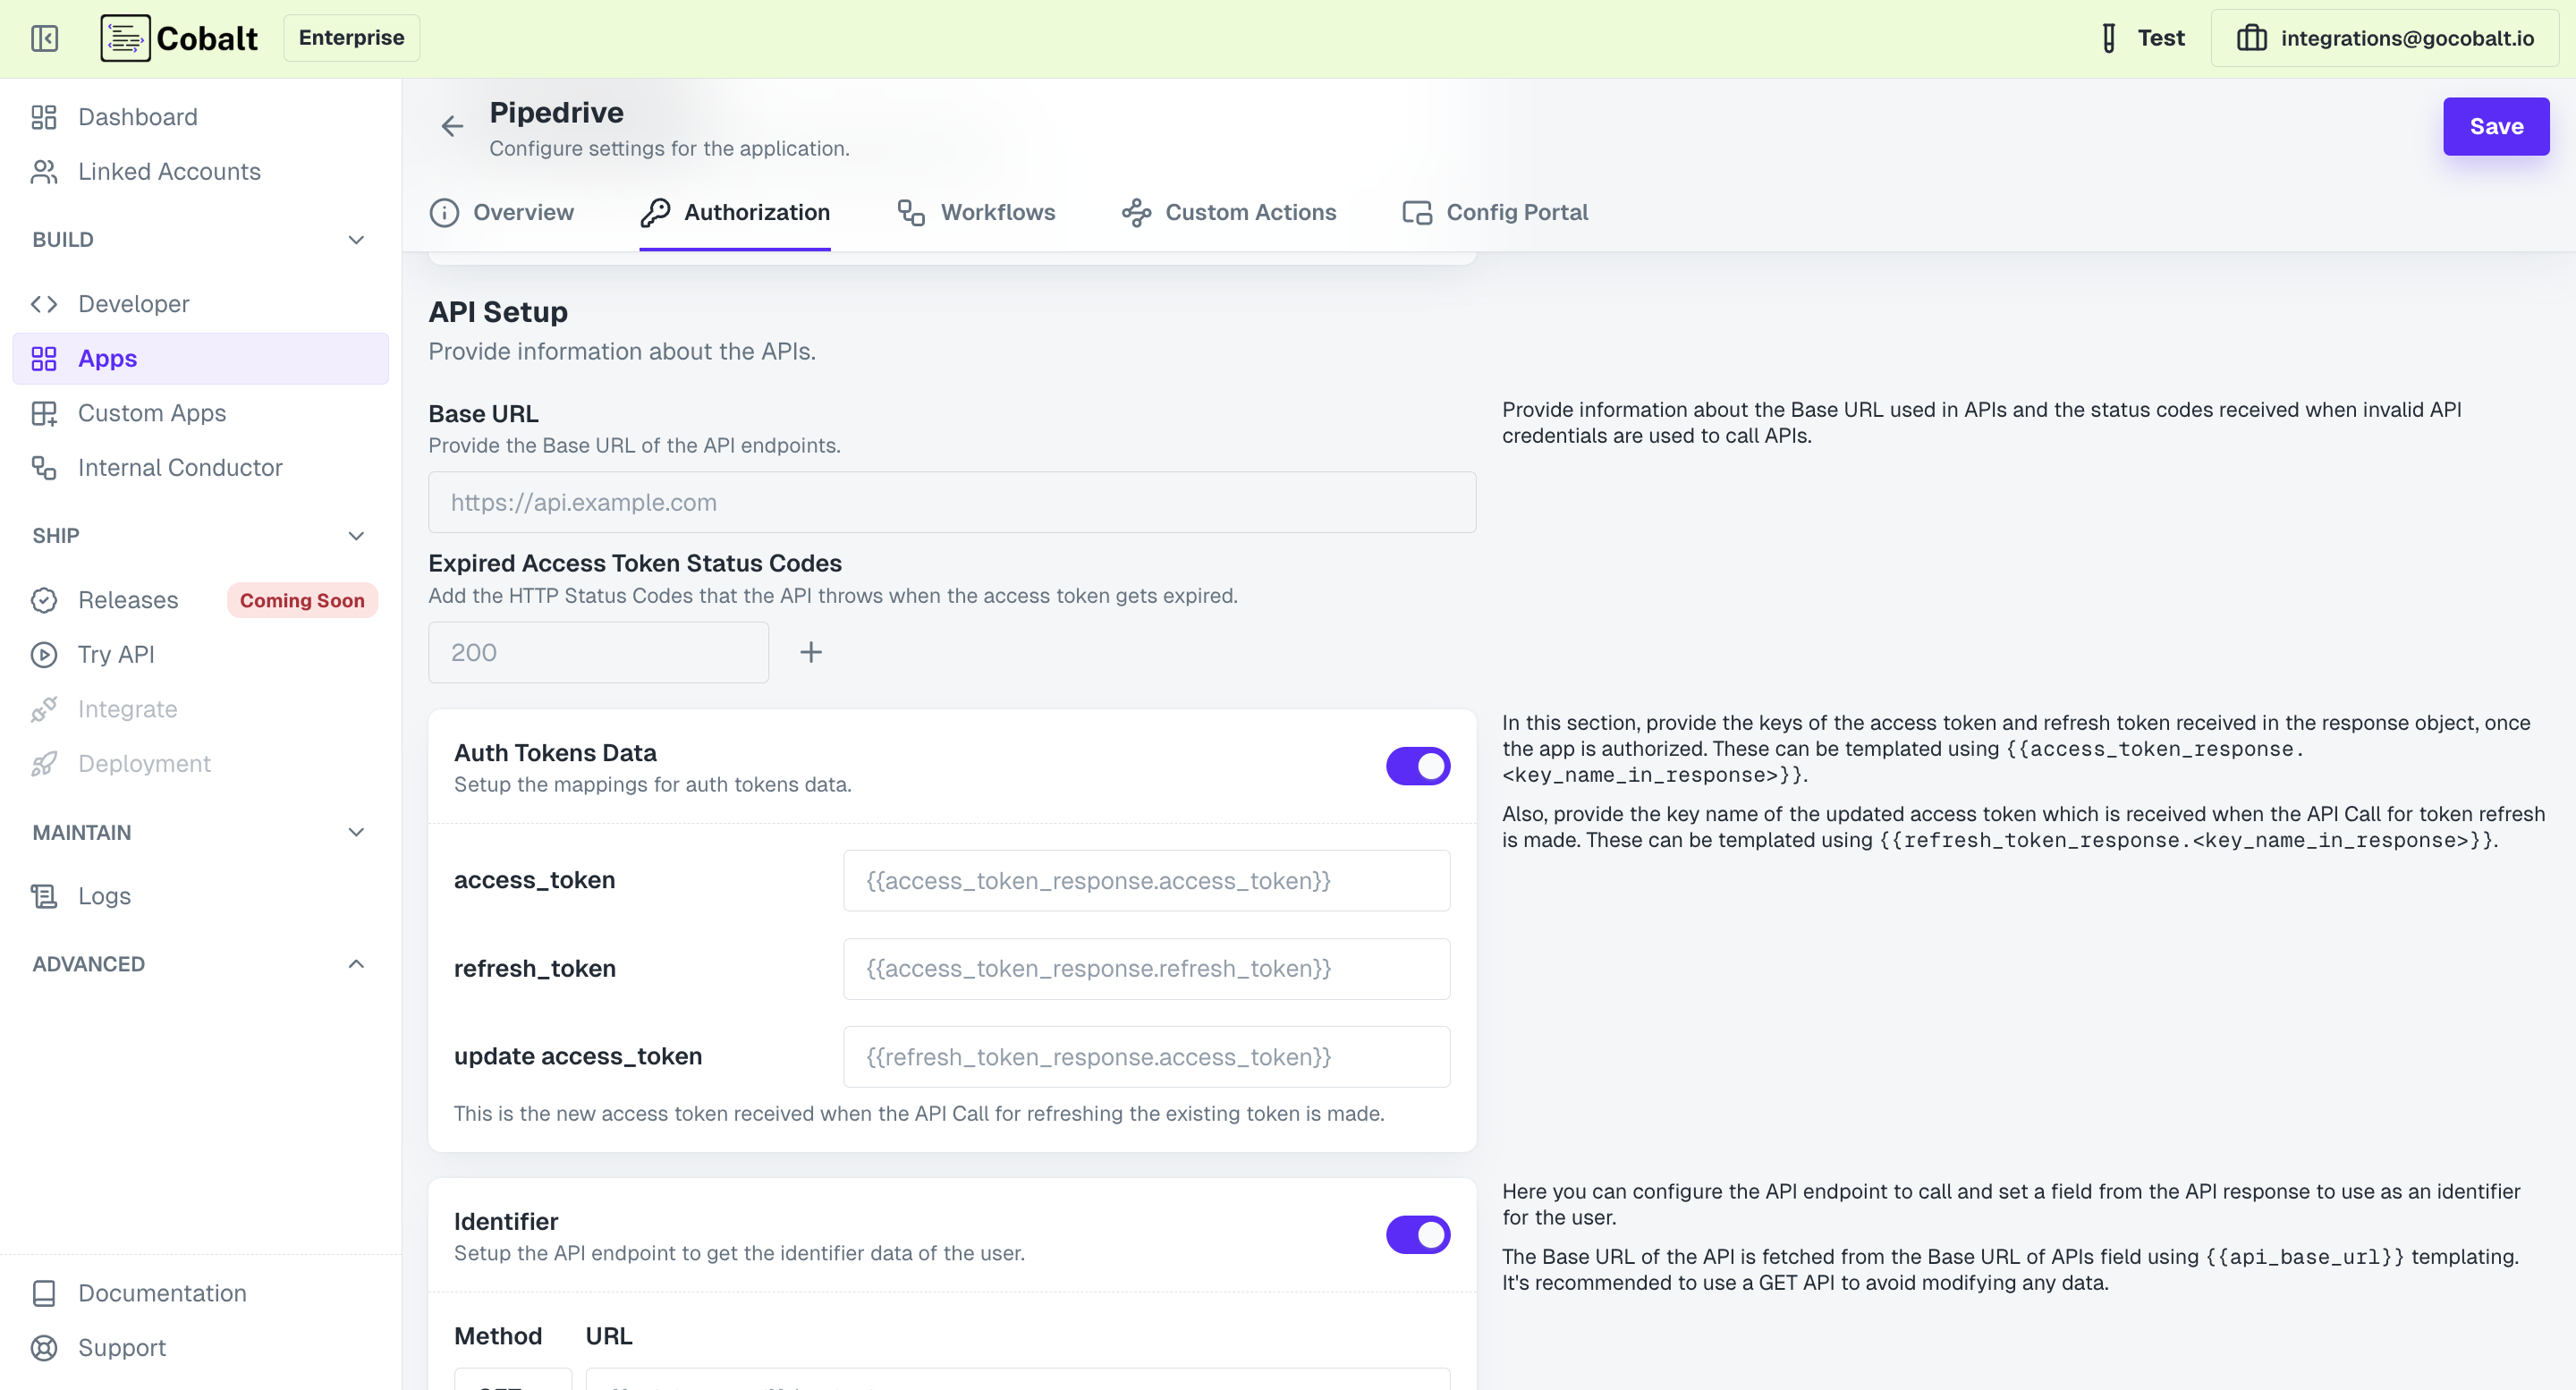
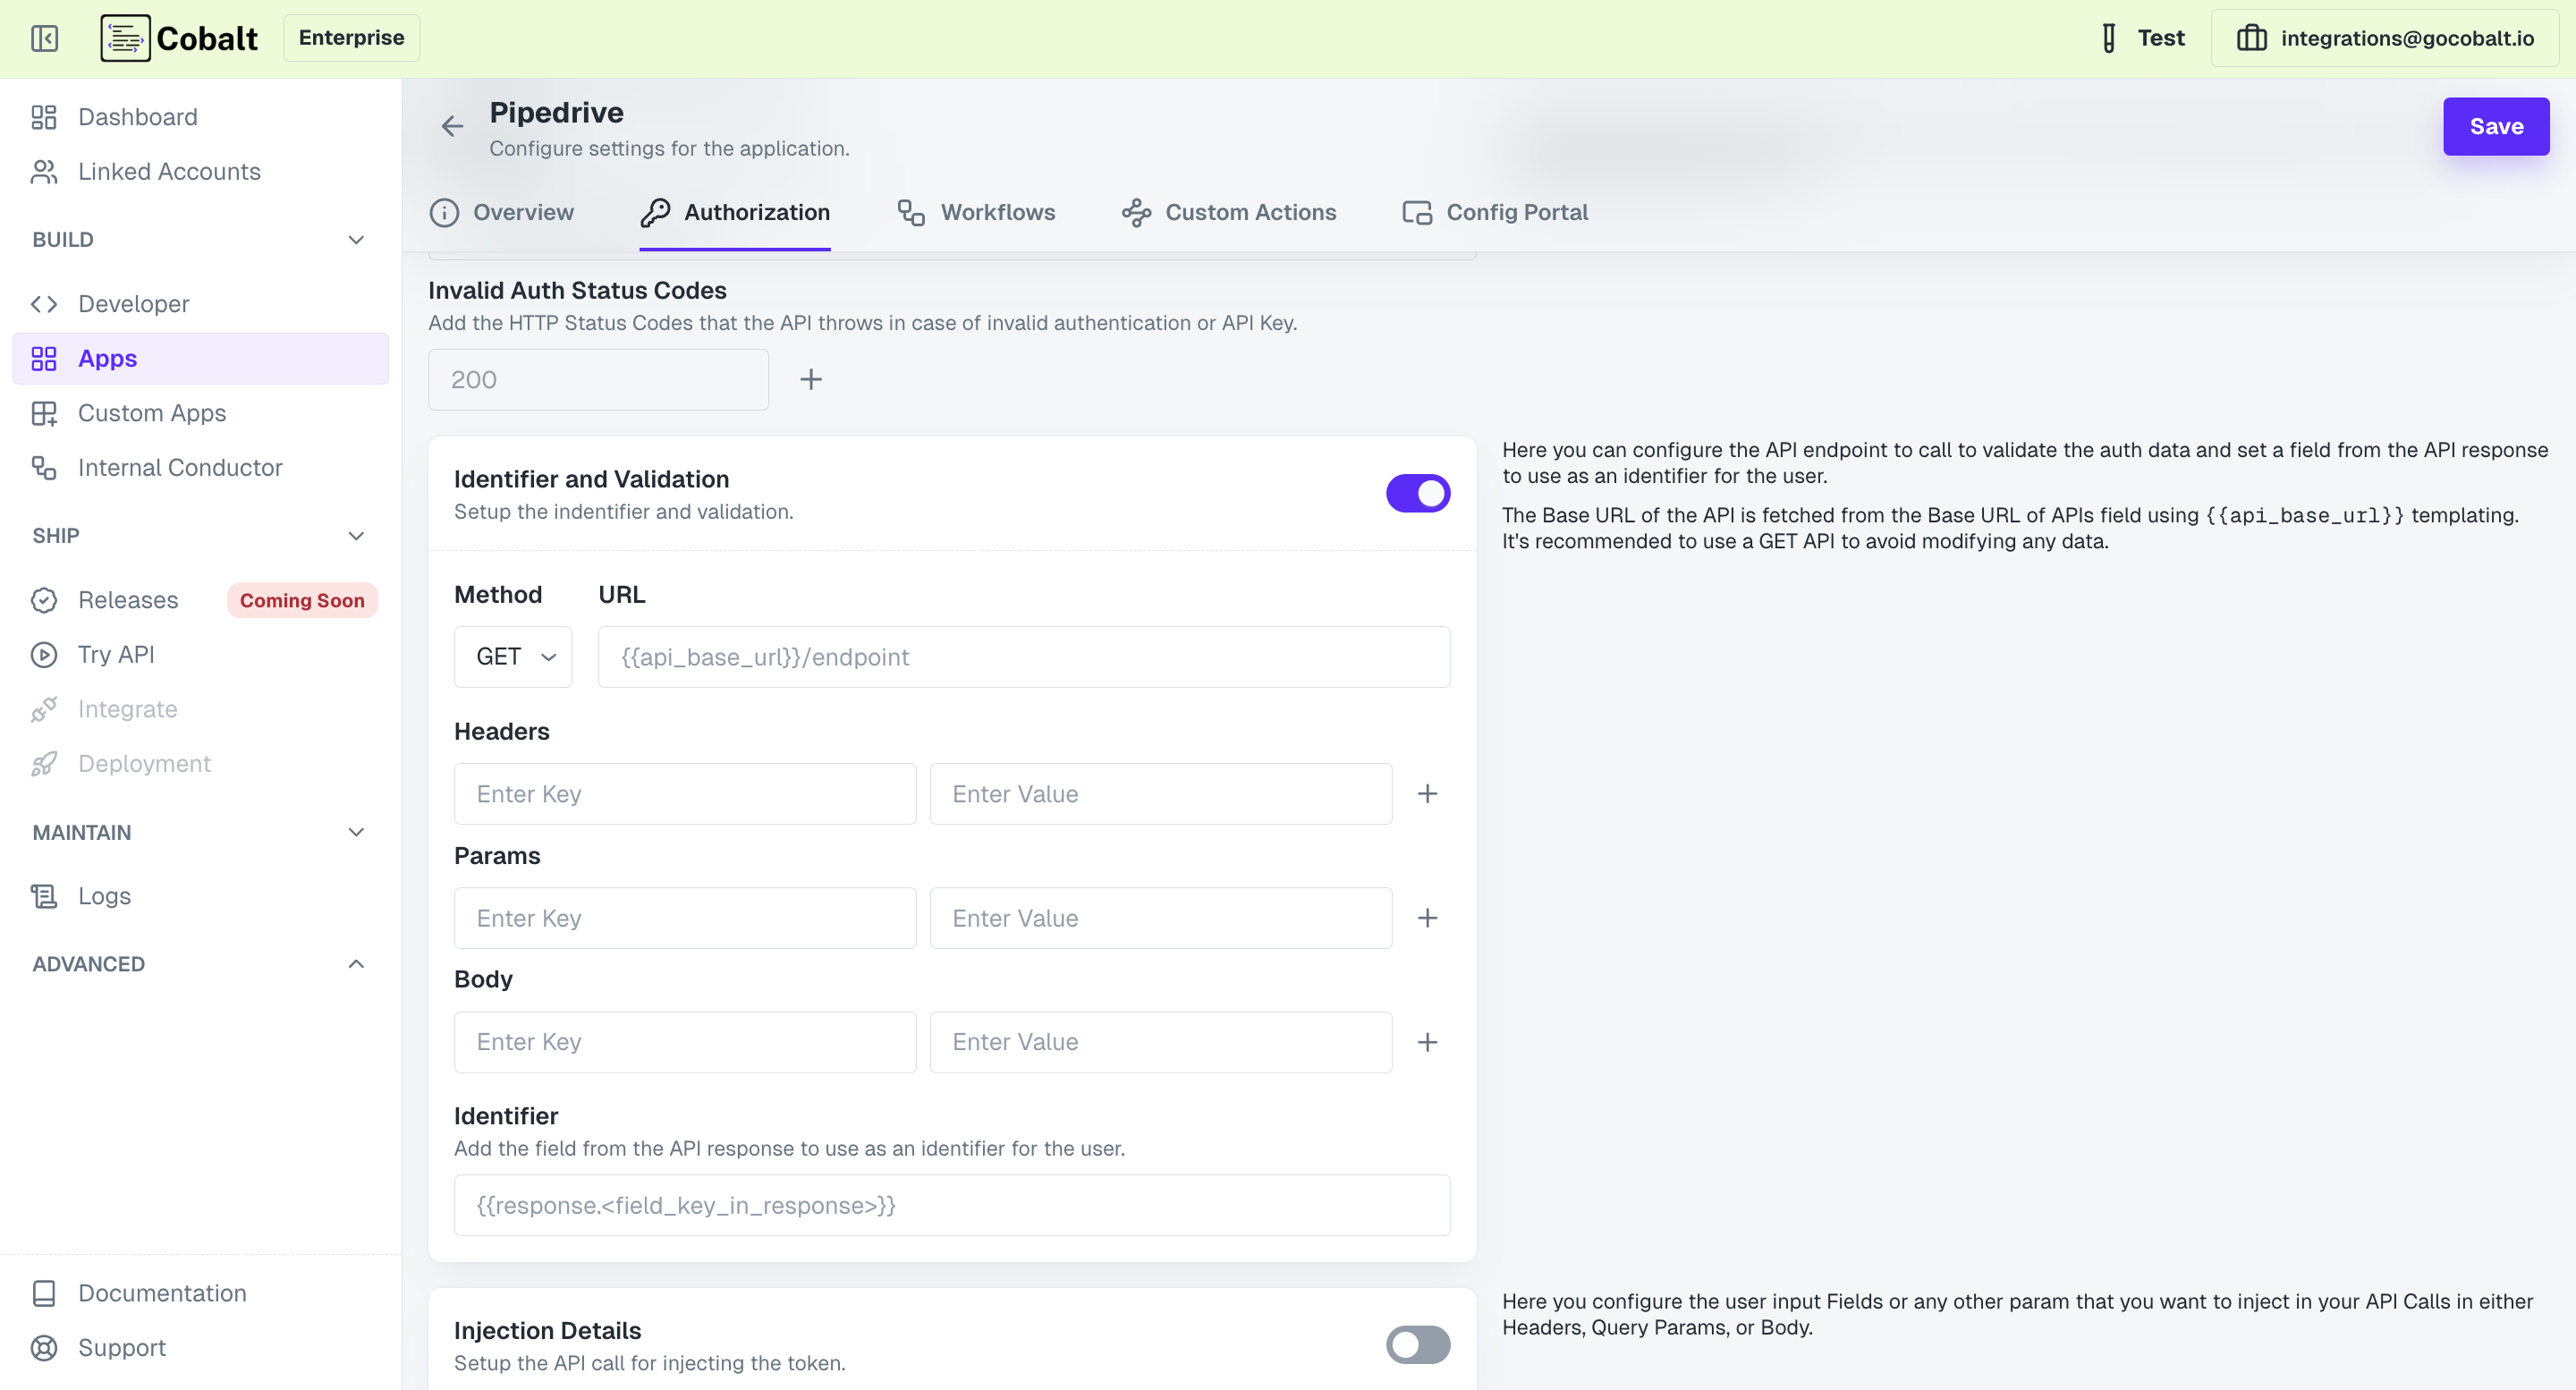
API Setup section, provide the Base URL for the APIs and appropriate code i.e. Expired Access Token Codes which is received on token expiry for the Refresh mechanism to work.Setup Identifier and Validation
Optionally, you can also provide an endpoint which will be called to perform validation of the provided credentials.
Extract Access Token & Refresh Token
In the 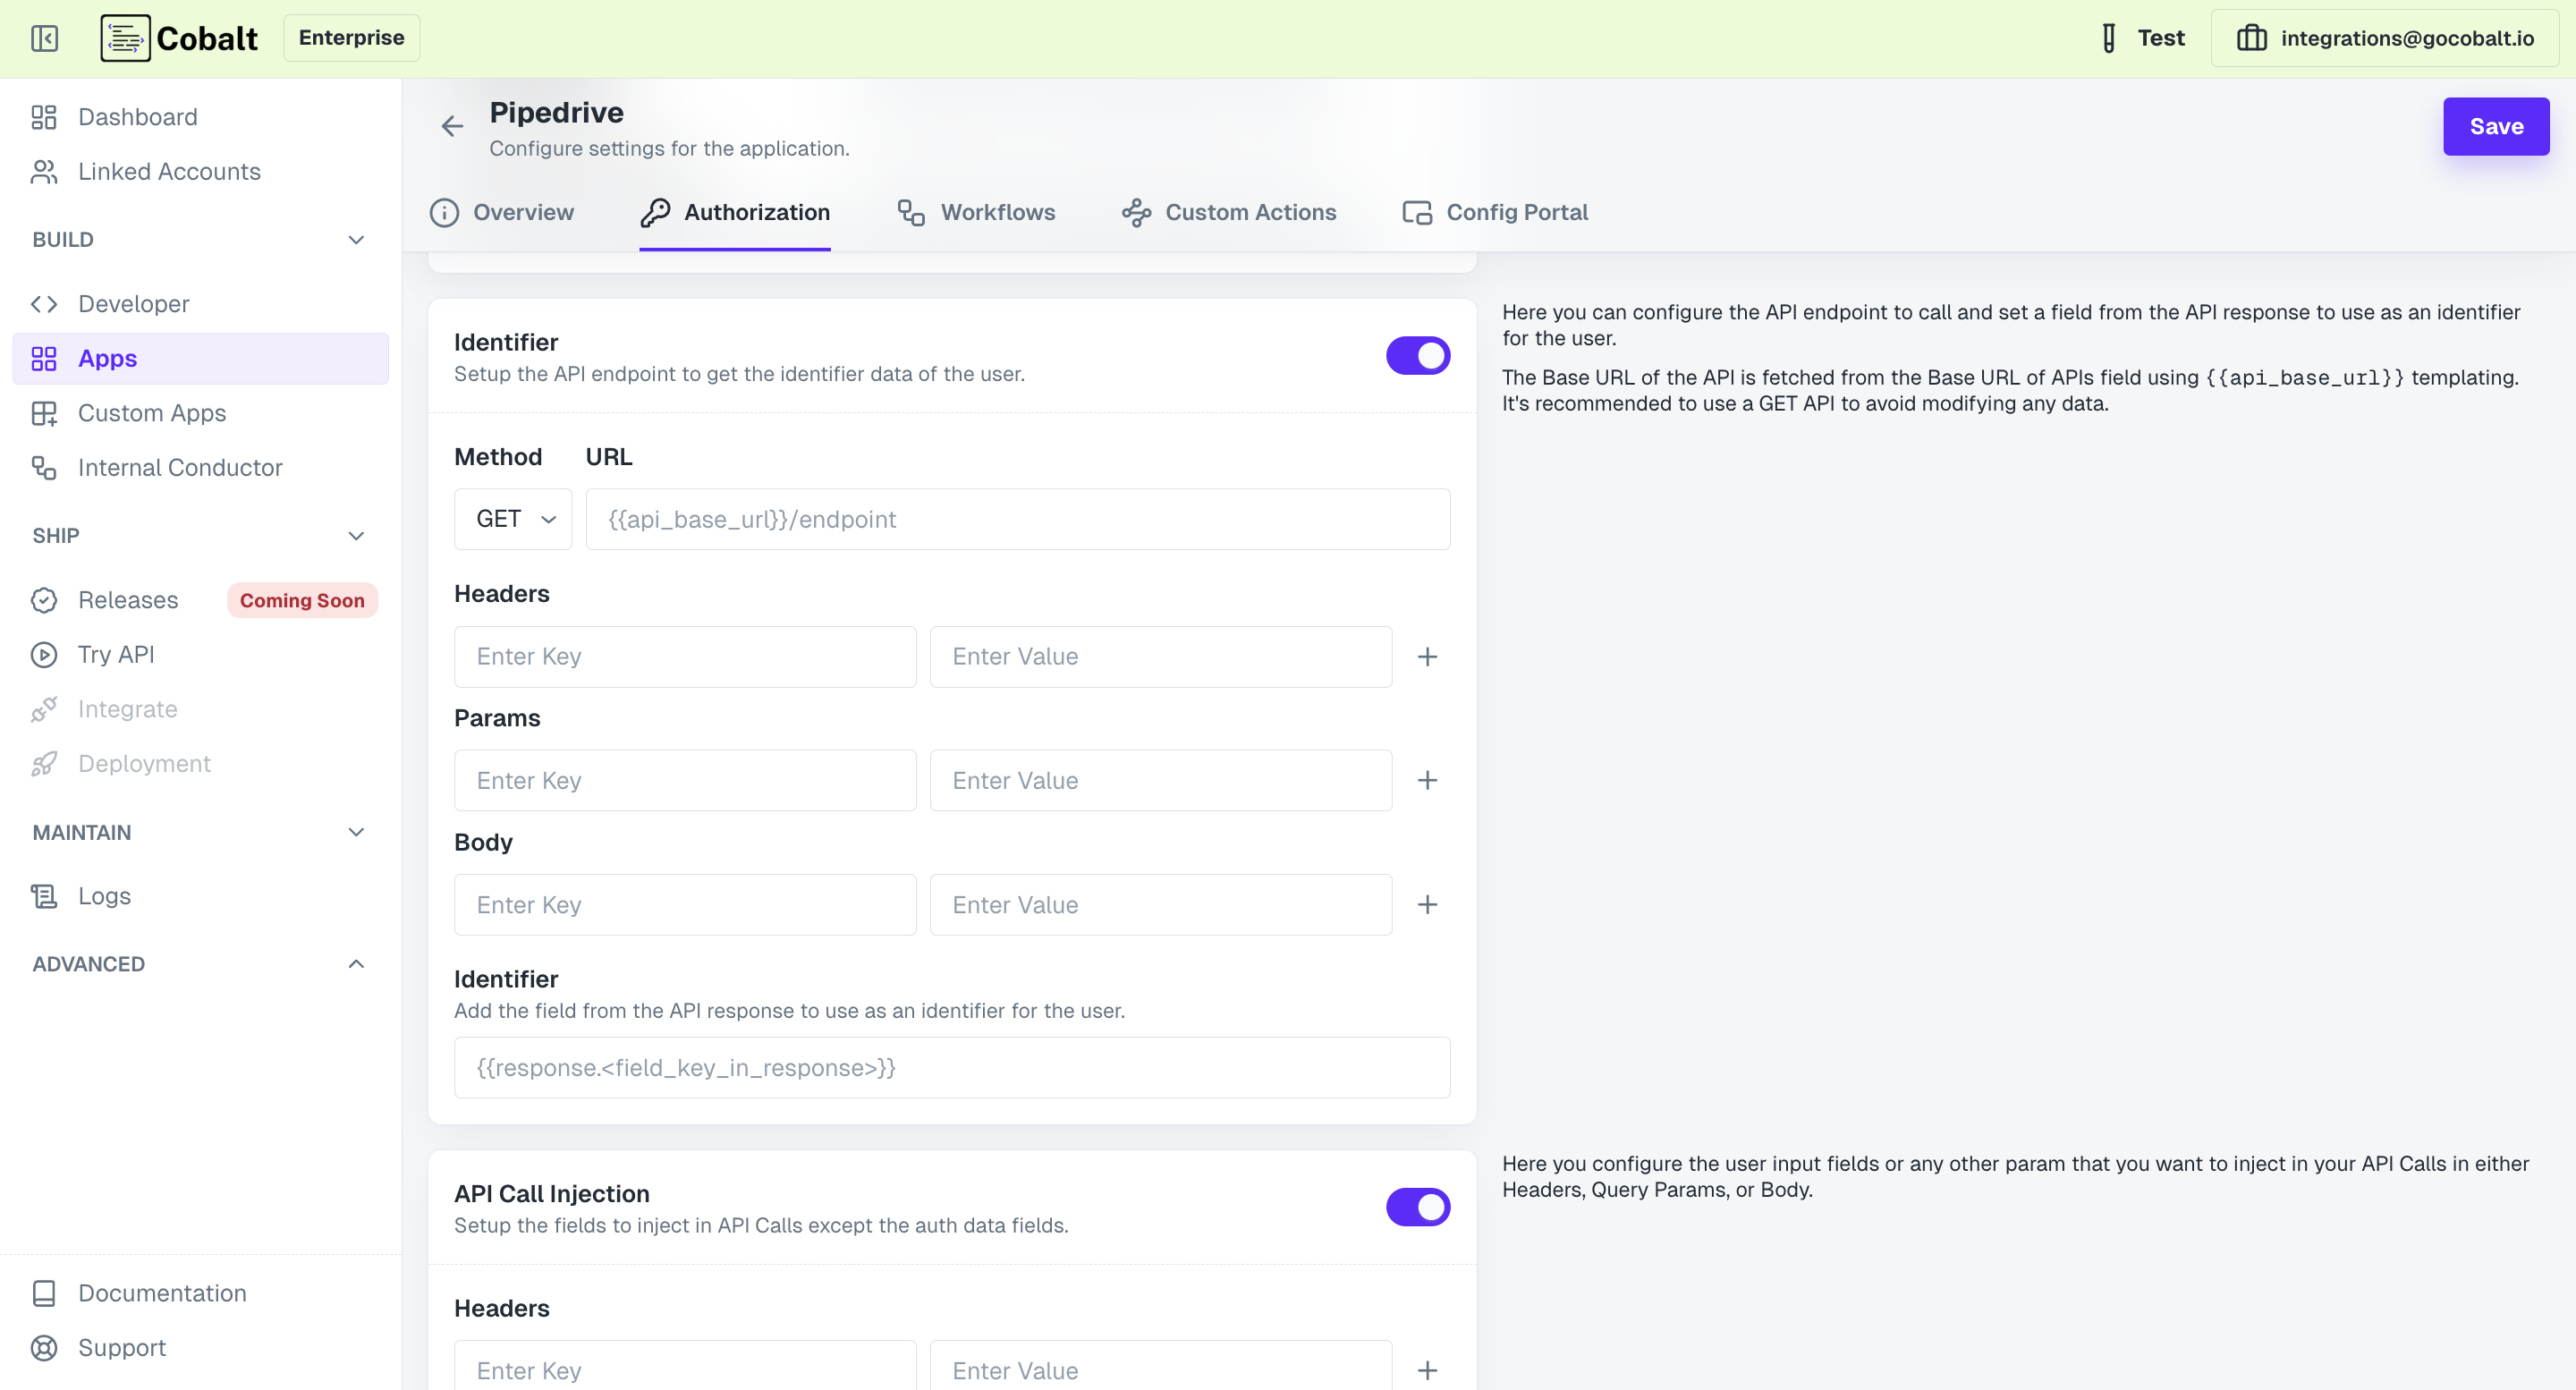
Auth Tokens Data section, you will provide the mapping using which the tokens can be extracted once received on callback on successful authorization.Usually an object is received after authorization which will be saved as access_token_response on Refold’s end and you need to provide the key mapping of the required fields from the object.Congratulations!You have successfully setup a OAuth 2.0 Custom Application in Refold.
No Auth
No Auth
Select this option if no authentication is required for accessing the custom app.
Custom Actions for App
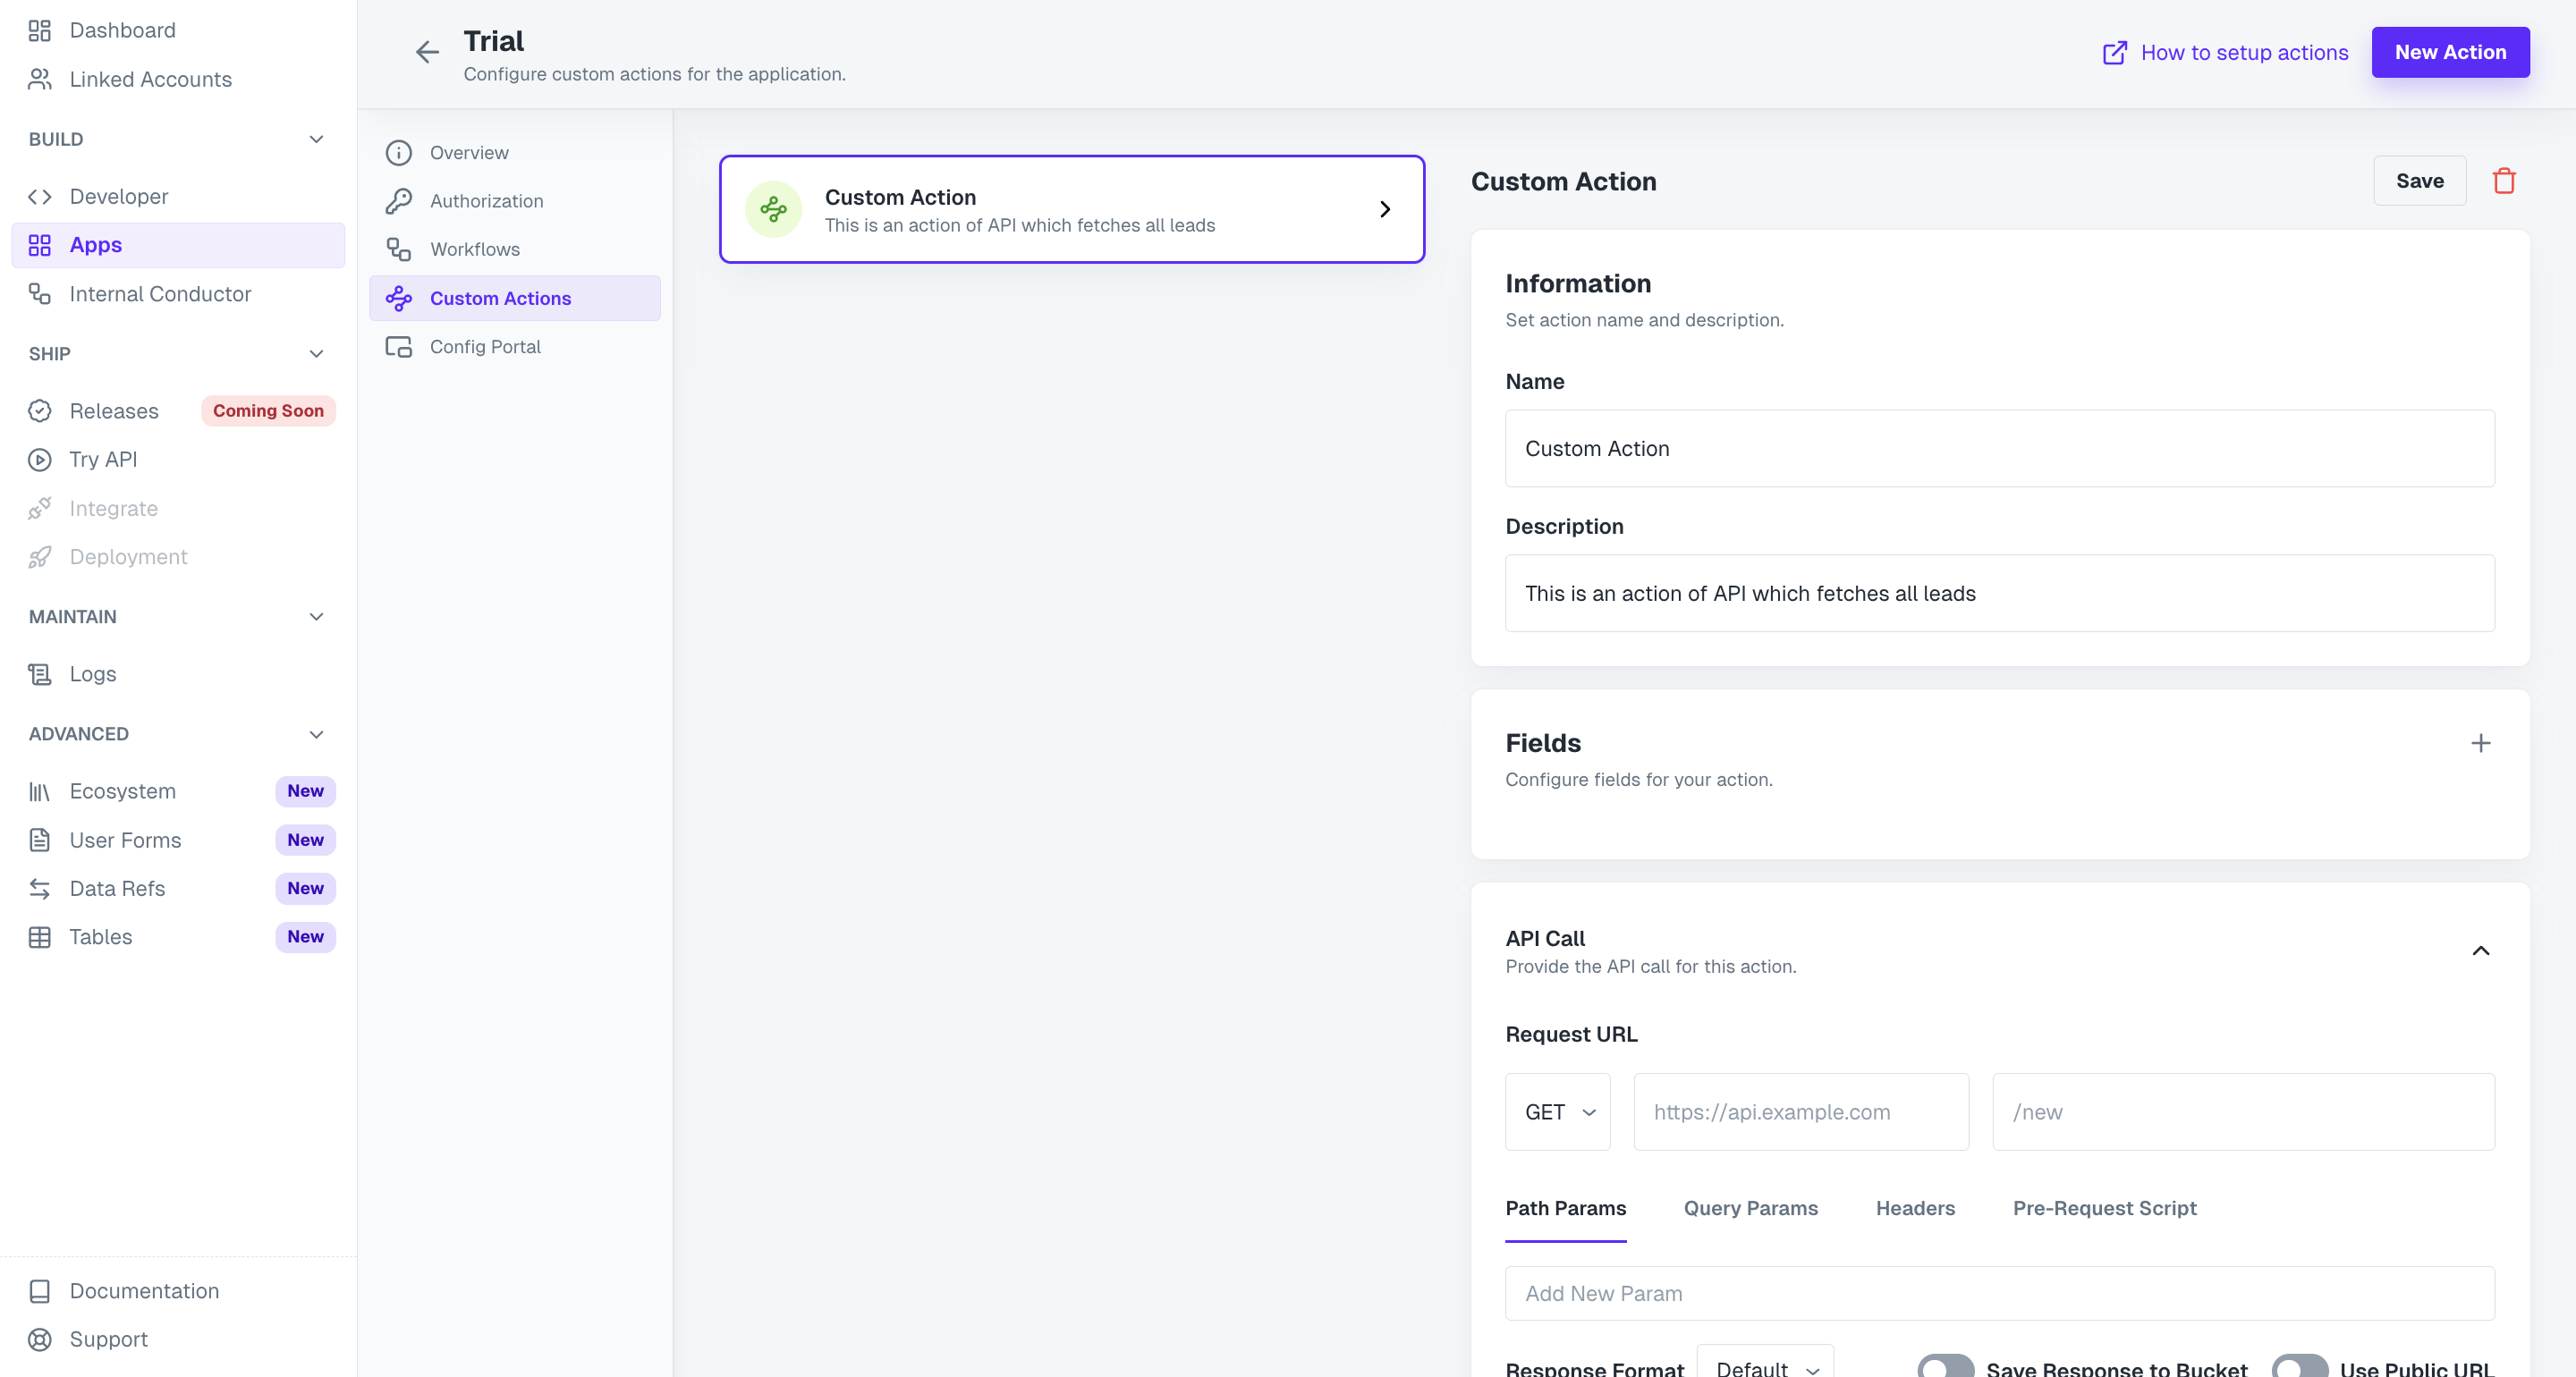
Custom Apps support the addition of Actions of APIs.Create Custom Action
SelectCustom Actions, click on the New Action button and provide a Name and Description.
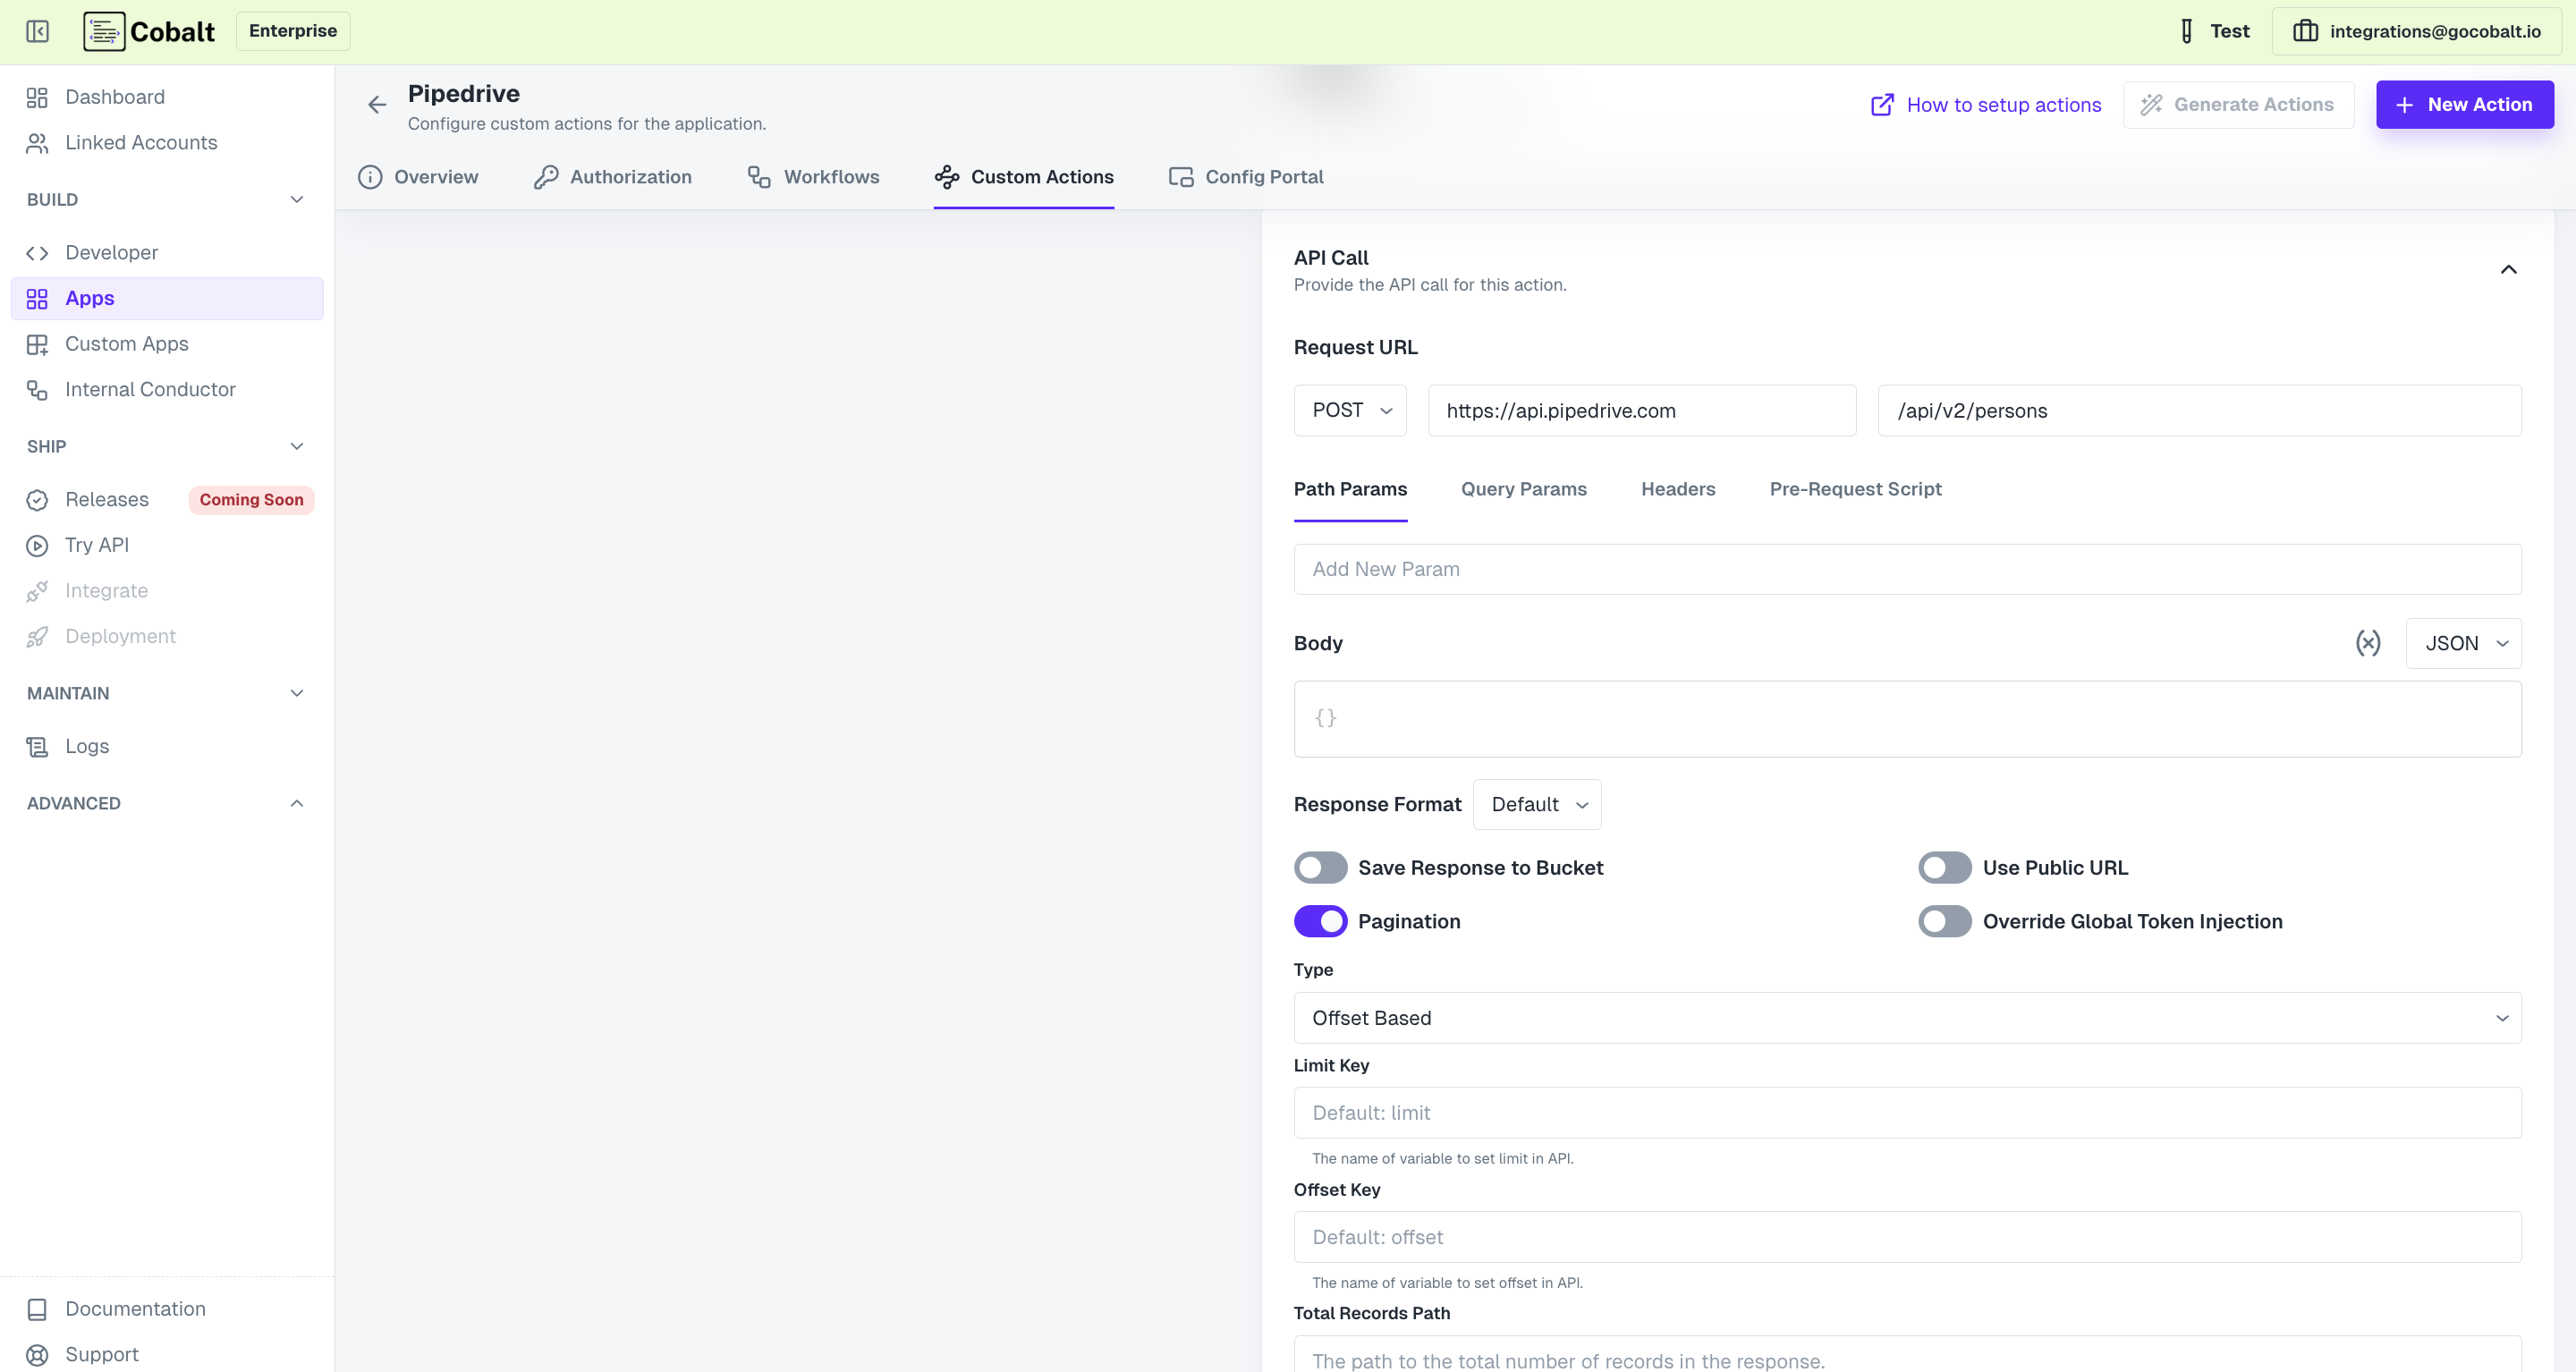
Add any required or optional Fields for the API and add the API under API Call section.
Provide the API by breaking it into 2 parts i.e. Base URL and the Endpoint.
Enable Pagination for Custom Action
If the Action’s API supports pagination, then you can add it to the custom action. Go to the API Call section and enable thePagination toggle.
In the Type field, select the pagination type and provide the required fields and click on Save API Call.