This guide covers the key steps, including configuring credentials, setting up a workflow, and testing the workflows. Follow the steps given below to execute a demo workflow present in your account and get the response.Documentation Index
Fetch the complete documentation index at: https://docs.refold.ai/llms.txt
Use this file to discover all available pages before exploring further.
Step 1: Configure Your Integration Credentials
The first step is to configure your credentials for the integration you want to test if required. Refold supports 2 types of Authentication: Key-based and OAuth 2.0 which you can check by navigating to your integration inApps > Settings of the integration.
For Key-Based
For Key-Based
If the integration is key-based, you would require your own API key and other credentials to authenticate with the integration and test it.To get your credentials, click on 
Read Documentation button present under Overview of the integration.OAuth Based
OAuth Based
If the integration is OAuth 2.0, then you will need to provide credentials of your app like Client ID and Client Secret OR you can also use our OAuth app credentials by choosing 
Use Our Credentials option.- Follow these steps to configure your credentials:
- Navigate to the
Overviewin the integration > Click onRead documentationand you will be redirected to the OAuth app Setup doc for the respective integration. - Create your integration credentials by following the setup guide, such as Client ID and Secret and add it in
Settingsand click onSave.
For certain integrations like DocuSign, if your developer app isn’t published, you won’t be able to authenticate an account outside the developer environment.
Alternatively, you can request us for a Demo account credentials for testing purposes.
Step 2: Workflow Setup
Once your credentials are configured, you can also check the demo workflows already set in your account by navigating toWorkflows in the integration.

Step 3: Set Up API Proxy
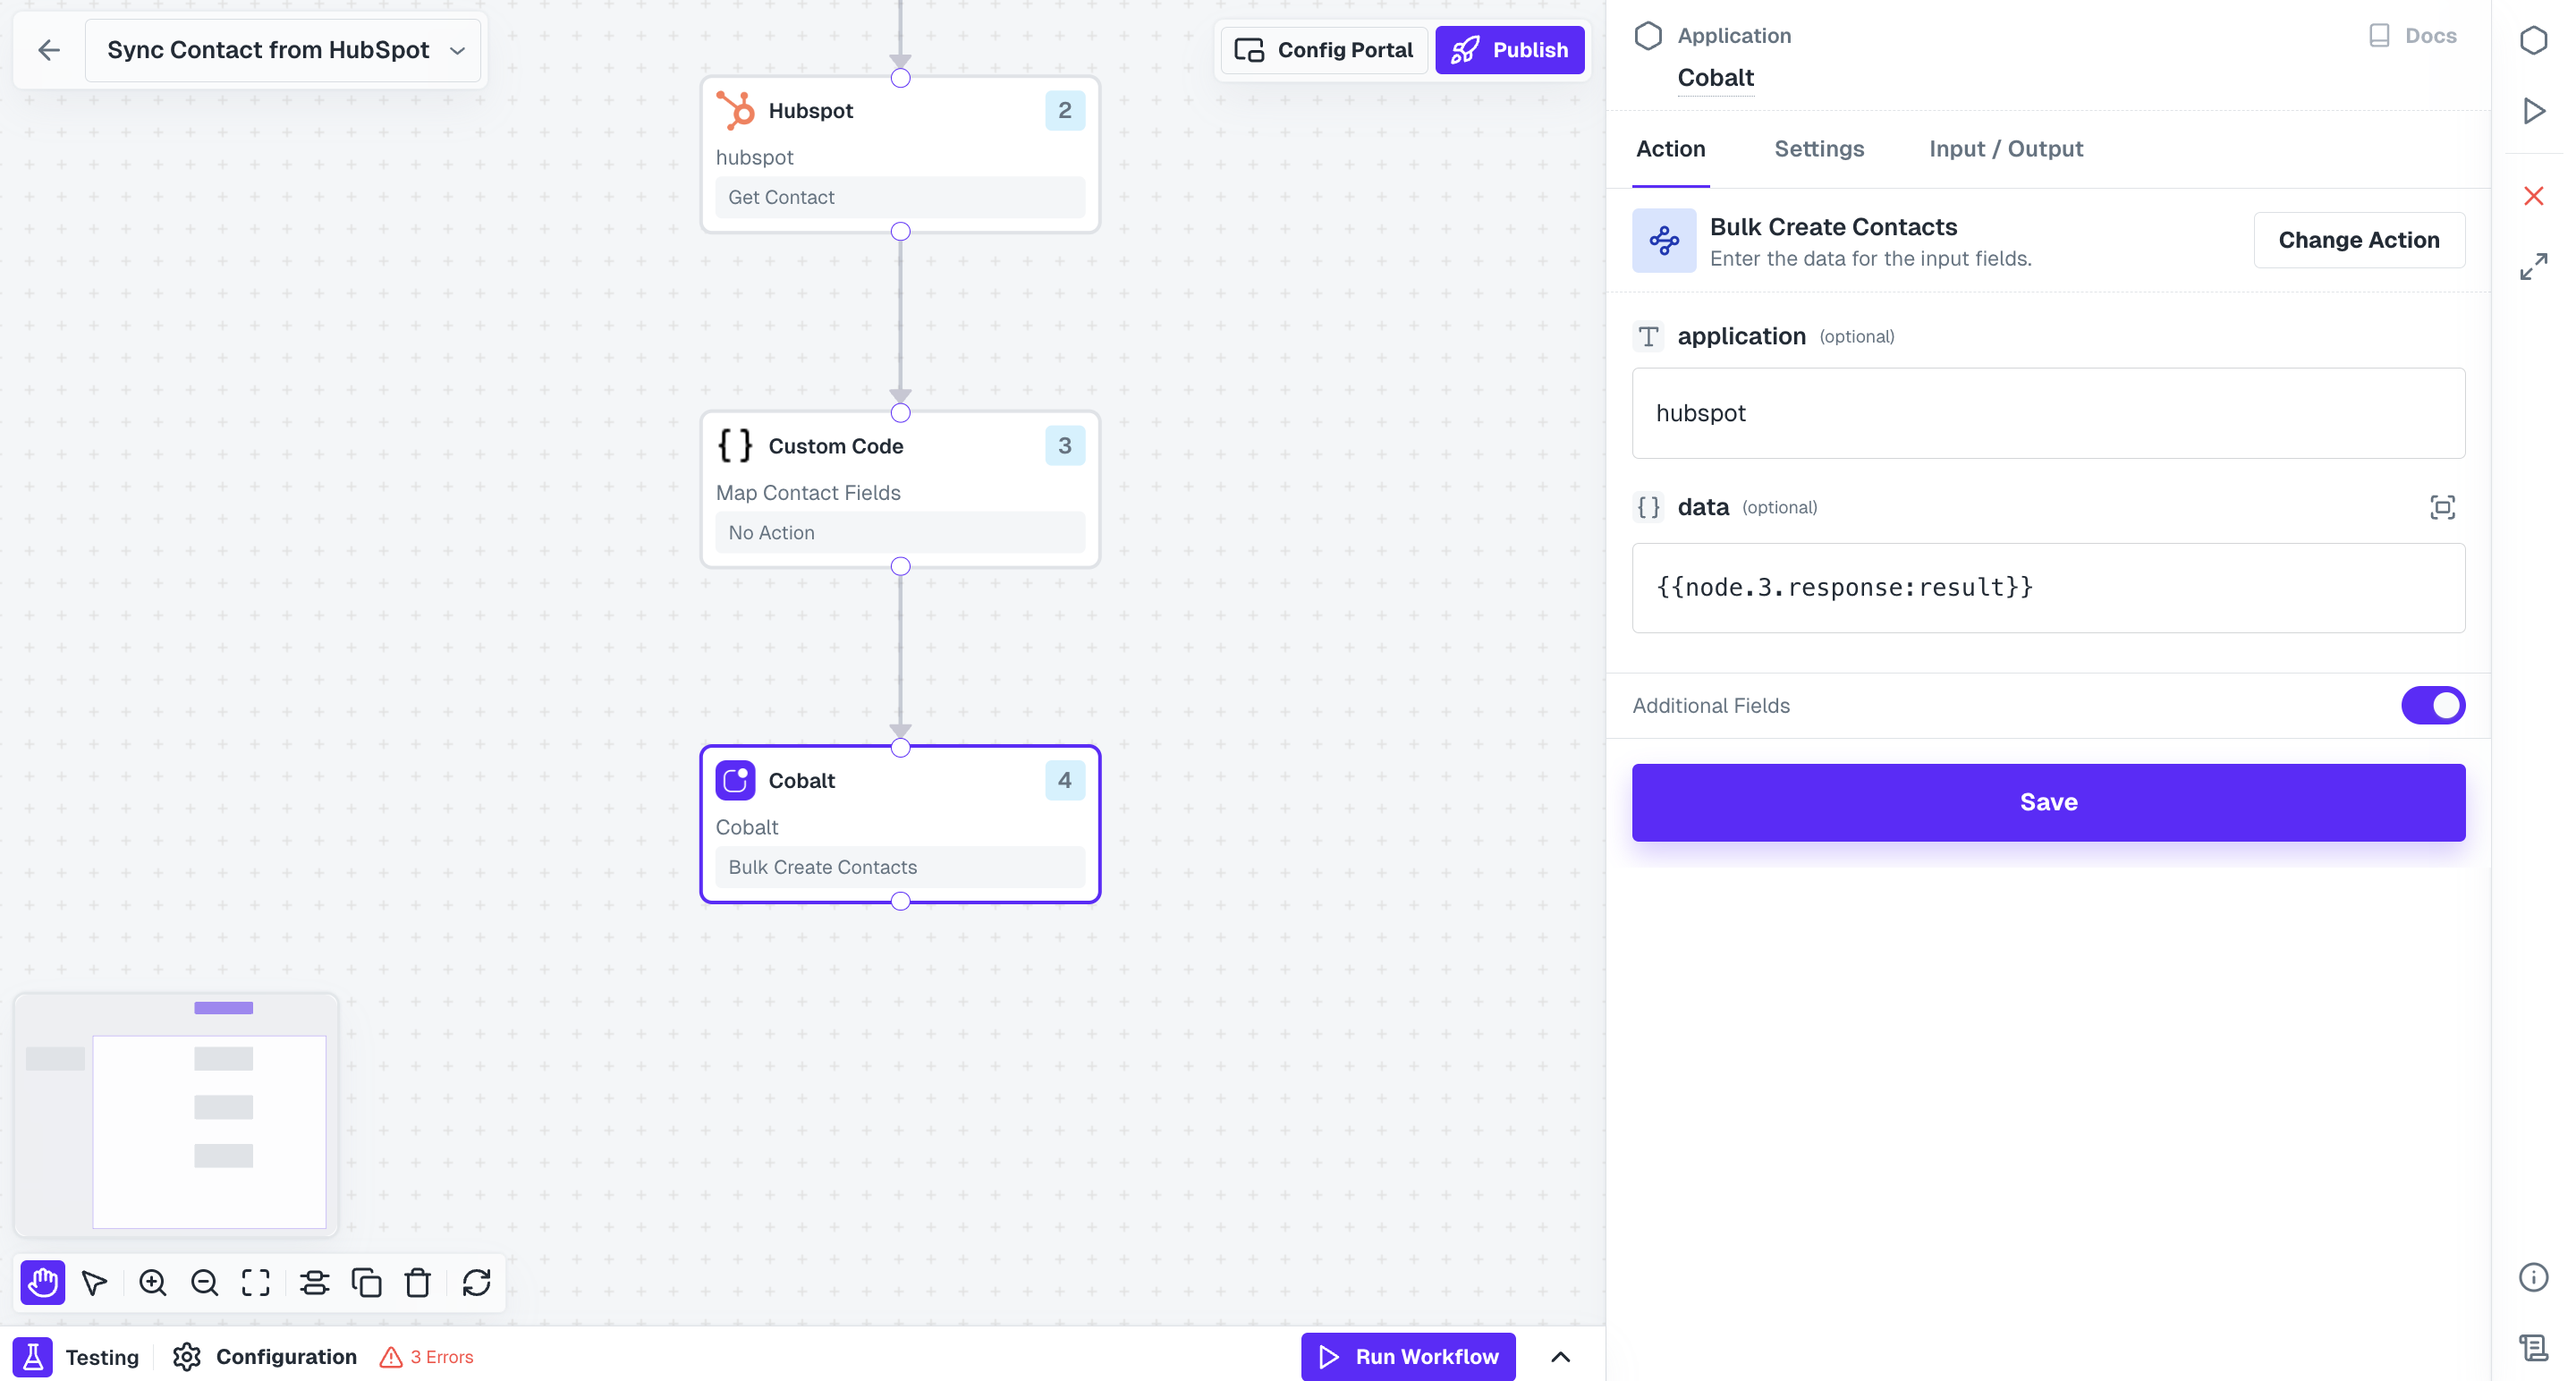
In most integrations where you want to fetch some data, you’ll need to setup API proxy to capture workflow’s final response during testing. It’s not necessary that every workflow will have an API Proxy present, in that case you can skip this step. Follow the steps given below to setup your own URL where you can receive the response:- Navigate to the workflow for which you want to configure your URL to receive the response.
- In the workflow, check the Native node present at the end of the workflow path and see the name of the
Actionthat is present in that node.
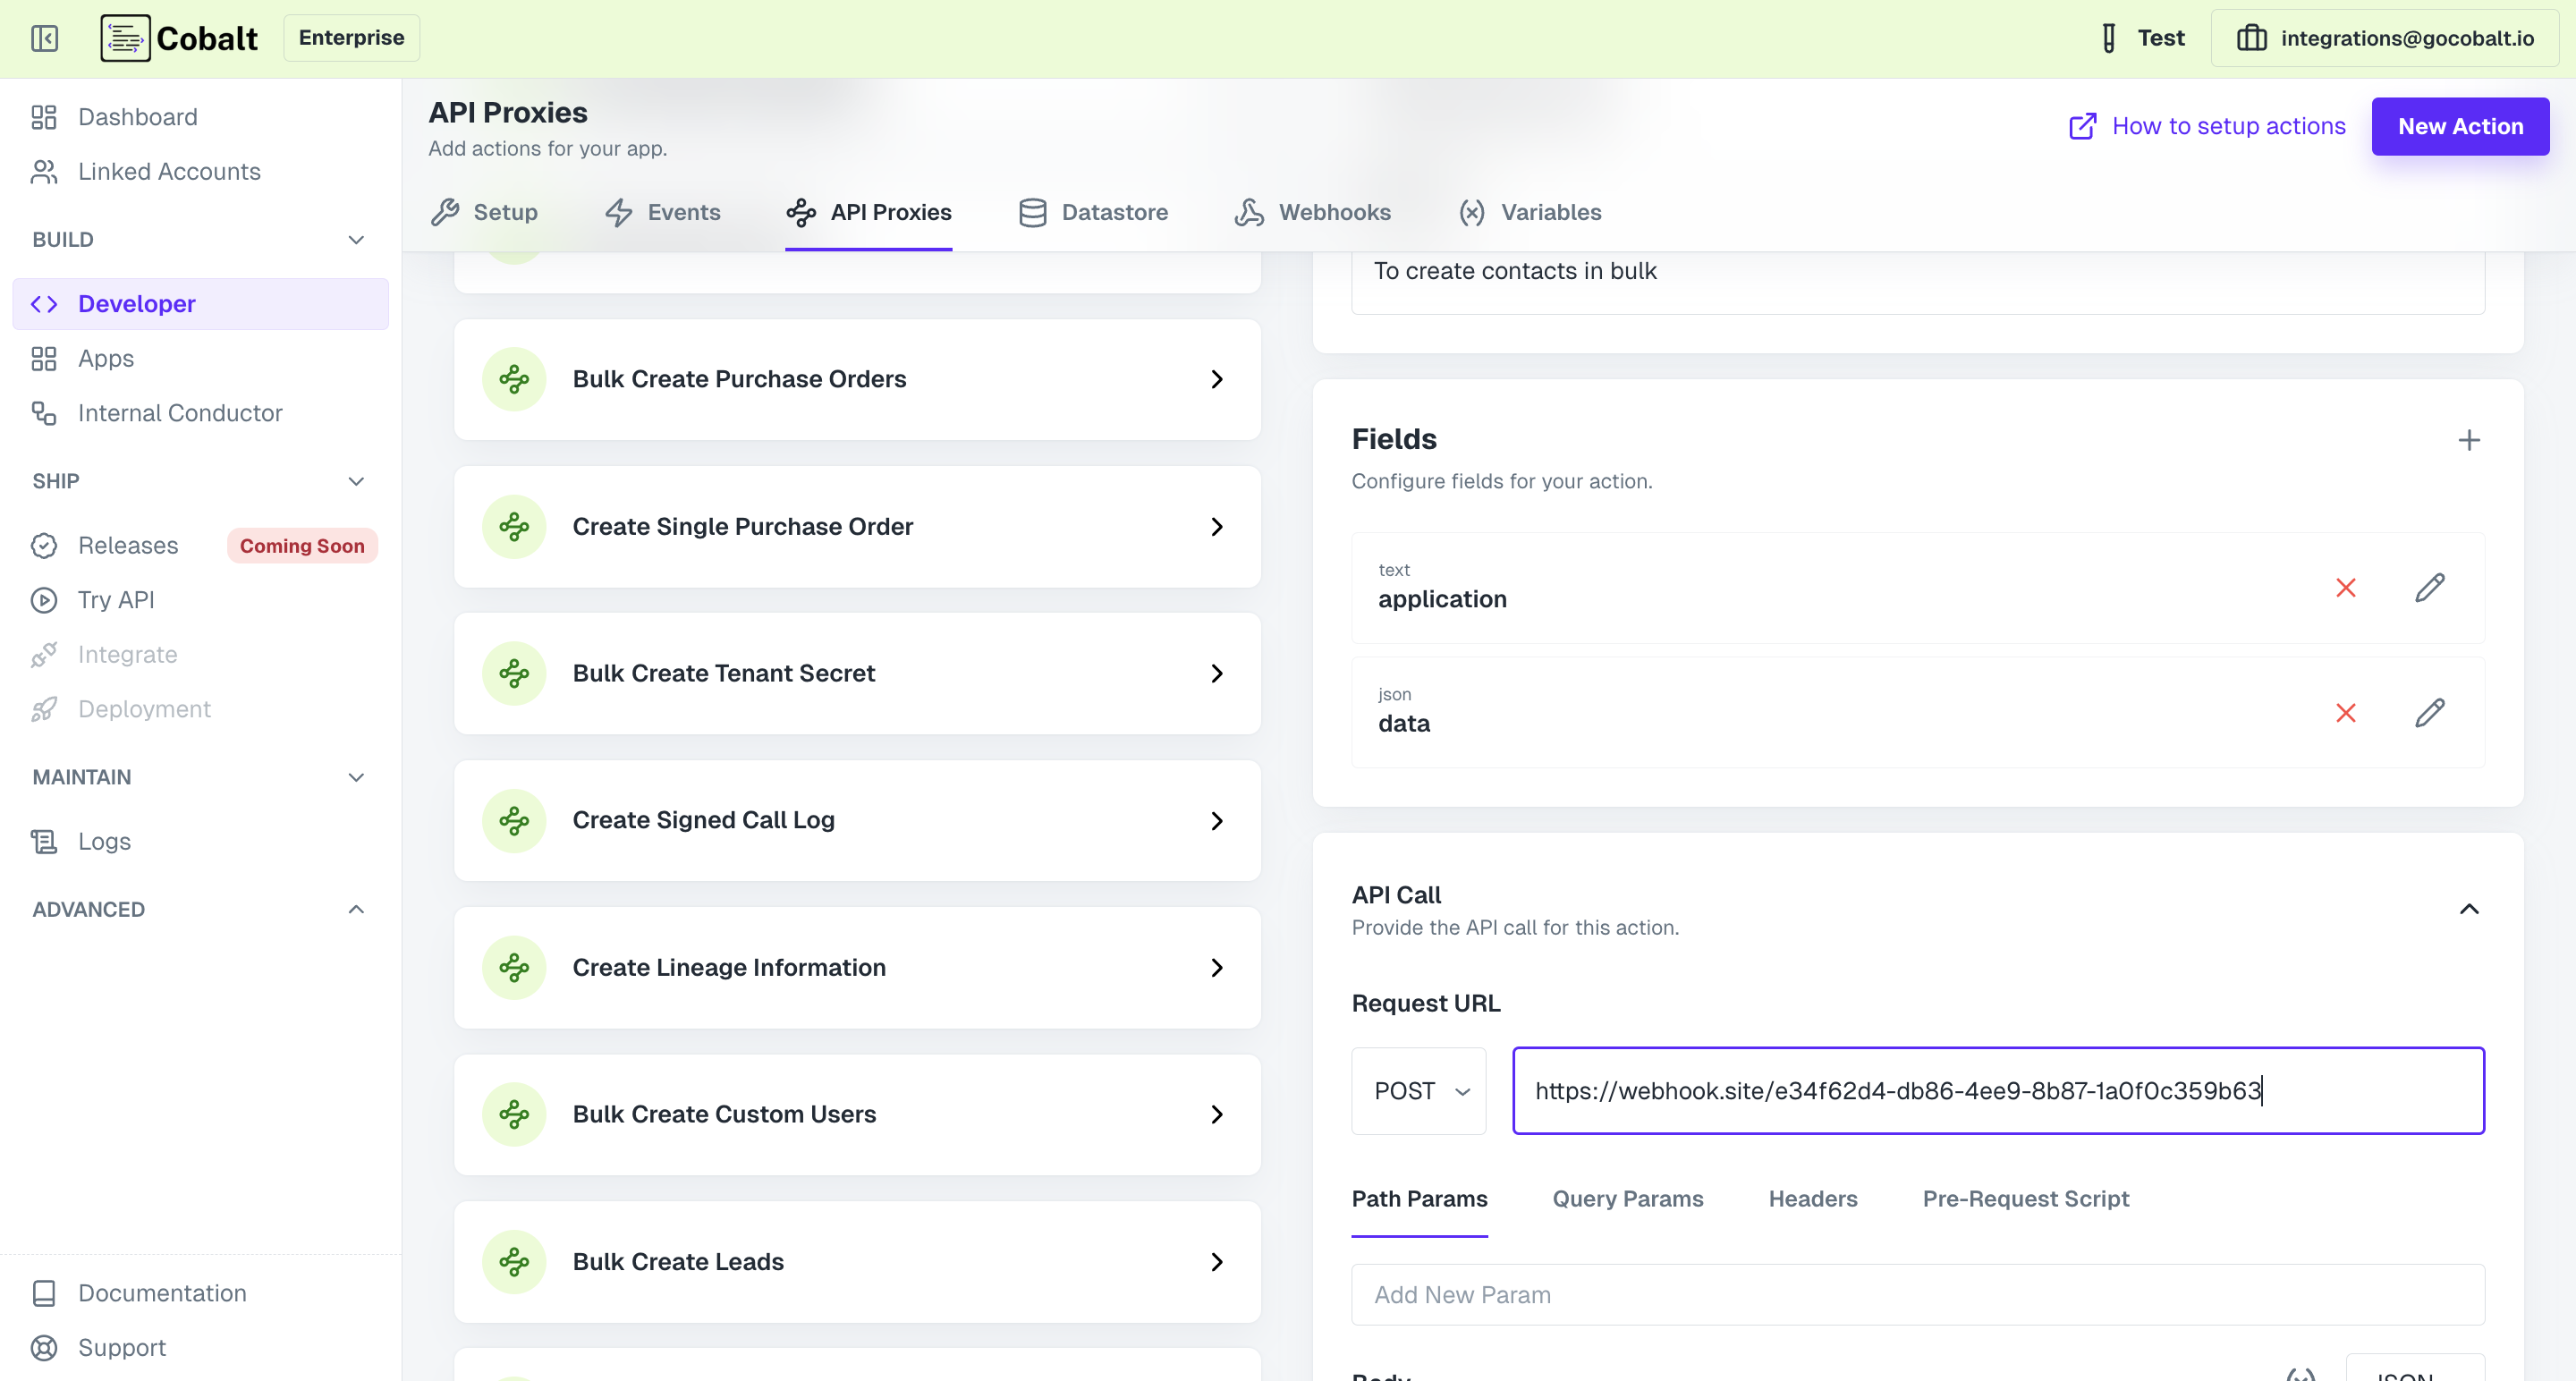
- To get your own URL for setup, go to webhook.site and copy
Your unique URL. - In Refold, navigate to
Developers>API Proxies> Search for the Action name that was setup in the workflow > Select it and paste the unique URL you copied underRequest URLpresent inAPI Calland click onSave API Call.
Step 4: Authenticate Linked Account
Next step is to perform authentication of a Linked Account to the integration, to link it to the workflow. Linked Accounts refers to the end-users or customers of our users who utilize the integrations built using the Refold platform. Go toLinked Accounts section in Refold and open any Linked Account present.
You can also create a new linked account if you want by clicking on
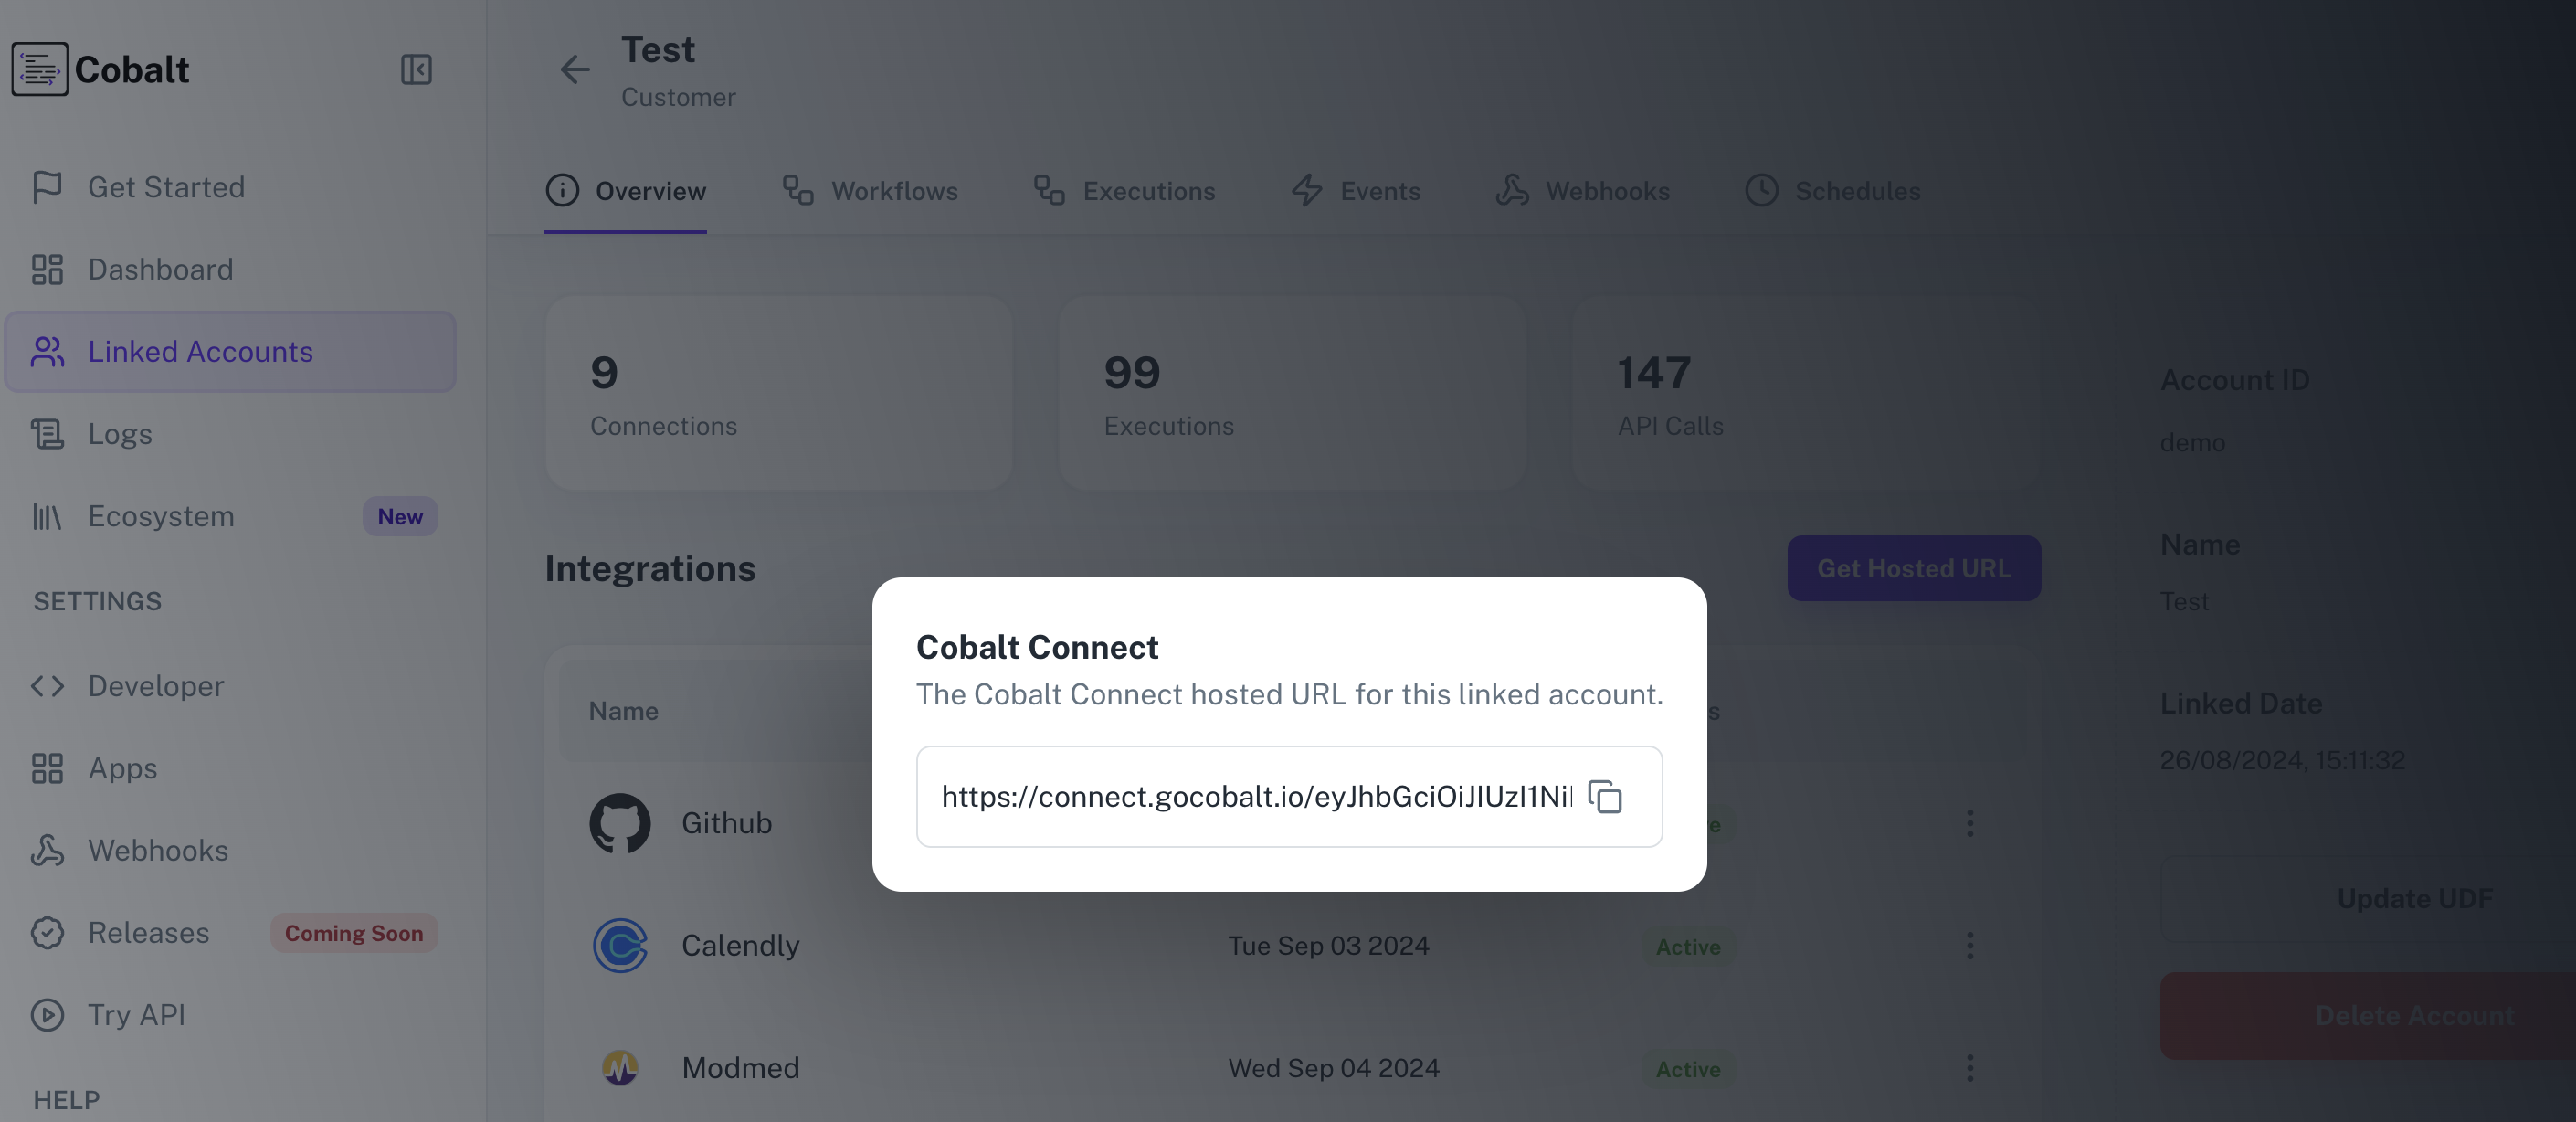
+ Add Account button in the top right.Get Hosted URL button > Generate Hosted URL > Copy the URL shown and open it in a new tab.
You can also build your own UI for end-users using our SDKs or APIs and Auth Flows.
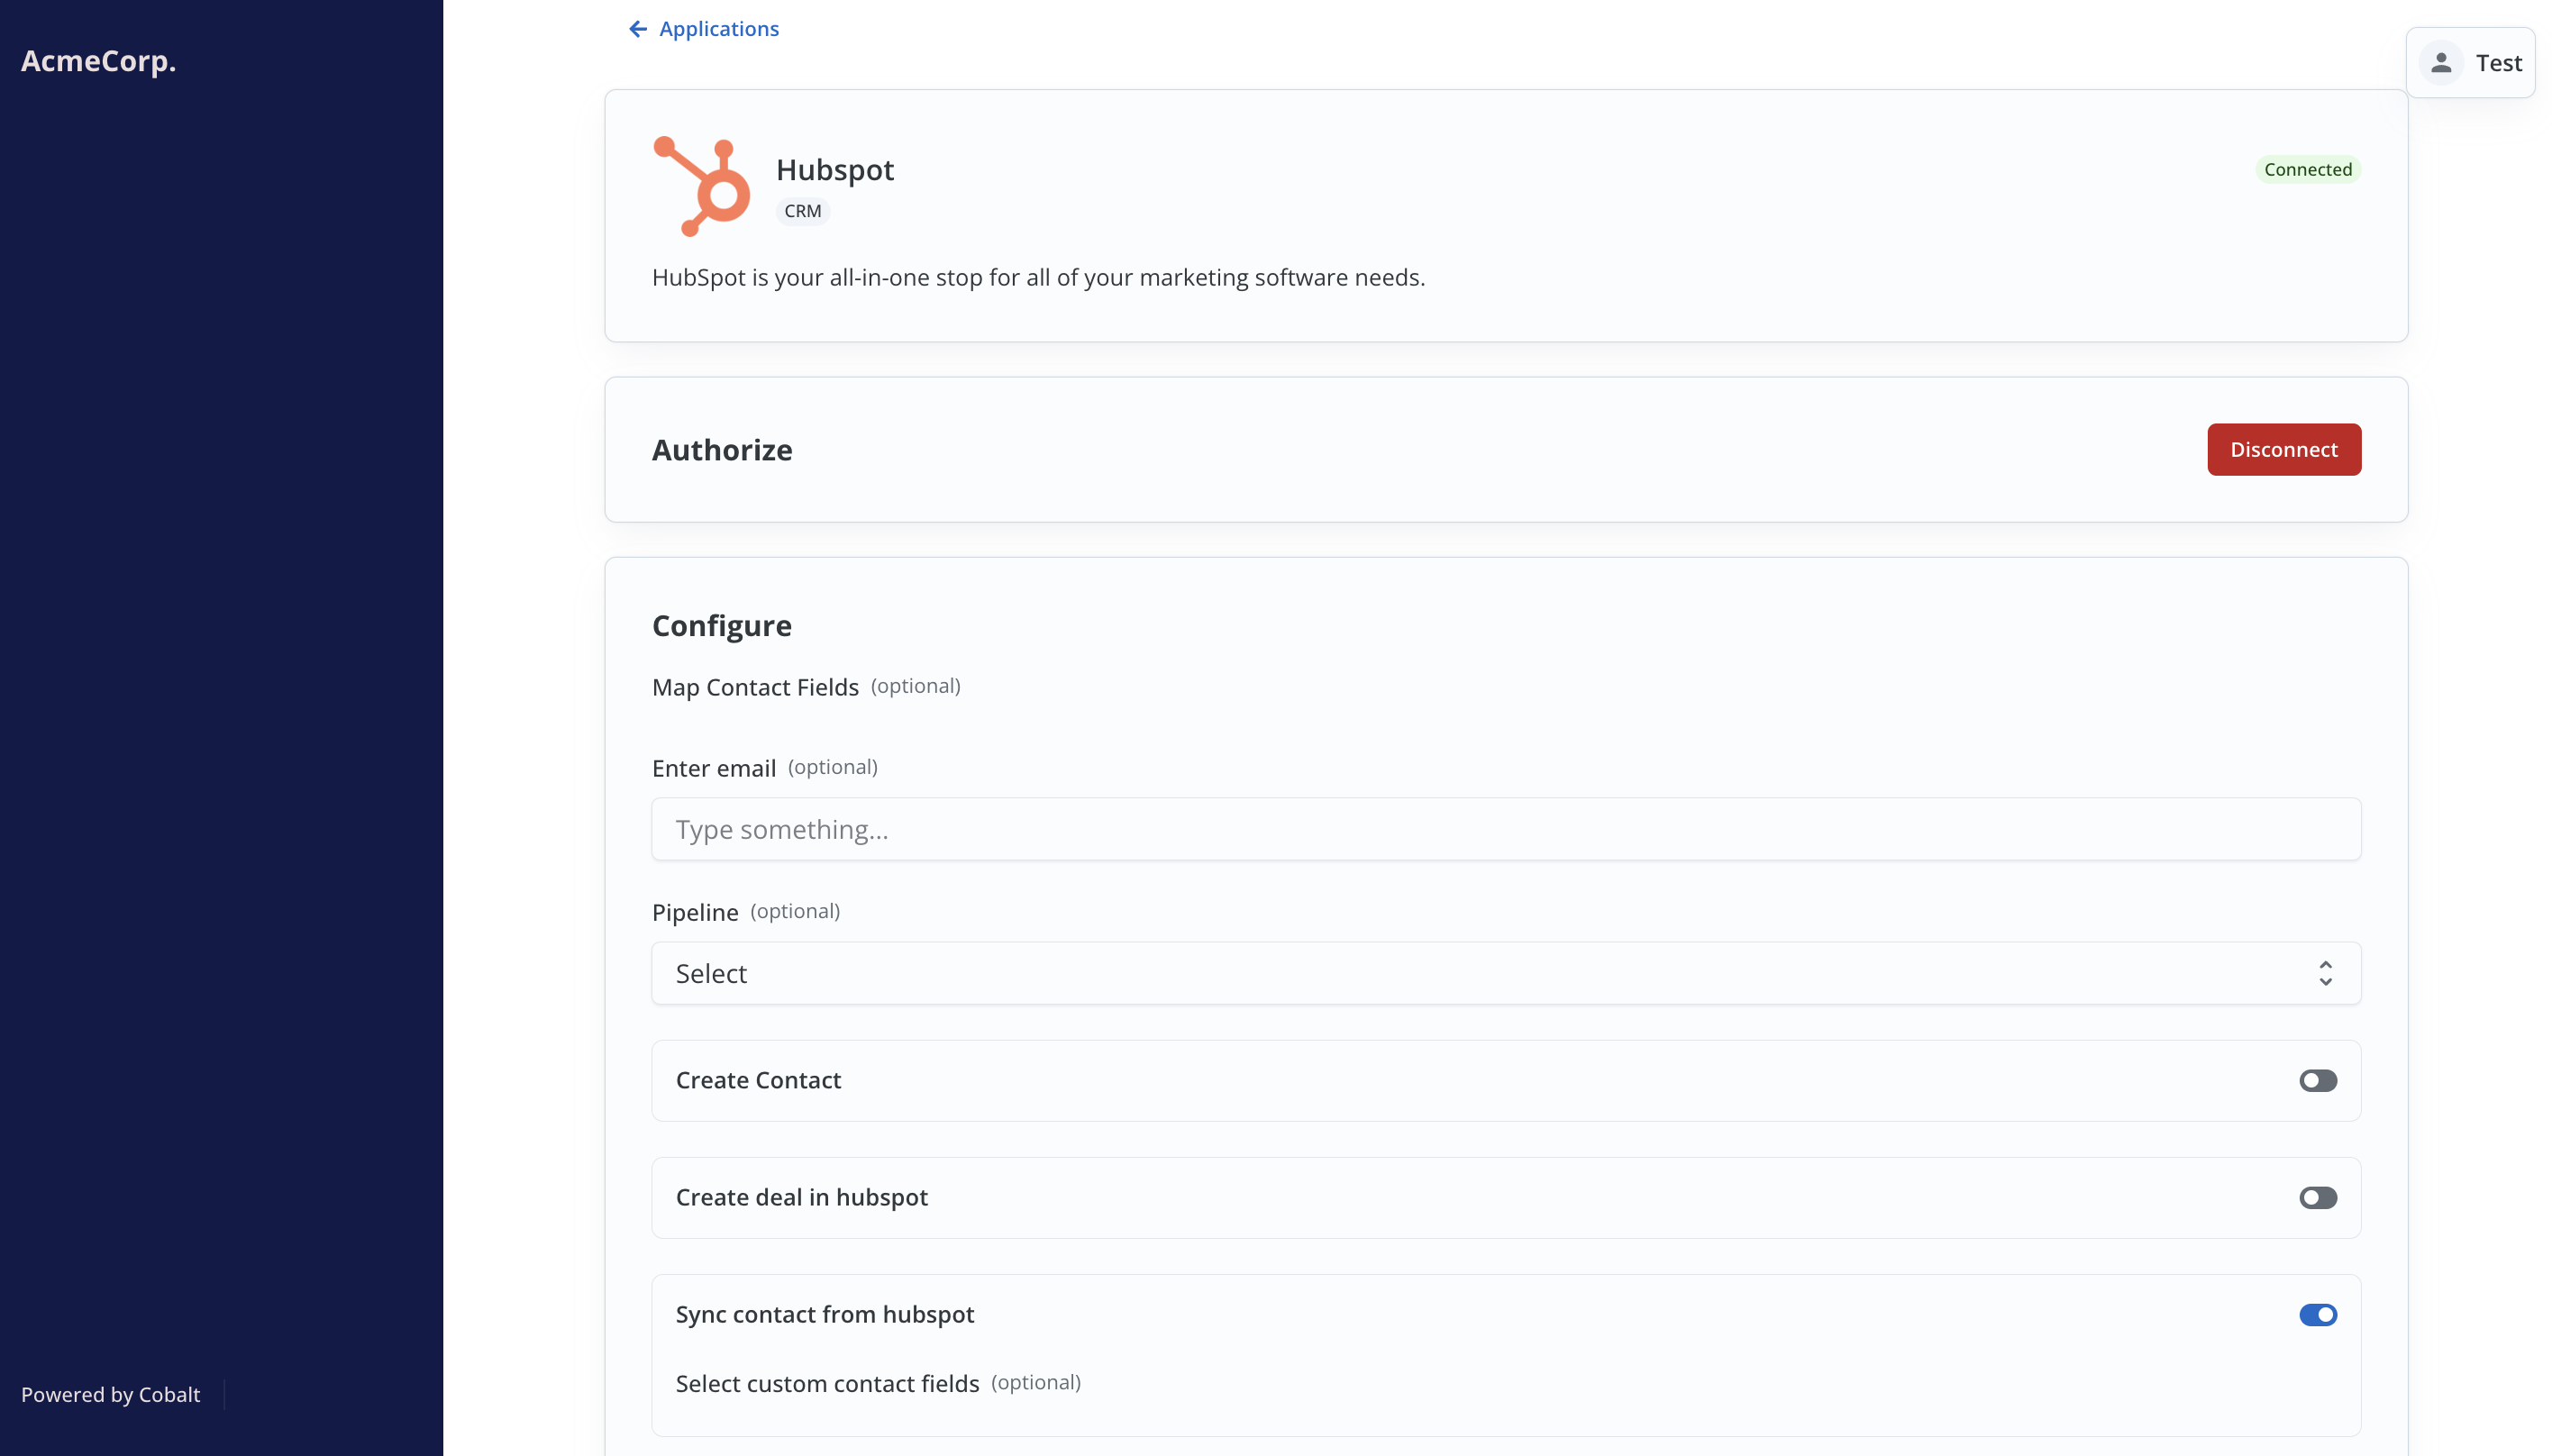
Connect or provide credentials if it’s Key-based and click on Connect. If the authentication is successful you should see a Connected tag displayed beside the integration name.
Next, enable the workflows which you want to test for the integration and click on Save.
If the authentication was not successful, please ensure that all the steps in Setup doc of the integration were followed correctly.
Step 5: Test the Setup
Now that everything is set up, you can proceed to test the workflow. Trigger of a Workflow can either be:-
Native App Trigger which triggers when a certain action is performed in the application. For eg: If the
Contact Createdtrigger of HubSpot is present in the Start Node of your workflow, then it triggers when a new contact is added to your HubSpot account. -
Event based triggers which triggers when an event is called on Refold. You can check which Event is added to the workflow by checking the Start Node of the workflow.
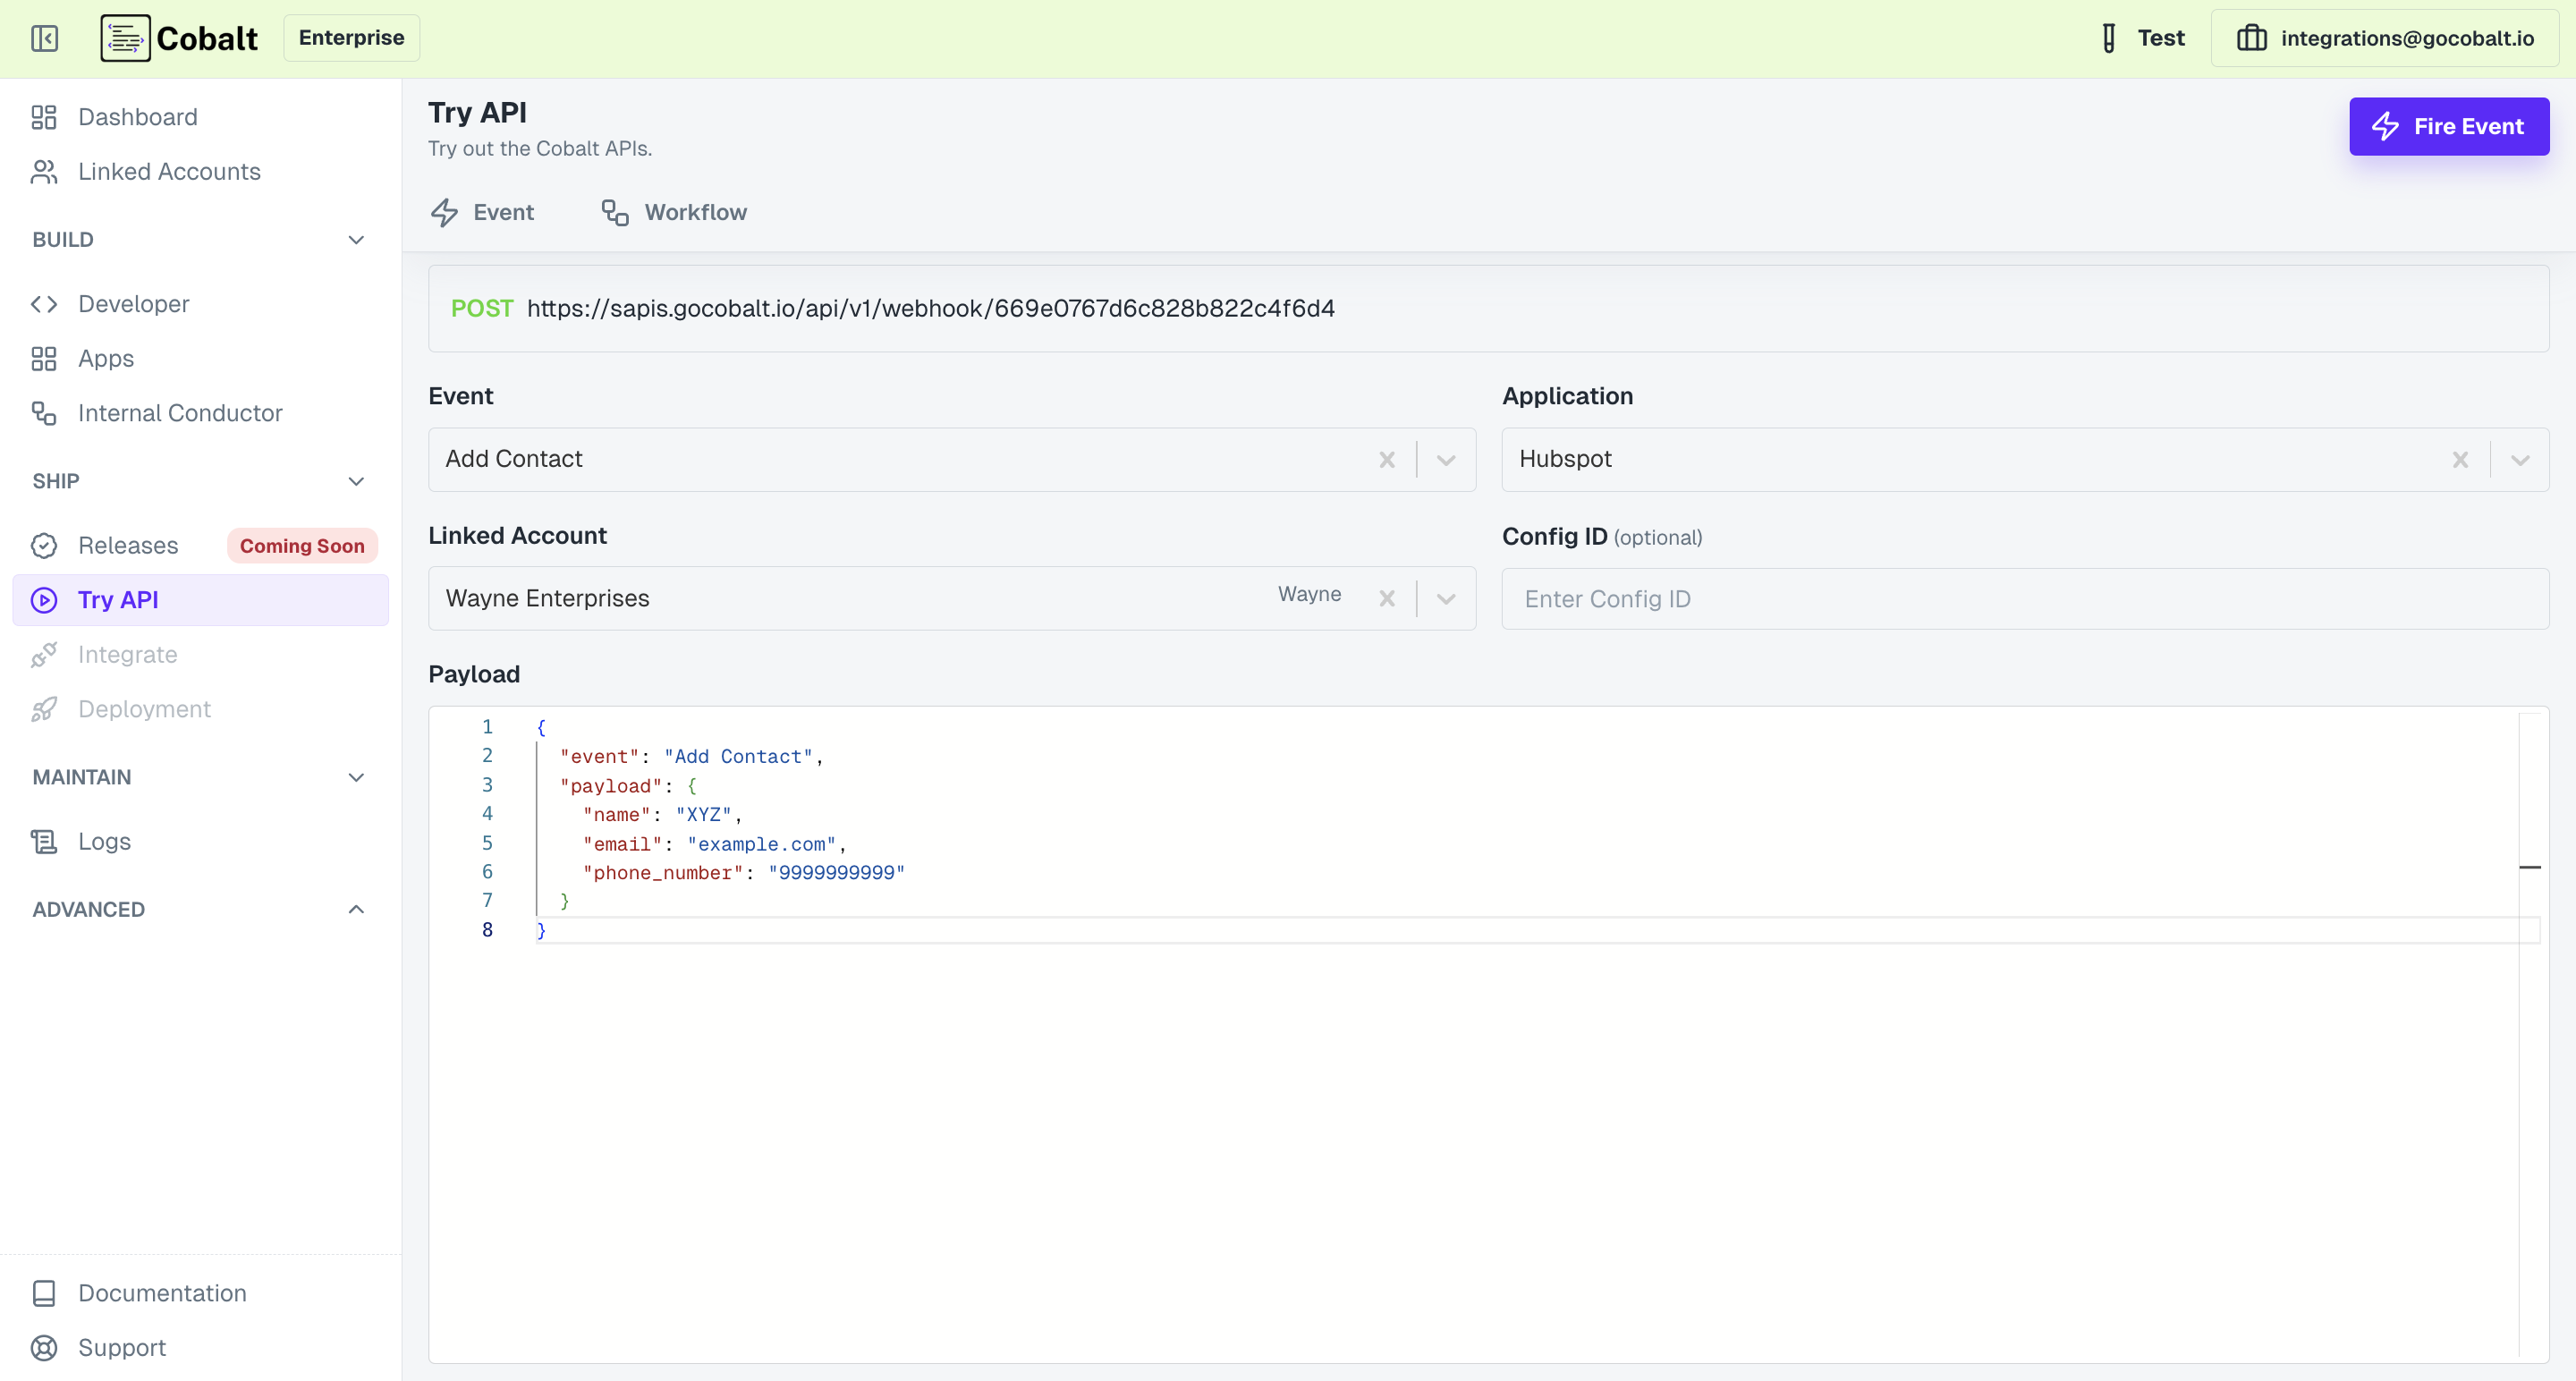
- To start the workflow execution, go to Try API section in Refold, provide the required details and click on
Fire Event.
- To start the workflow execution, go to Try API section in Refold, provide the required details and click on
Hurray! You have successfully completed setup for an integration and also executed the workflow to receive the final response.