Consider a use-case where you want to sync all the opportunities present in Salesforce to your system. In the Salesforce integration, go toDocumentation Index
Fetch the complete documentation index at: https://docs.refold.ai/llms.txt
Use this file to discover all available pages before exploring further.
Workflows and create a new workflow by clicking on +Add Workflow button and name it as Sync Opportunities.
Build Workflow
Follow the steps given to build the workflow:Add Trigger in Start Node
All workflows start with a trigger, which determines when the workflow will run and how data is passed into the workflow.
For this workflow we will use the Event Based trigger.Click on the 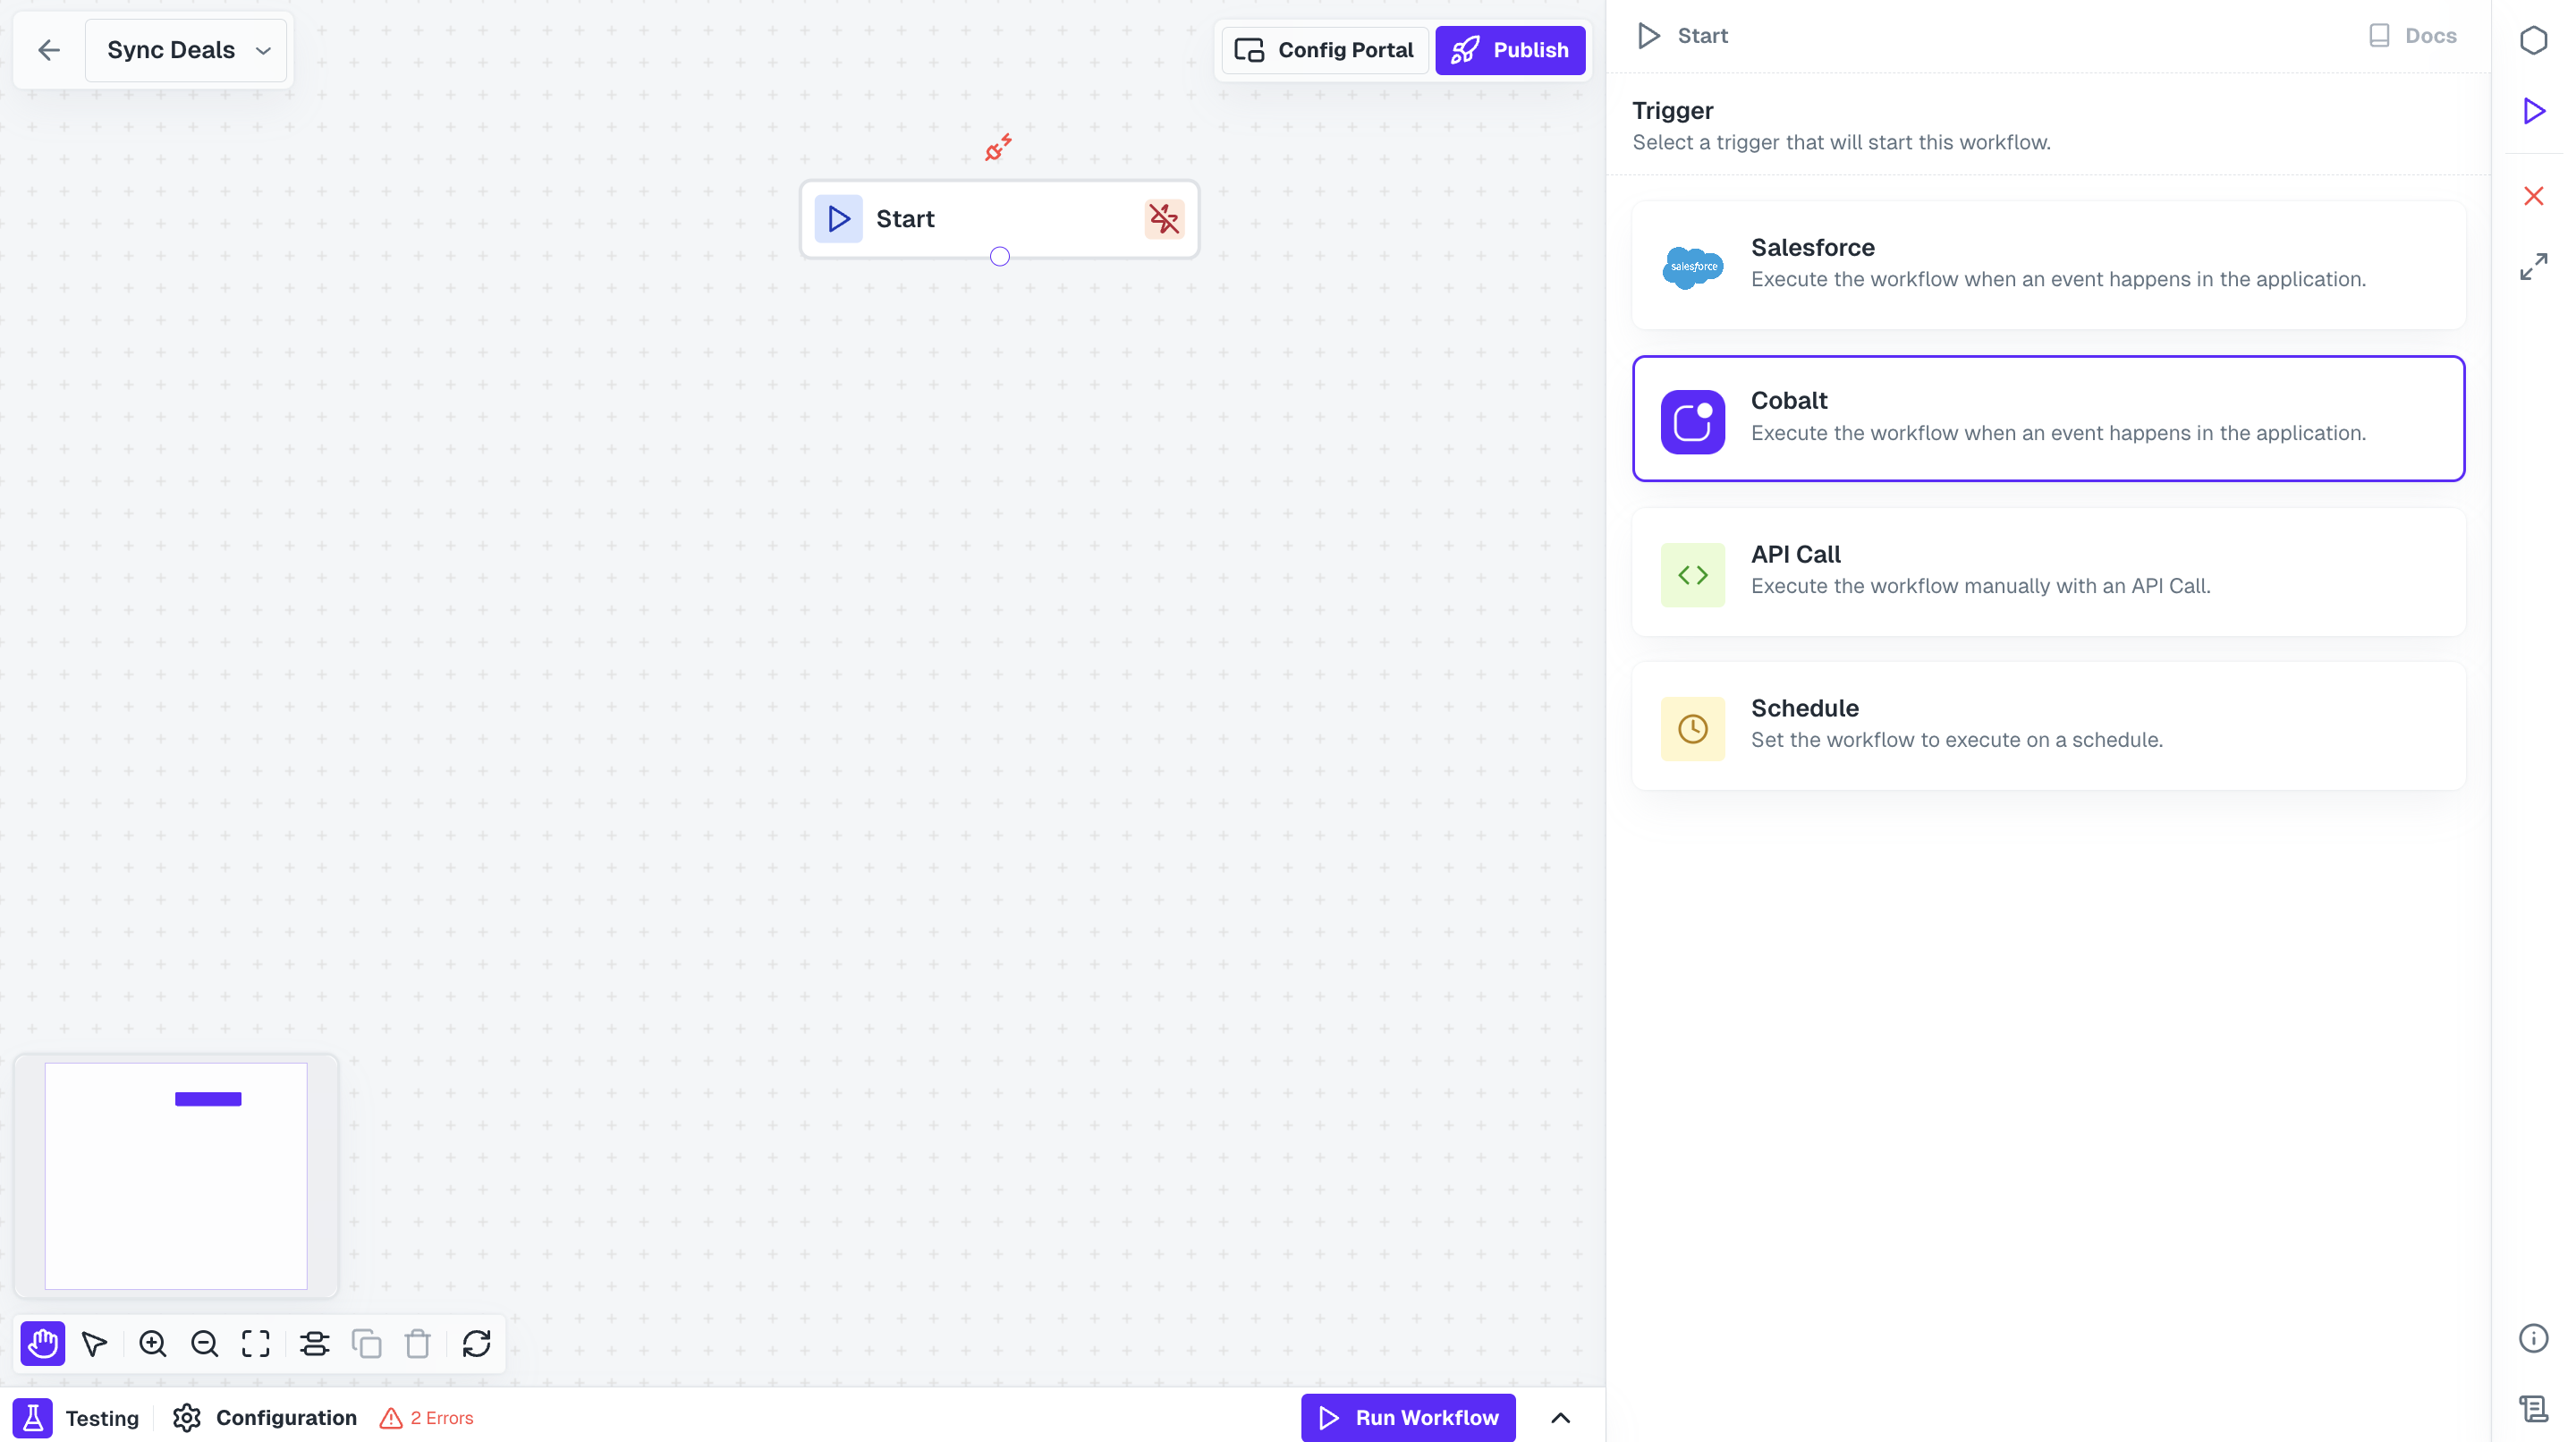
Start Node, select your native app option and click on + Create New Event.Add Salesforce Node
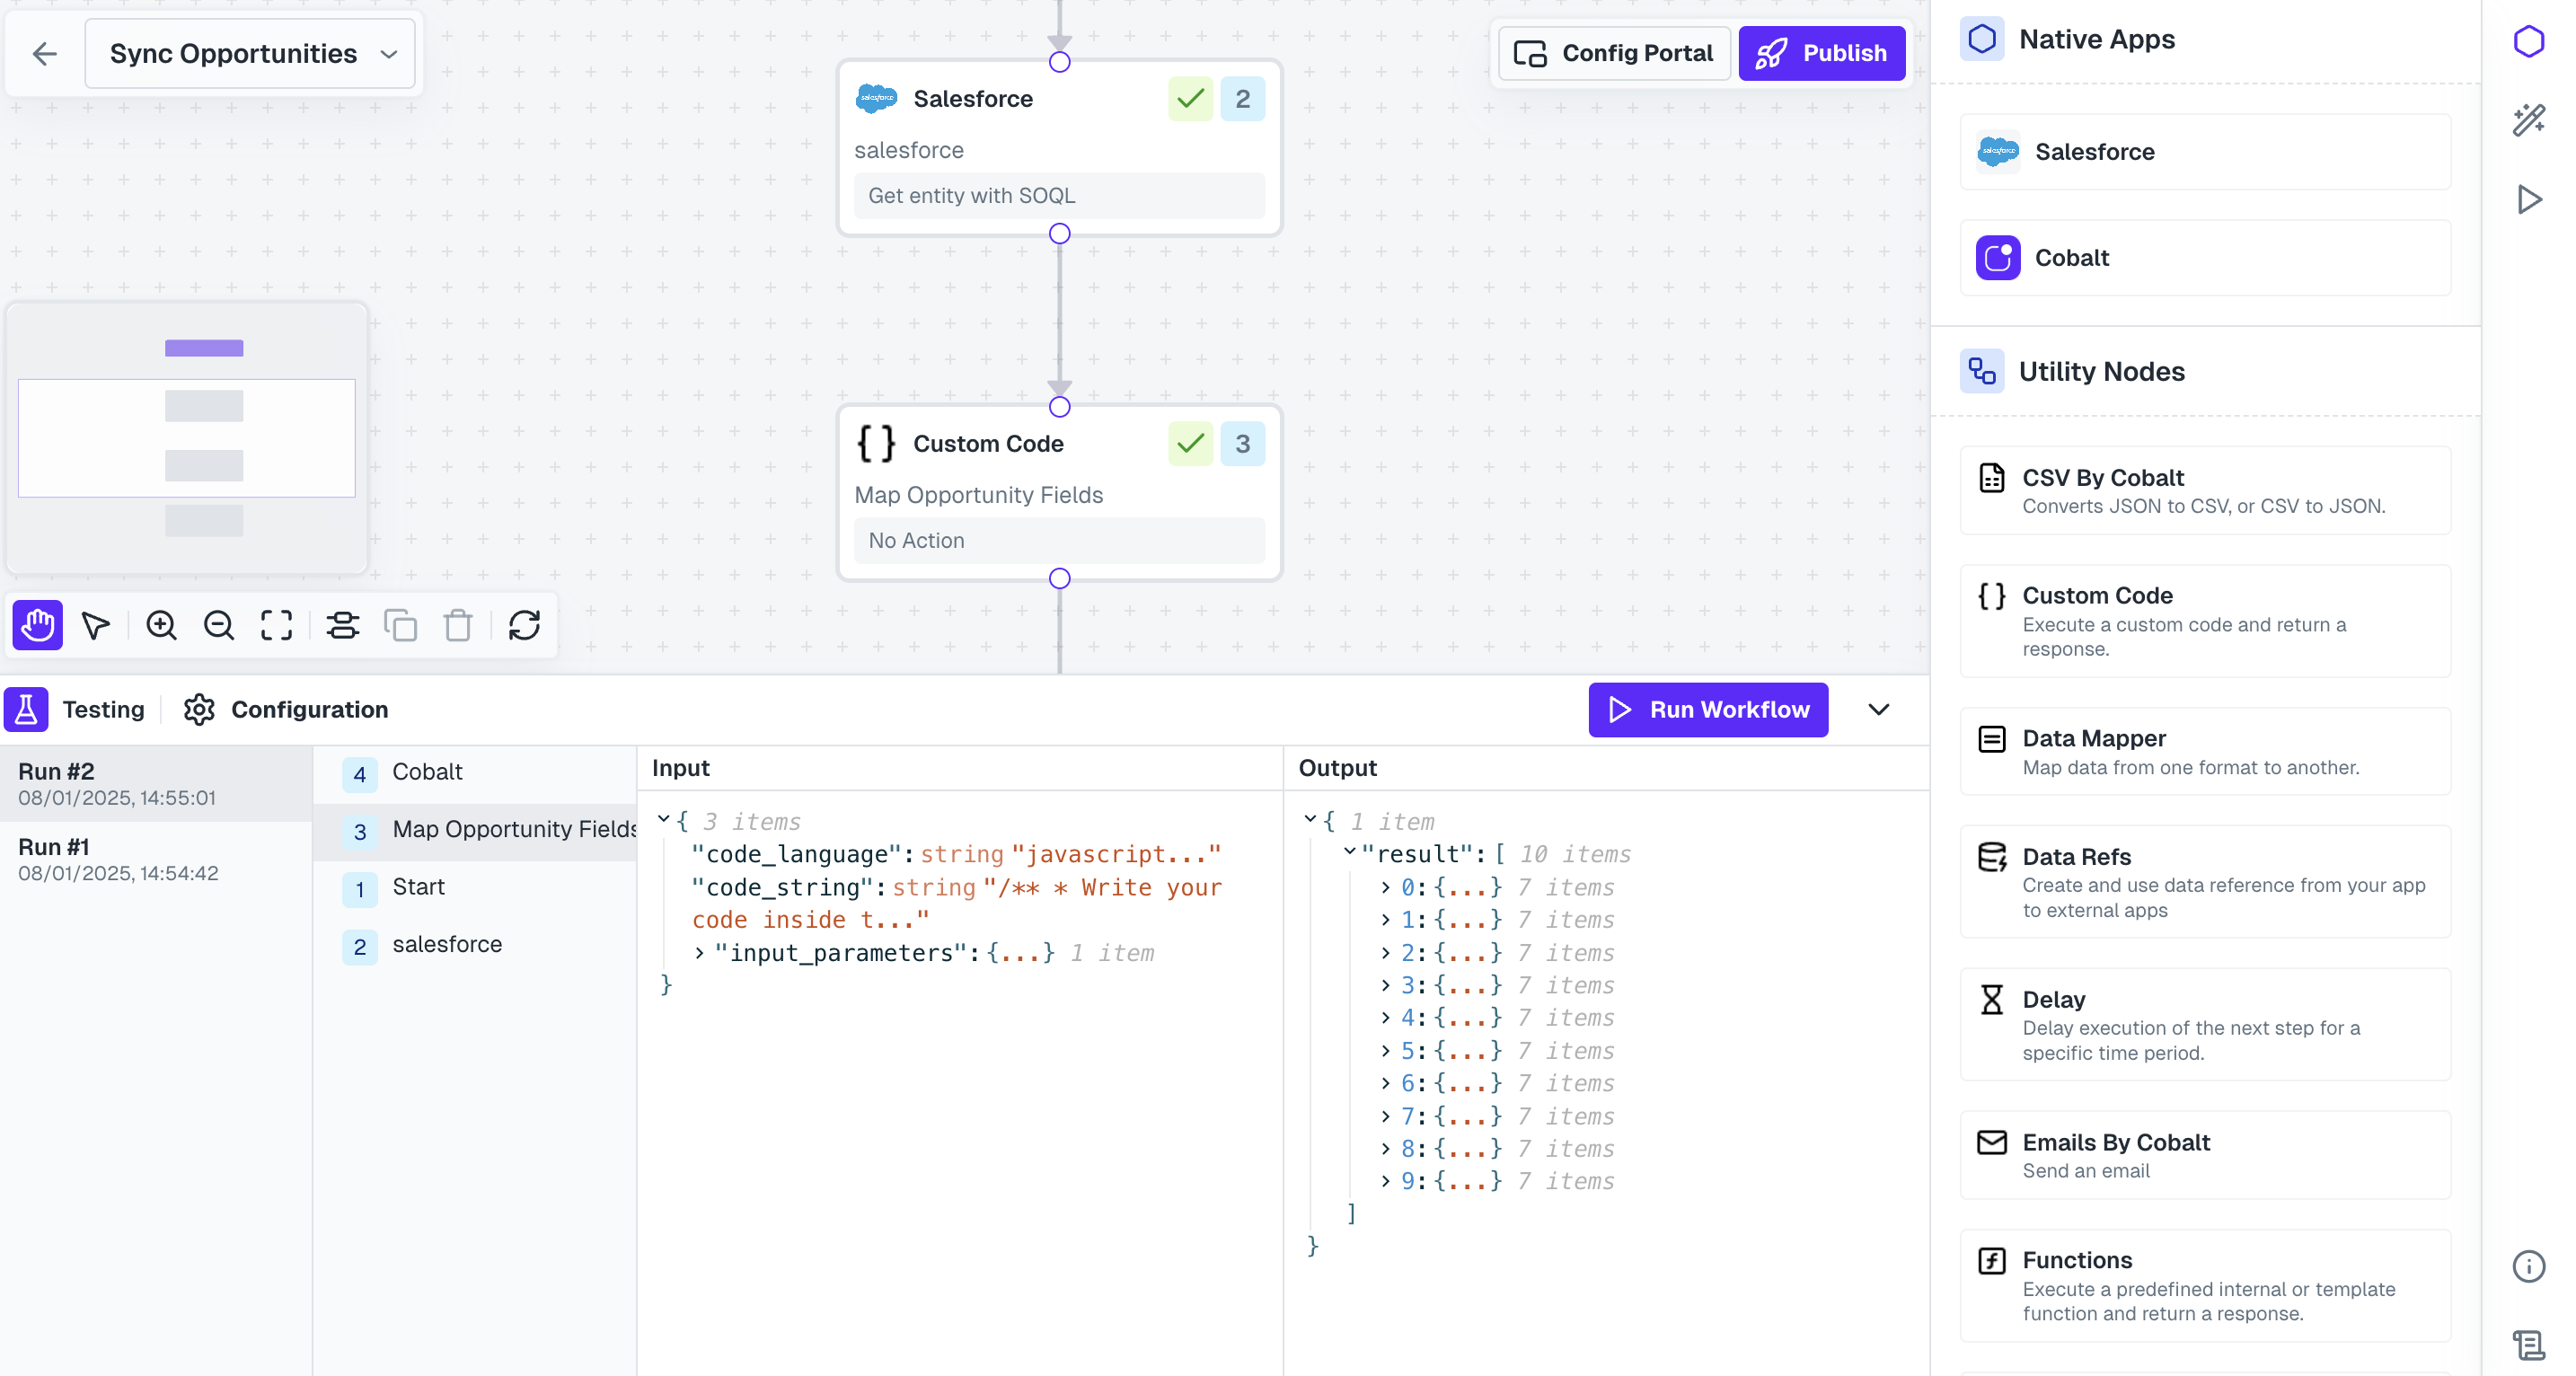
Now to fetch all the opportunities present in your user’s account, we need to call Salesforce API.Click on 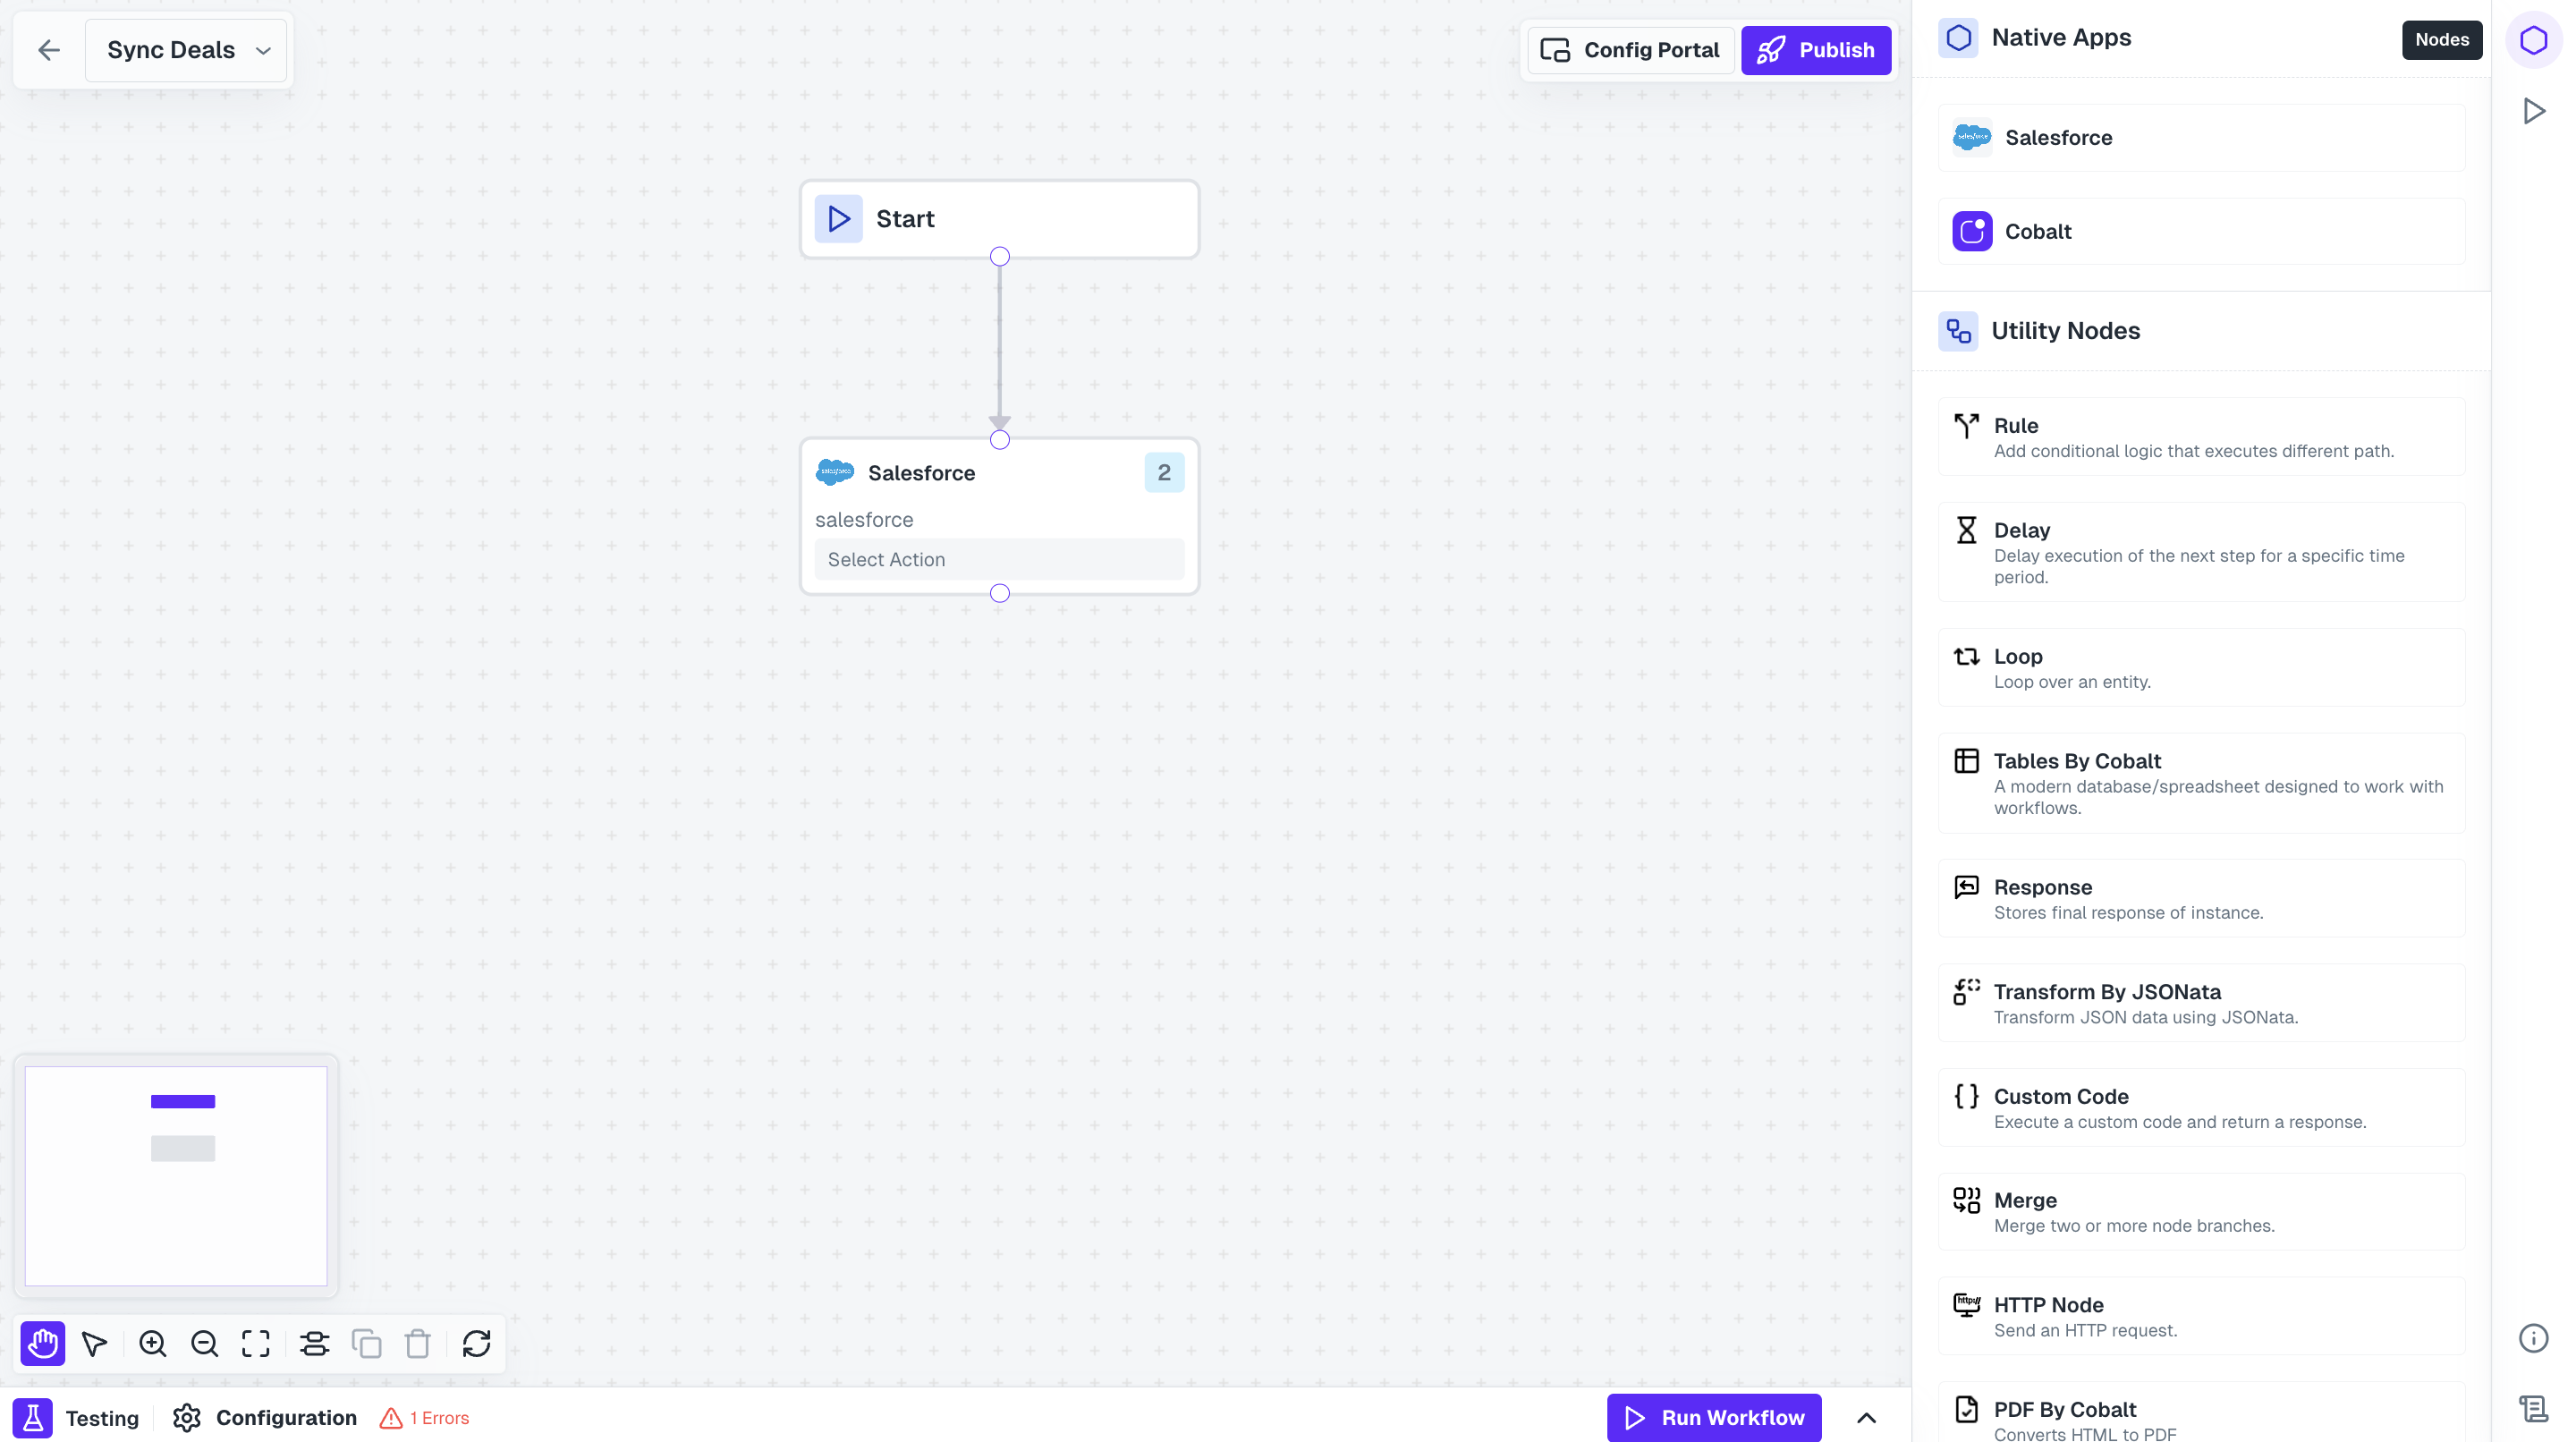
Nodes option in the top right and drag the Salesforce Node from Native Apps section to the workflow builder. Connect this node with Start Node.Fetch Opportunities from Salesforce using Action
Click on the Salesforce Node and select 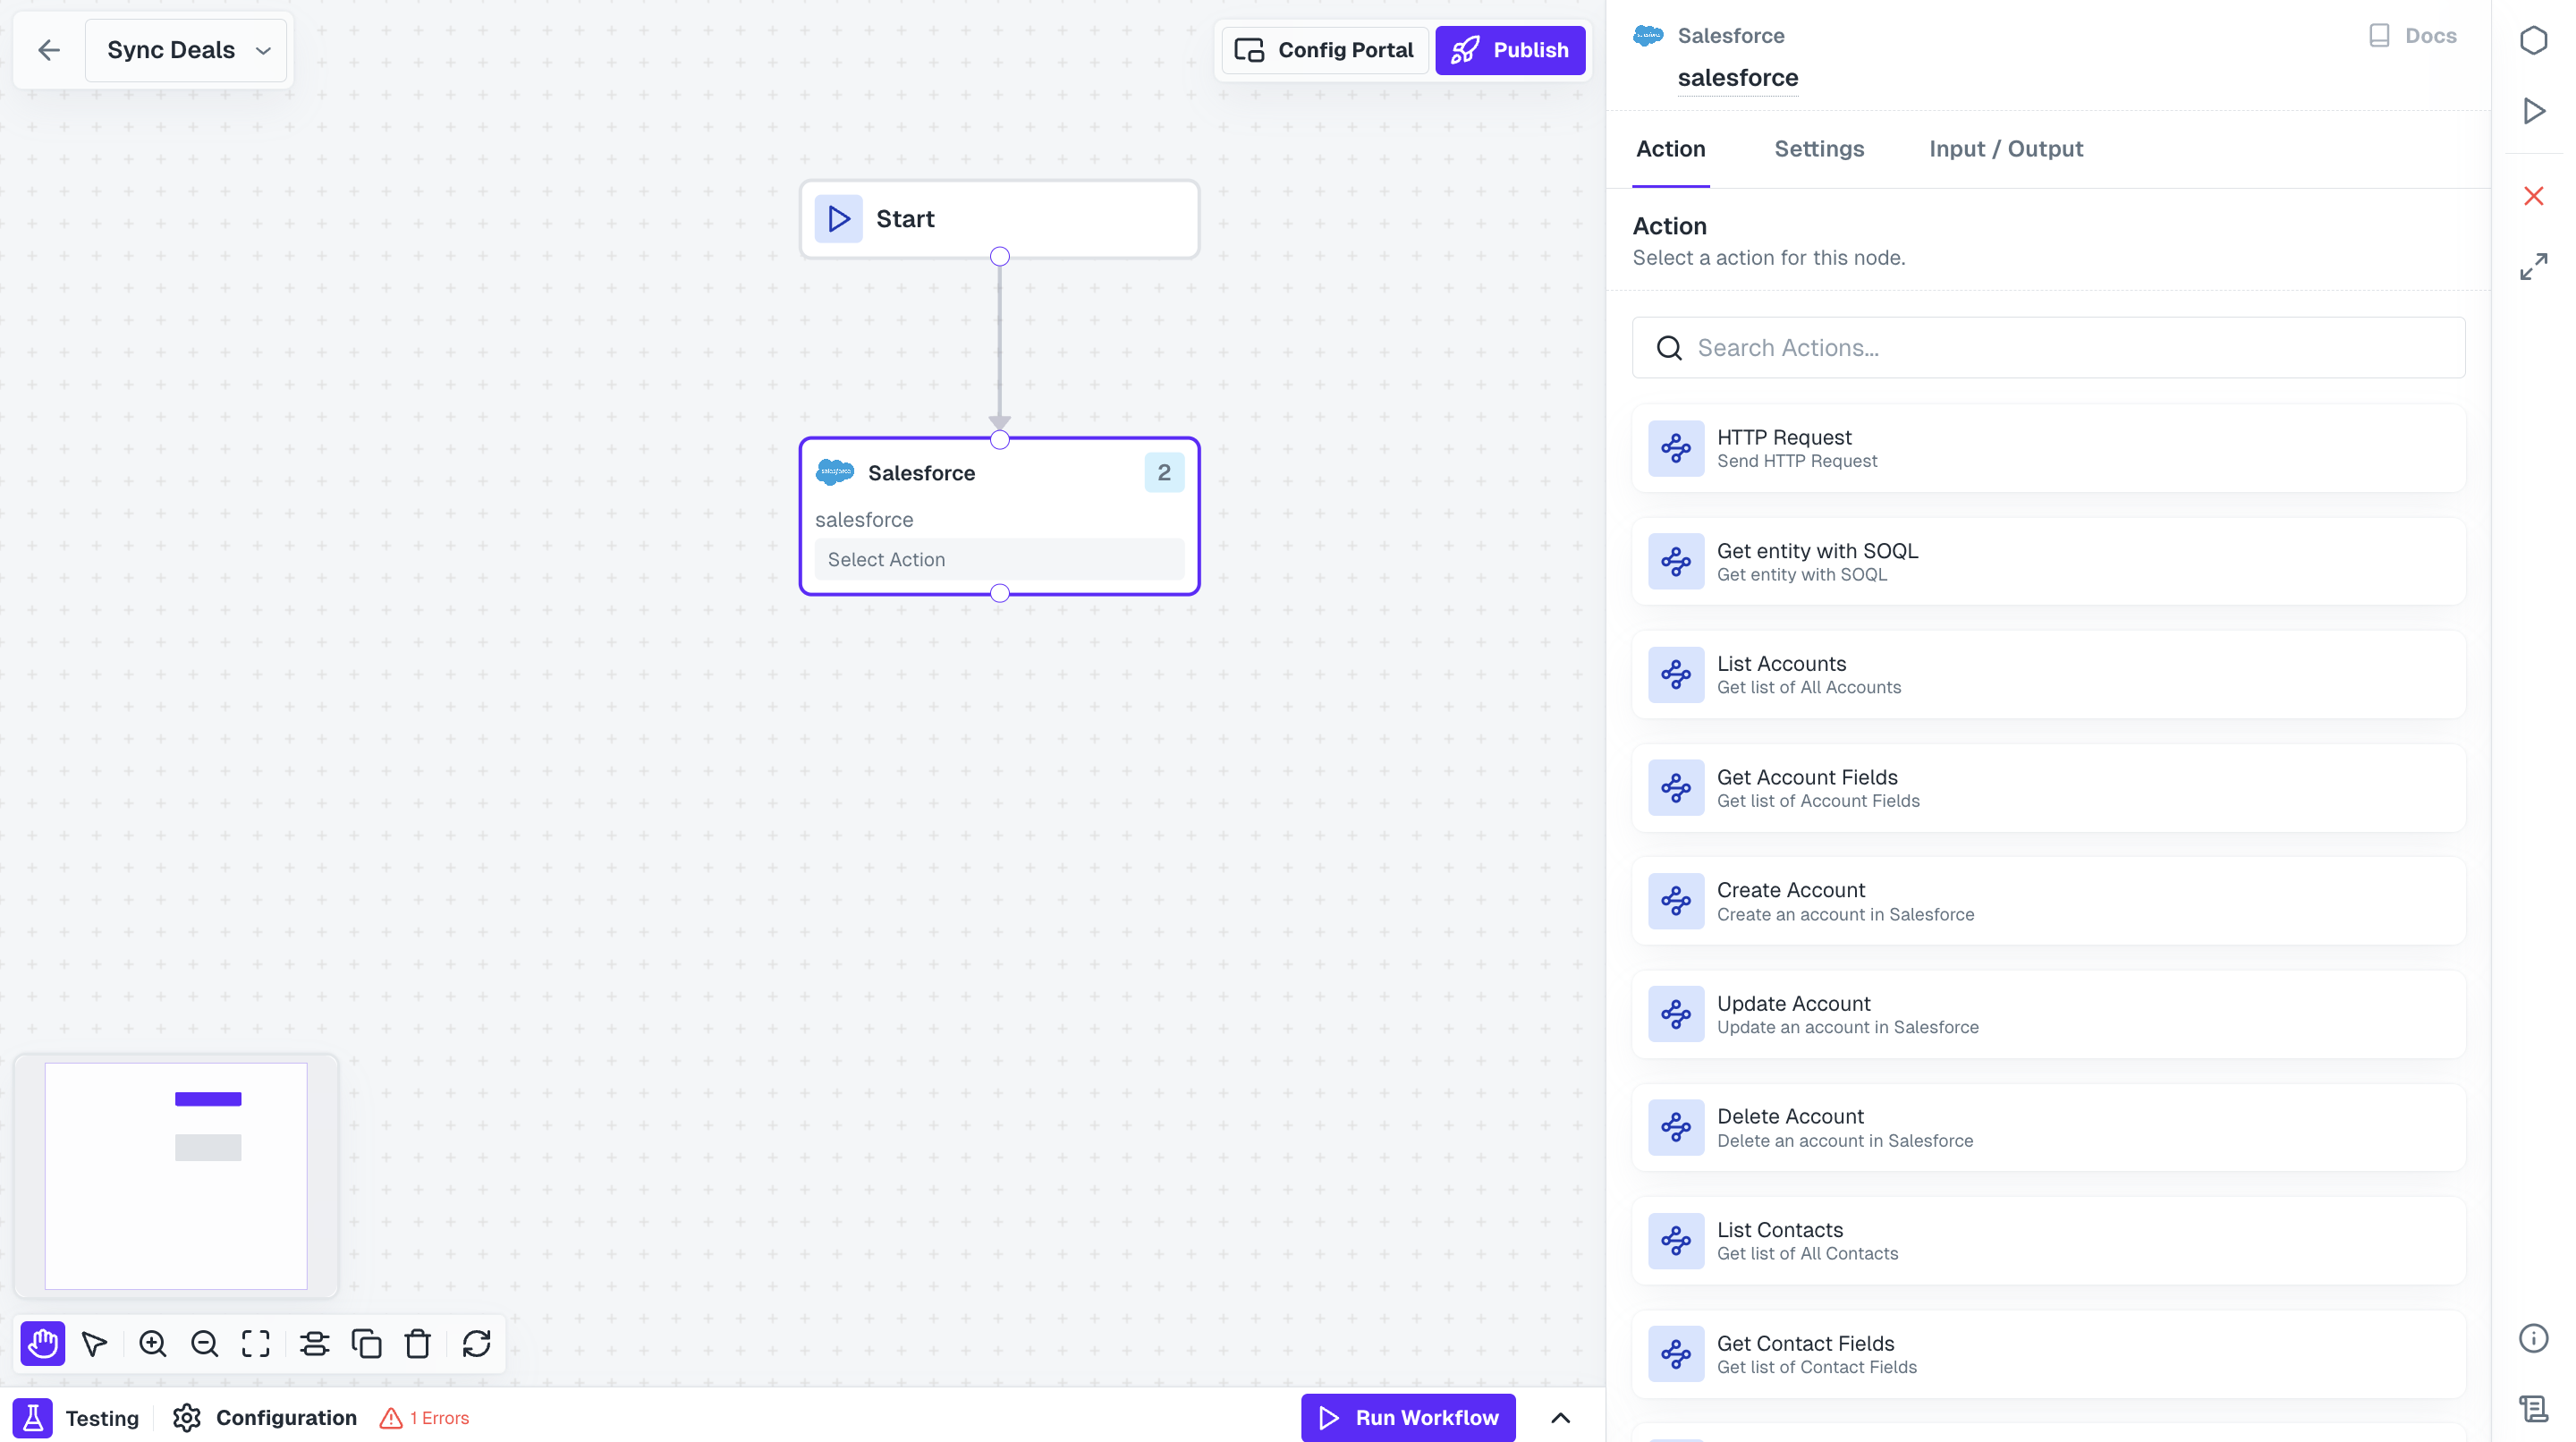
Get Entity with SOQL action.SOQL query field and click on Save.You can provide any additonal fields that you want to fetch about opportunities from Salesforce by adding it to this query.
Add Custom Code node
We have fetched all the opportunities, but you might require to structure it as a payload which your platform can receive. Let’s do this using Custom Code node.Drag the Custom Code from the Utility Nodes section onto the workflow builder and connect it with Salesforce node.
Mapping Opportunity fields
Click on 
+ Map Fields under Input Parameters, add key name as deals and in value we will provide the response received through Salesforce node which will be restructured.In Value, select Nodes tab under Insert Variable and click on + of the Salesforce Node.API Proxy in Workflow
You have successfully fetched all opportunities and structured the payload. Now to receive it in your server, you need to configure an API Proxy.In Refold Dashboard, navigate to 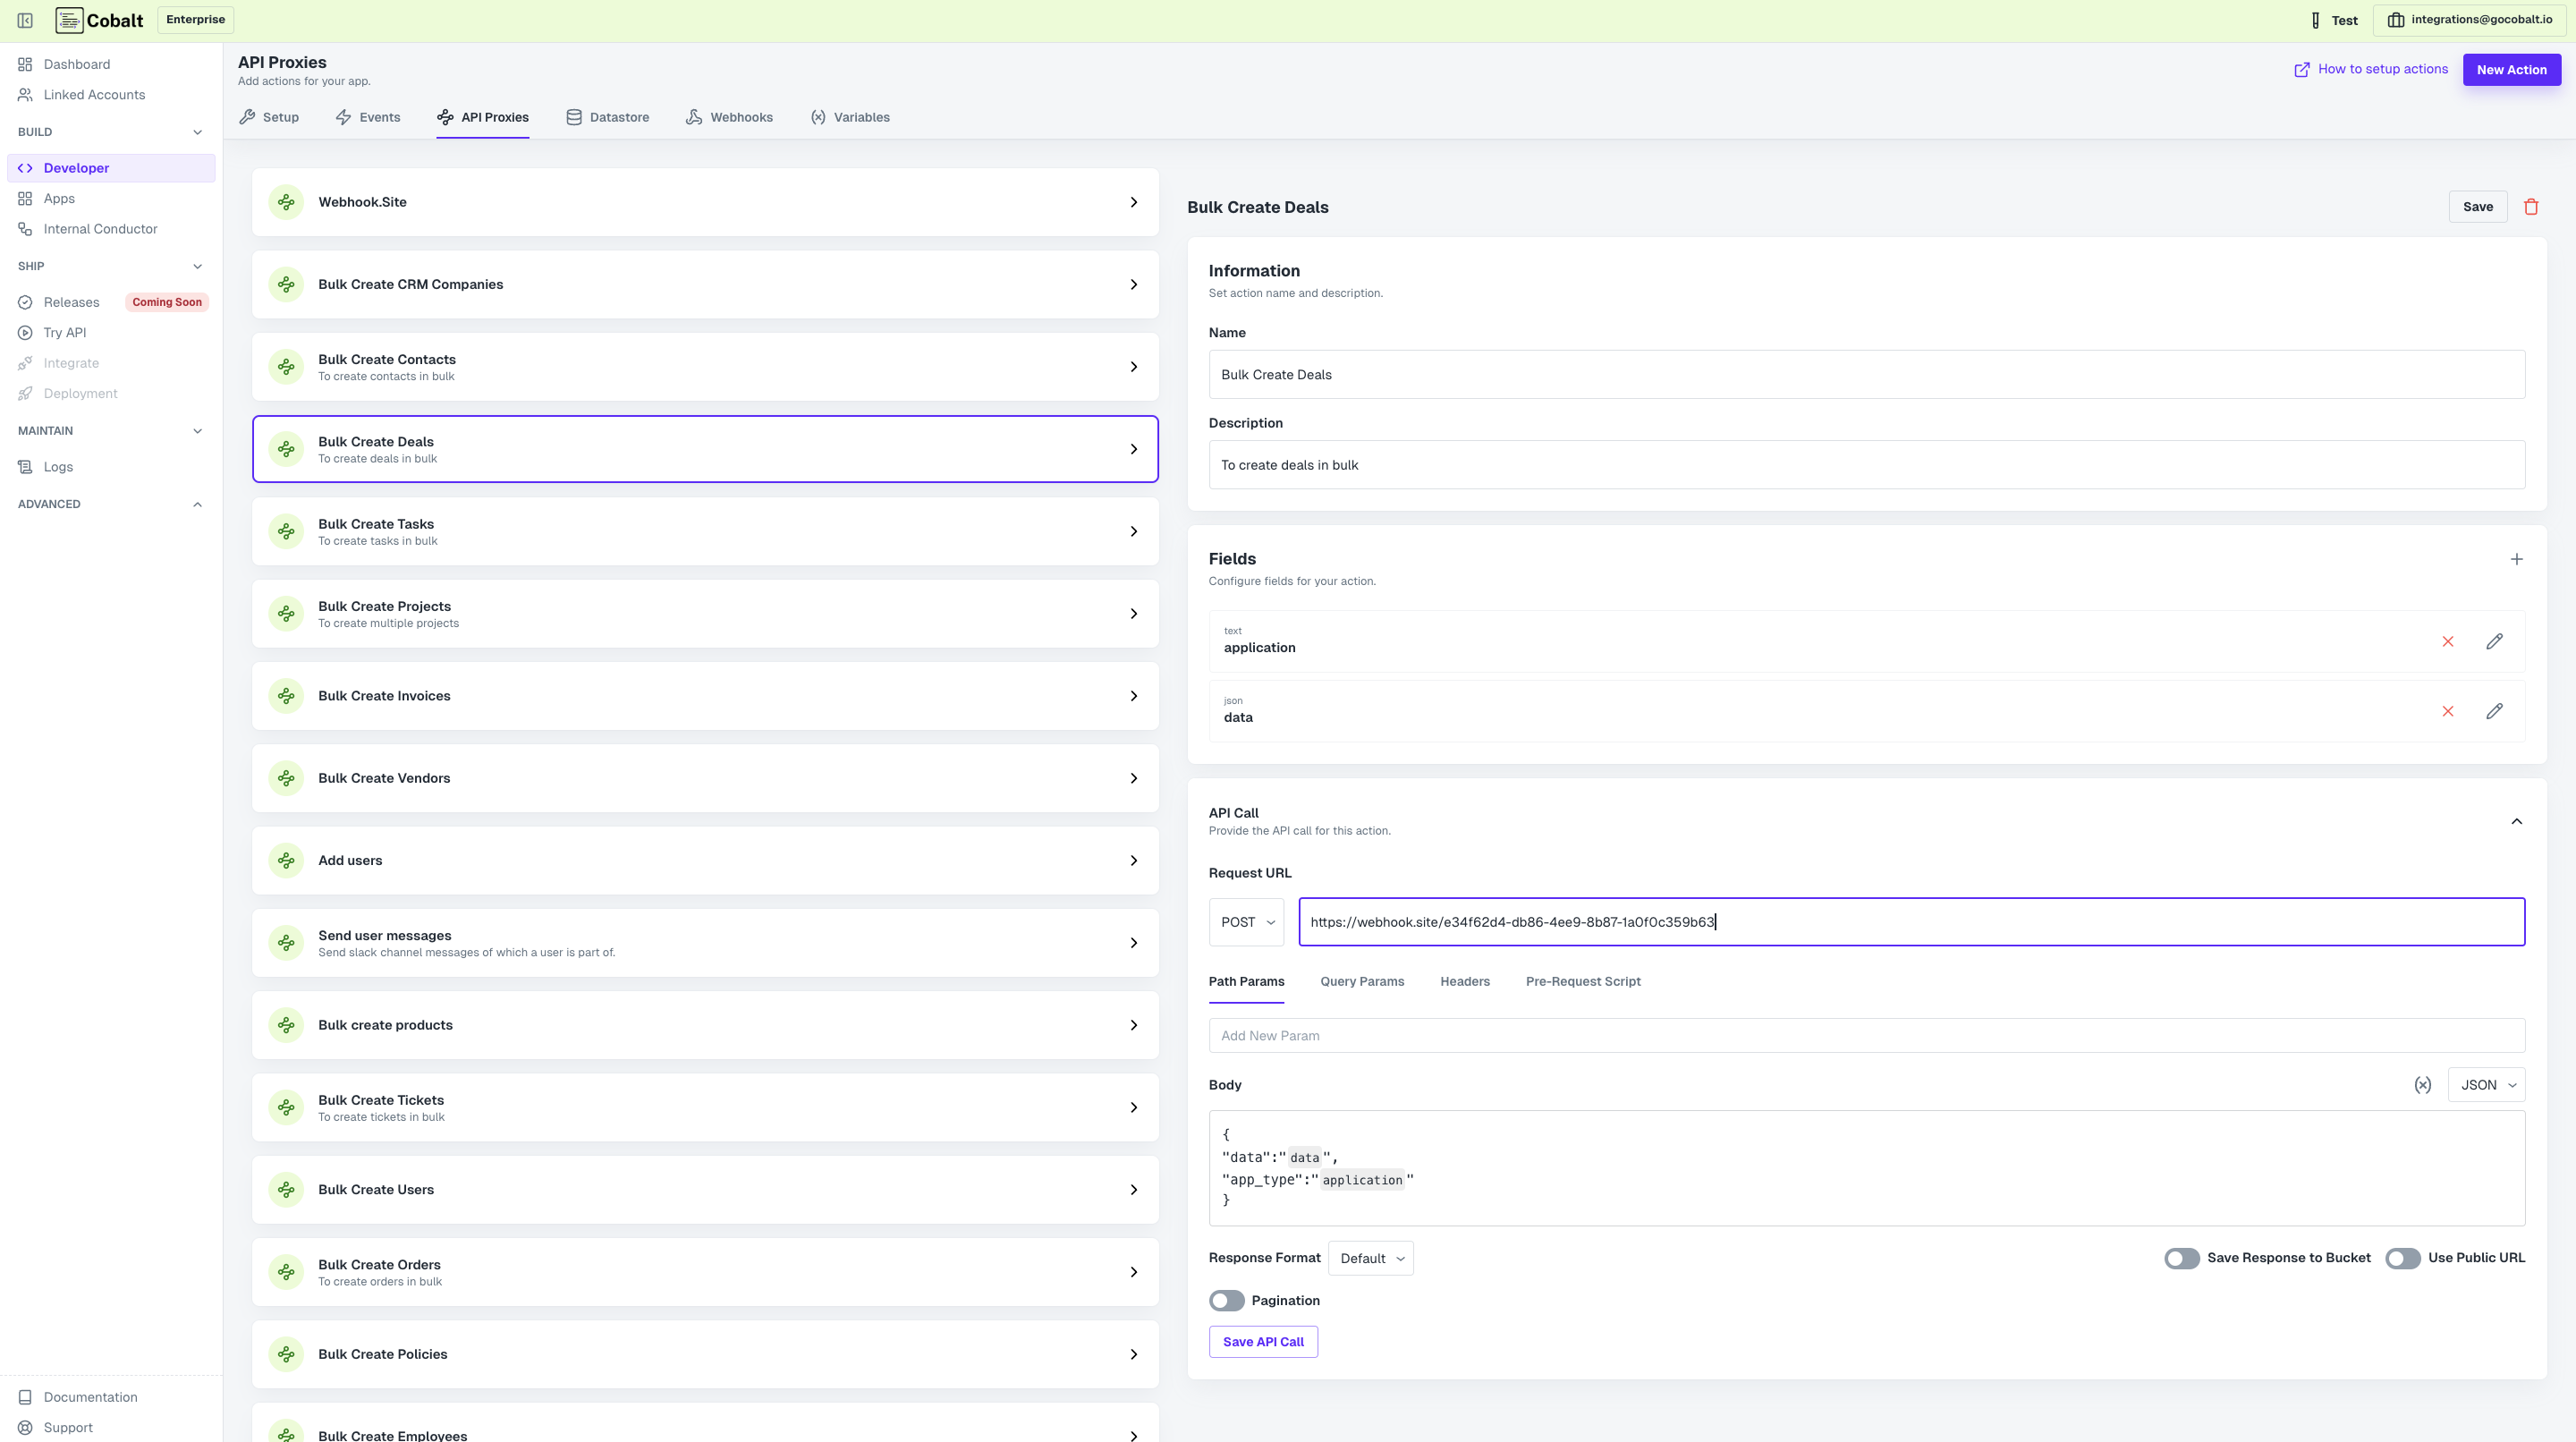
Developer > API Proxies and click on New Action. Configure an API endpoint, where you want to receive the response.If you want to test, go to webhook.site and copy Your unique URL and configure this as a POST Request and Save.Use API Proxy in Workflow
From Native Apps nodes, add your org’s Node and connect it with Custom Code.Click on the node and select the API Proxy that you created from the Actions. Add the response from Custom Code node in data field and click on 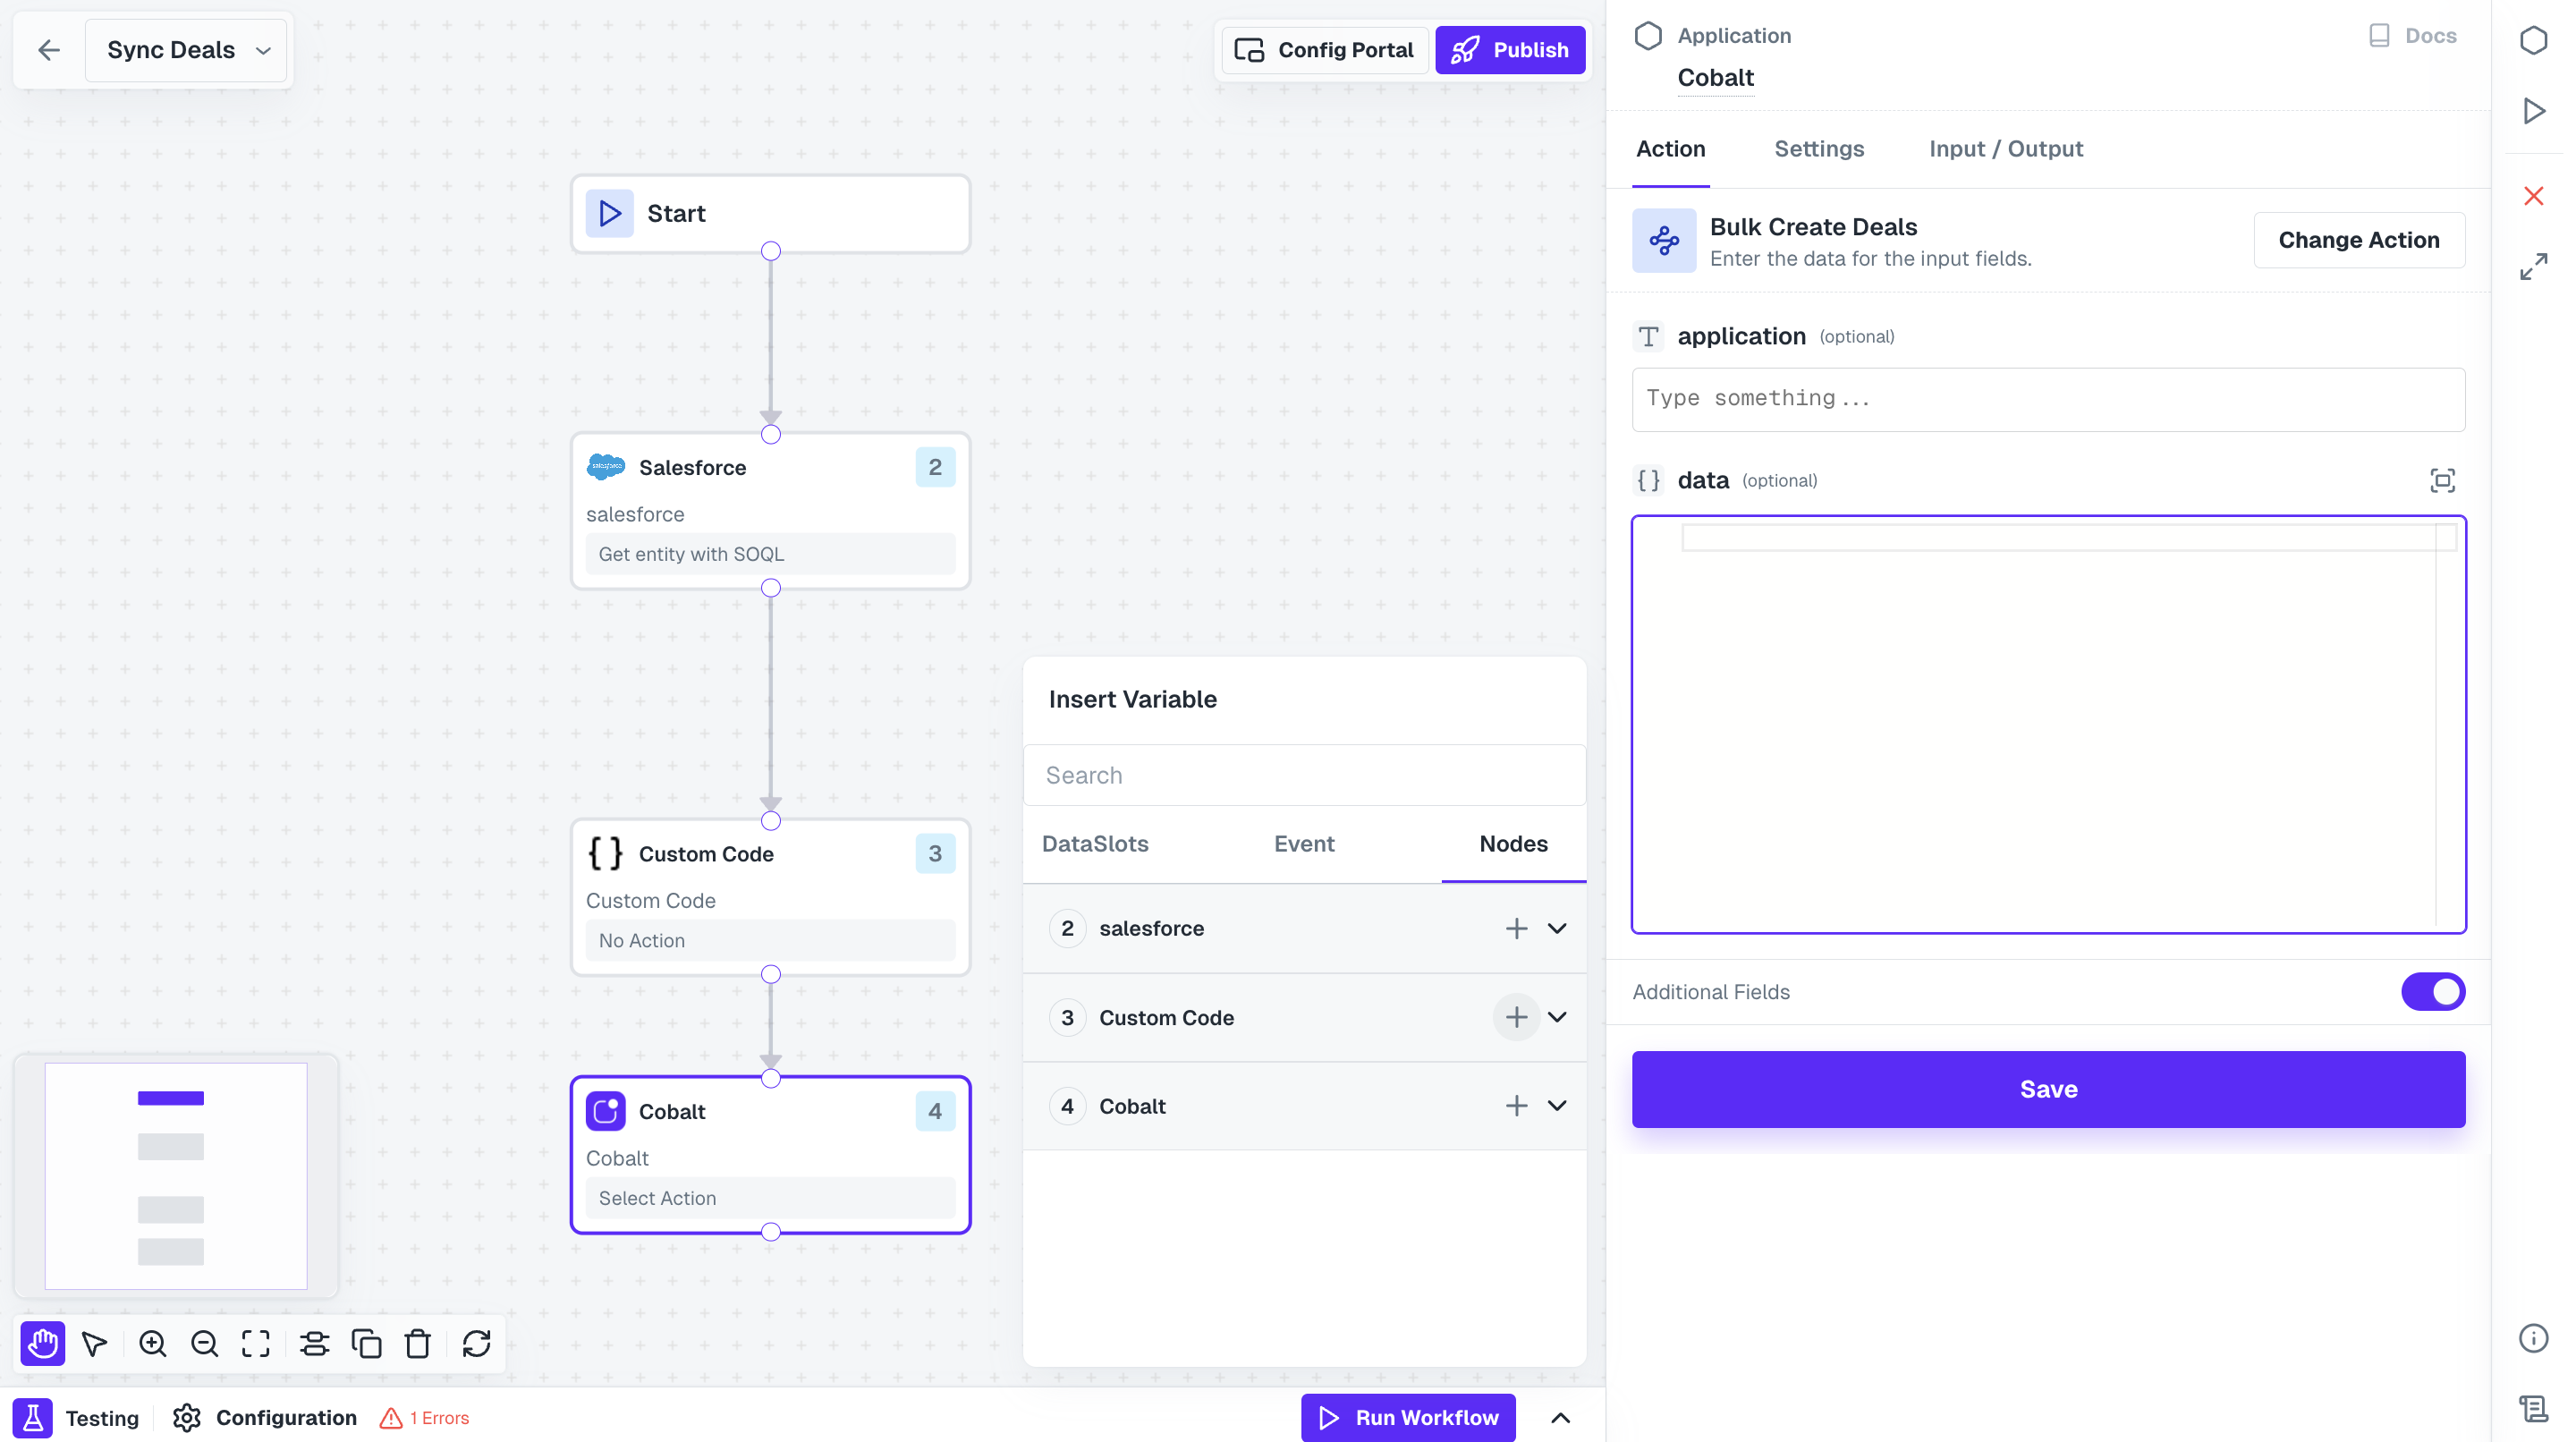
Save.Ensure that you add a field in the API Proxy where you can pass the JSON data and then added it to the API Call body as well in the POST request.
Test Workflow
Once your workflow is built, you can perform both node level and workflow level testing to check it. Before testing a workflow, ensure the following pre-requisites are completed:- Linked Account configured with authentication completed with the integration.
- Sample Payload for testing is available & configured.
Testing Node
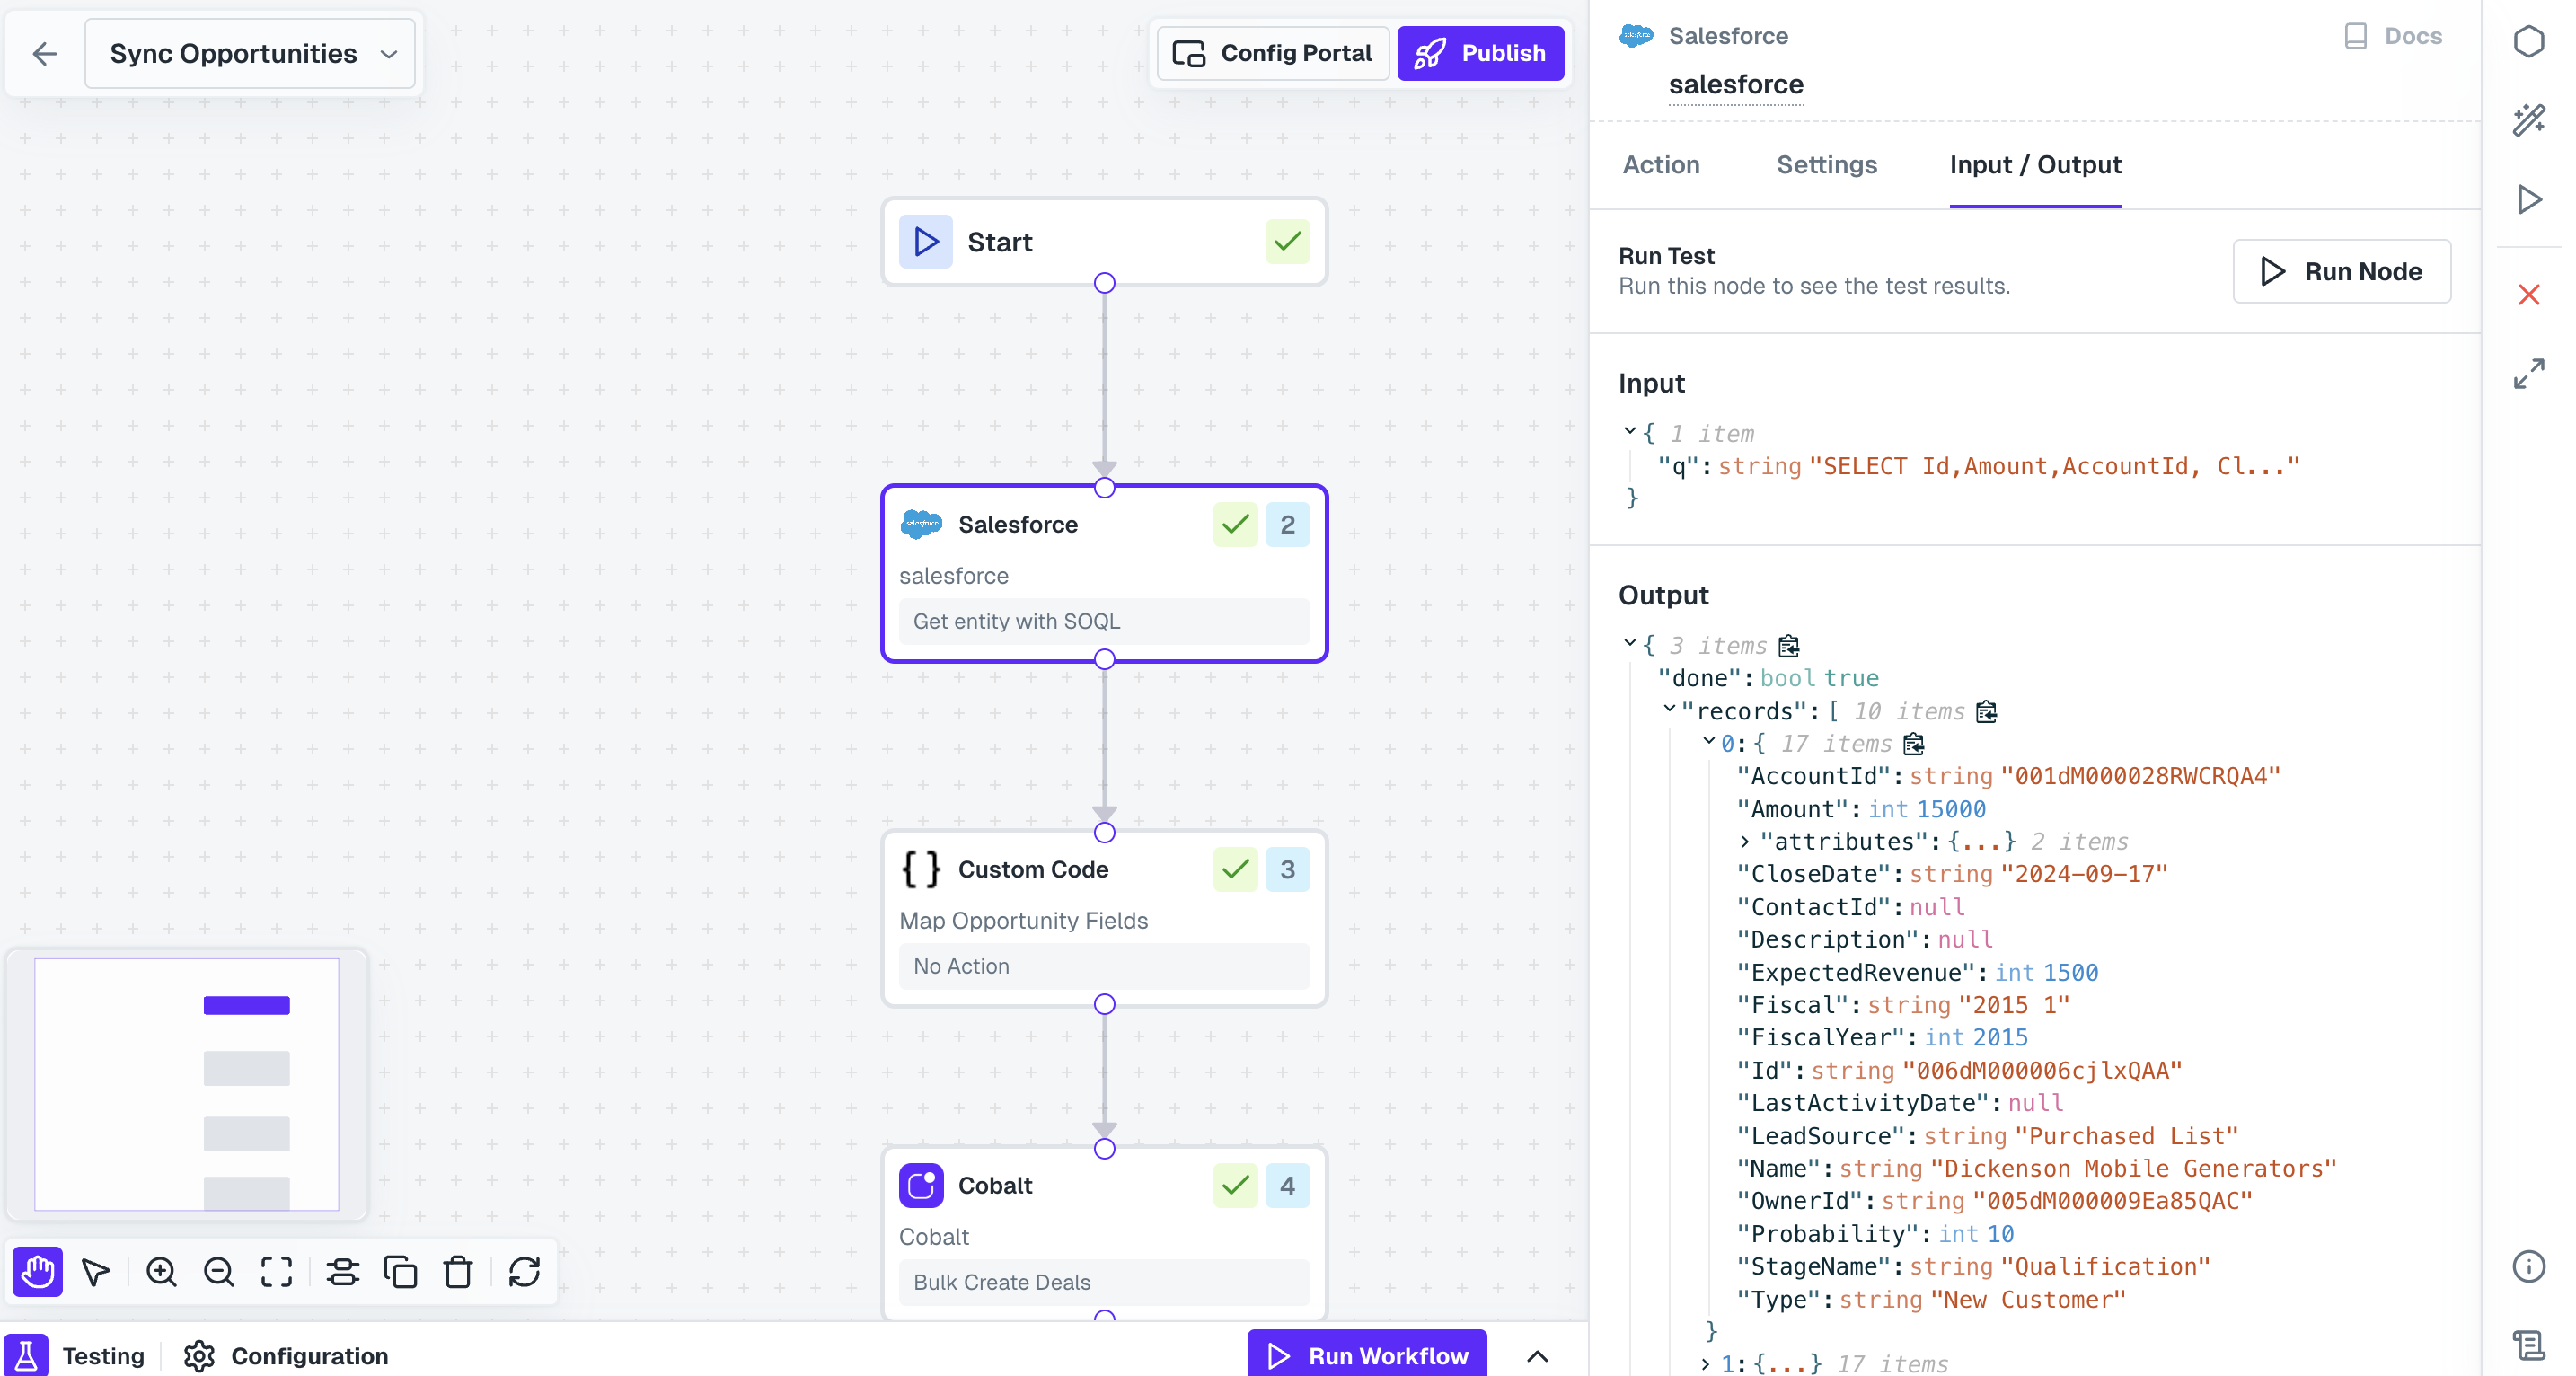
Once the node executes successfully, a checkmark appears on the node, indicating it has been tested.
Testing Entire Workflow
Open the testing modal present at the bottom. Click onRun Workflow button to perform a test execution and a Test Run log is generated with output of each node.
Hurray!!You have successfully created and tested a Salesforce workflow to sync all the opportunities to your system.