In this guide, we will walk through the essential steps required to build a NetSuite integration using the Refold platform. This process involves three major steps i.e. User Authentication with NetSuite, Creating Workflows and Using workflows for users.Documentation Index
Fetch the complete documentation index at: https://docs.refold.ai/llms.txt
Use this file to discover all available pages before exploring further.
Authenticating with NetSuite integration
To get started, first you need to enable the NetSuite integration in your account and also setup some basic processes.Enable the NetSuite App
Step 1: Enable the NetSuite App
After setting up your account, the next step is to enable the NetSuite app in your Refold account.Apps cannot be enabled using the API. You will need to enable the app through the UI.
Apps in Refold and search for Netsuite and enable the app by clicking on the Go Live button in the top right corner.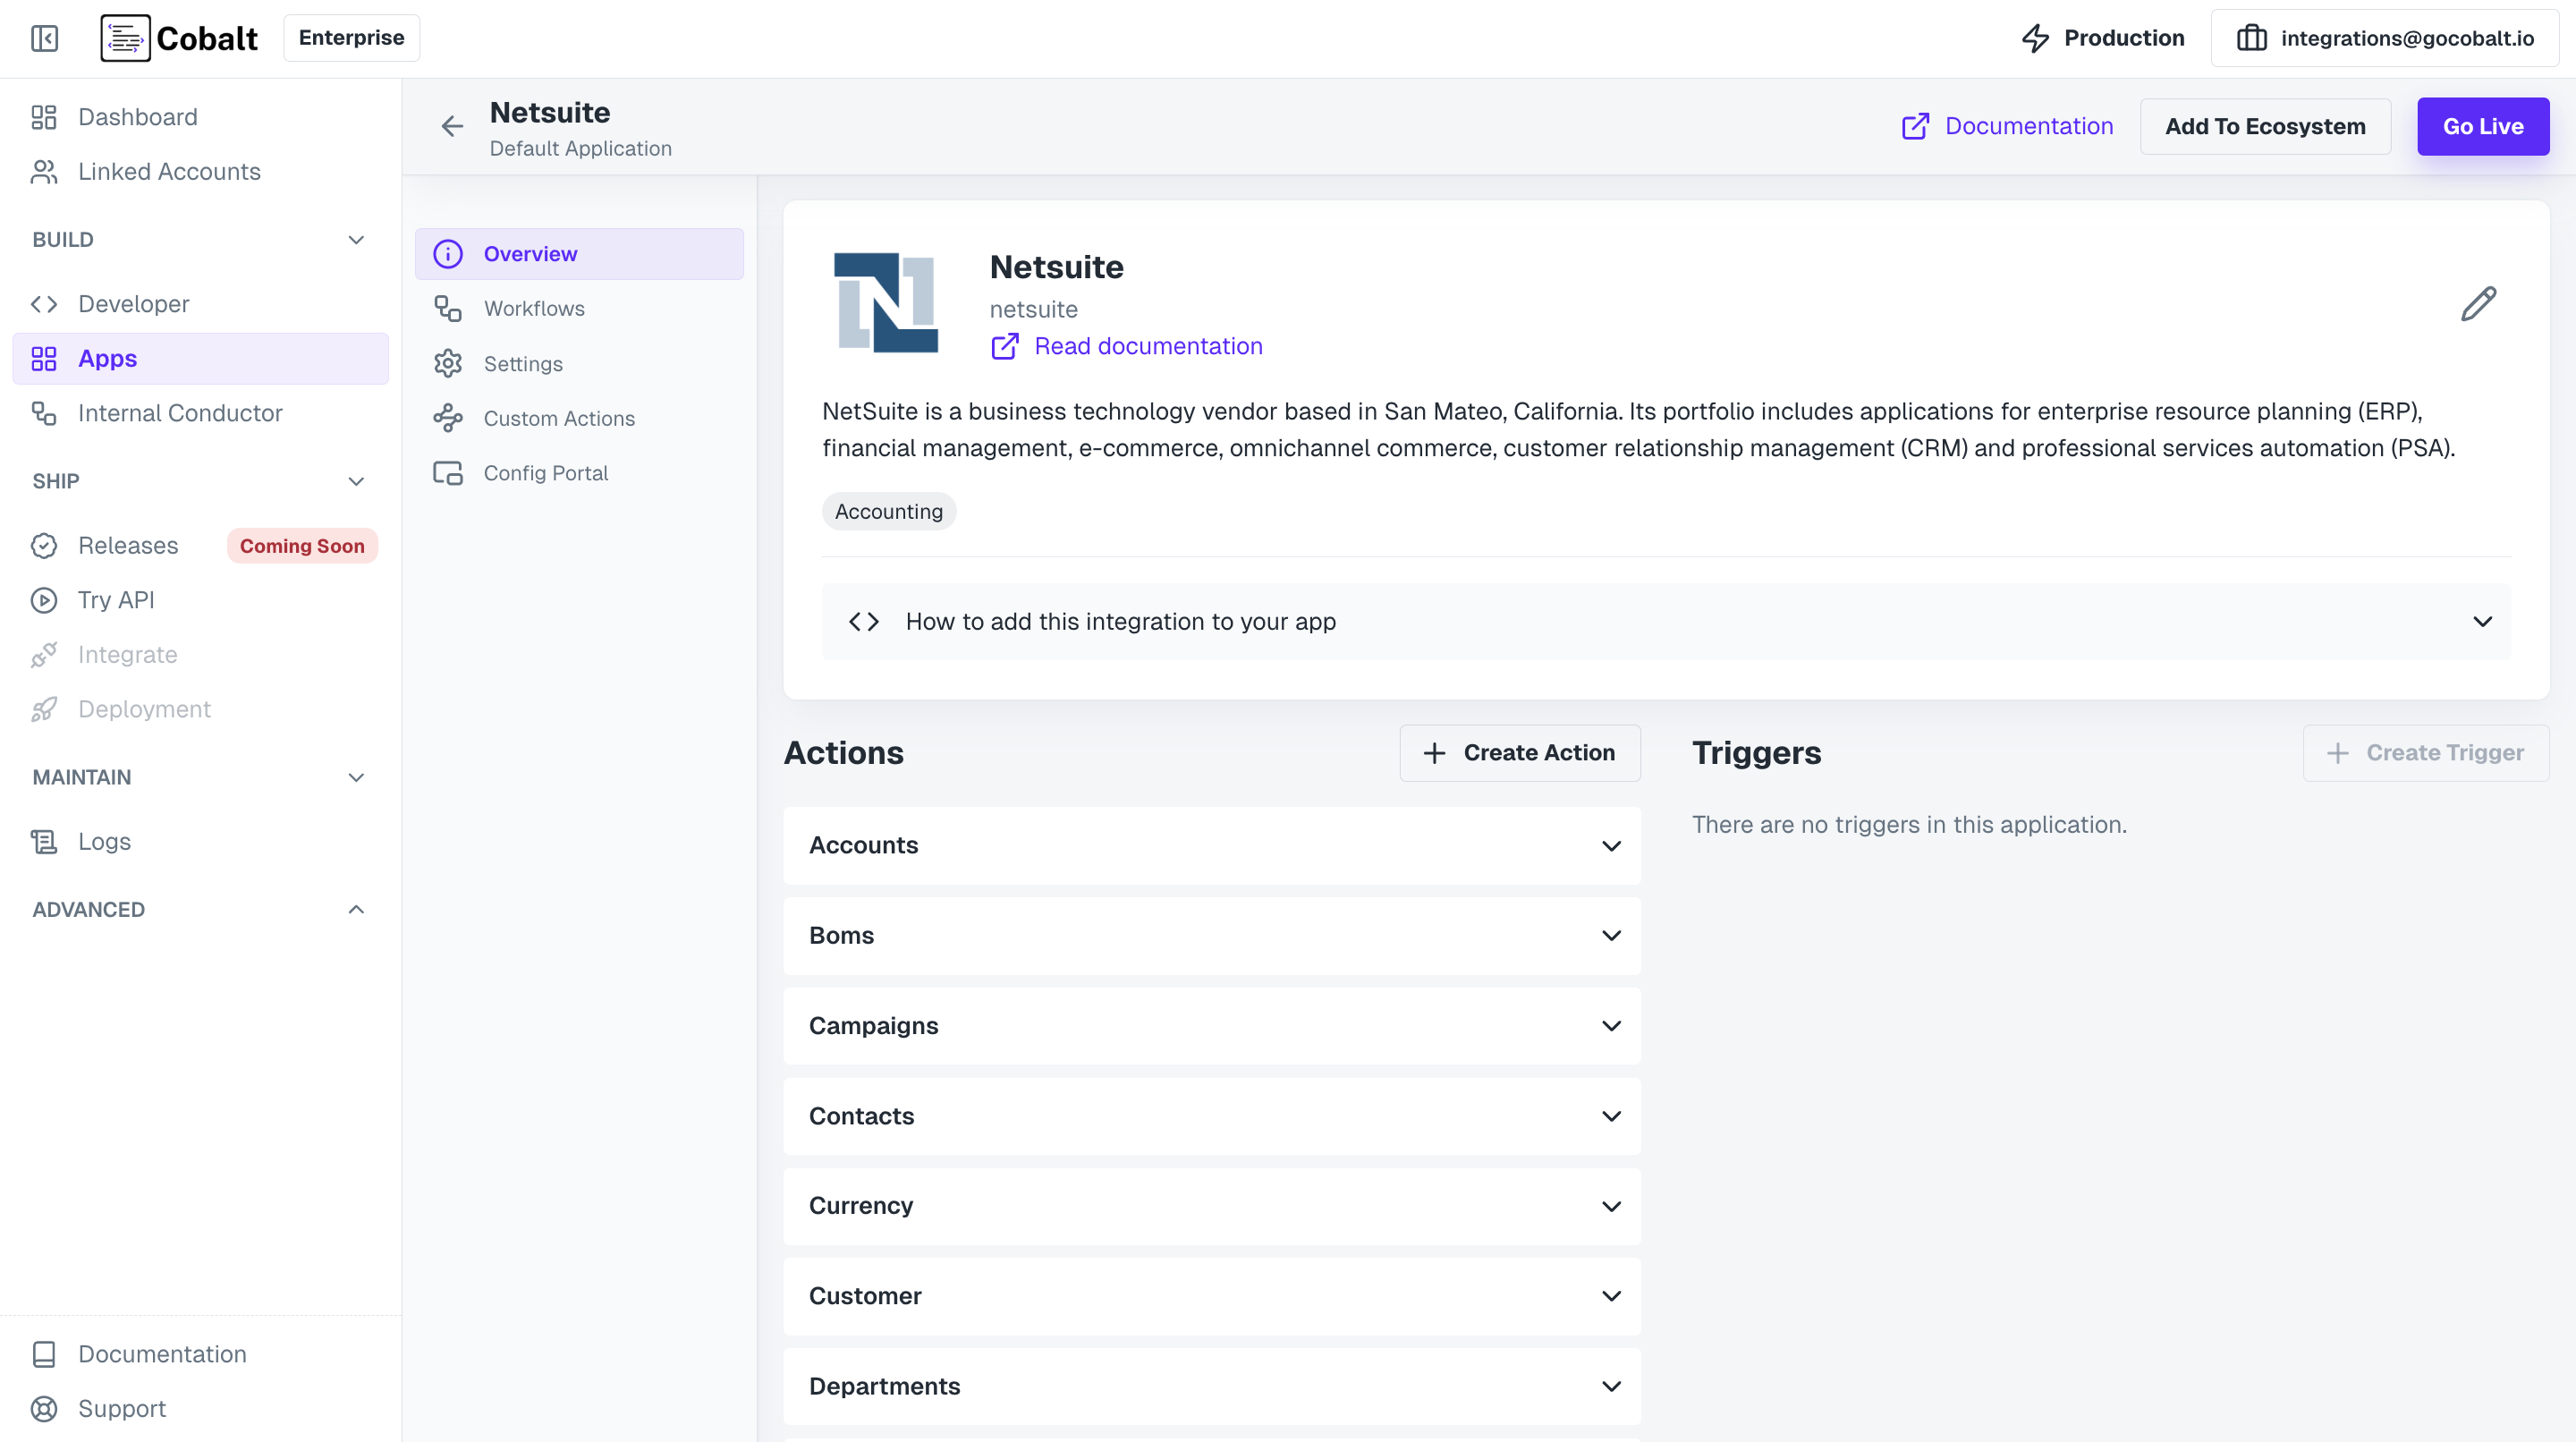
Create a Linked Account
Step 2: Create a Linked Account
A Linked Account in Refold represents the end-users or customers who will use the integration through the platform. Each Linked Account requires a unique linked_account_id, which typically corresponds to an ID from your internal data model (e.g., a user or account ID).To upsert (create or update) a Linked Account, use the following API call:| Param | Required | Type | Description |
|---|---|---|---|
| linked_account_id | Mandatory | String | Unique customer identifier |
| name | Optional | String | Name of the customer |
Generate Session Token for your Linked Account
Step 3: Generate Token
After creating a Linked Account, the next step is to generate a session token. Session tokens help protect your Refold API key and manage end-customer tokens more securely.To create a session token, use the following API call:Open Hosted Portal Auth Flow
Step 4: Open Hosted Portal Auth Flow
Next, you will need to generate a Hosted URL that your users will use to authenticate with Salesforce. Refold securely stores the credentials and handles API calls on behalf of your users.Use the following API call to generate the Hosted URL: Hosted Portal is a no-code solution provided by Refold that removes the need to build your own UI for handling integration authentication and configuration.
Authenticate Using Hosted Portal
Step 5: Perform Key based Authentication
Visit the Hosted URL provided in the API response. The Hosted Portal will display all the integrations you have enabled, including NetSuite.To authenticate:- Navigate to the NetSuite integration in the portal.
- Provide the requested credentials.
- Click on Connect to begin successfully authenticate with NetSuite.
You have successfully authenticated with NetSuite integration.The next step is to create workflows for your use-case.
Creating Workflows in NetSuite
There are 2 major categories of workflows that you can create in NetSuite currently.Data Import from NetSuite
Sync data from NetSuite to your system.
Push Data to NetSuite
Create data on NetSuite from your system.
Data Import from NetSuite
Consider a use-case where you want to sync all the contacts present in NetSuite to your system. In the NetSuite integration, go toWorkflows and create a new workflow by clicking on +Add Workflow button and name it as Sync Contacts.
Data Import from NetSuite
Data Import from NetSuite
Follow the steps given to build the workflow:
Add Trigger in Start Node
All workflows start with a trigger, which determines when the workflow will run and how data is passed into the workflow.
For this workflow we will use the Event Based trigger.Click on the 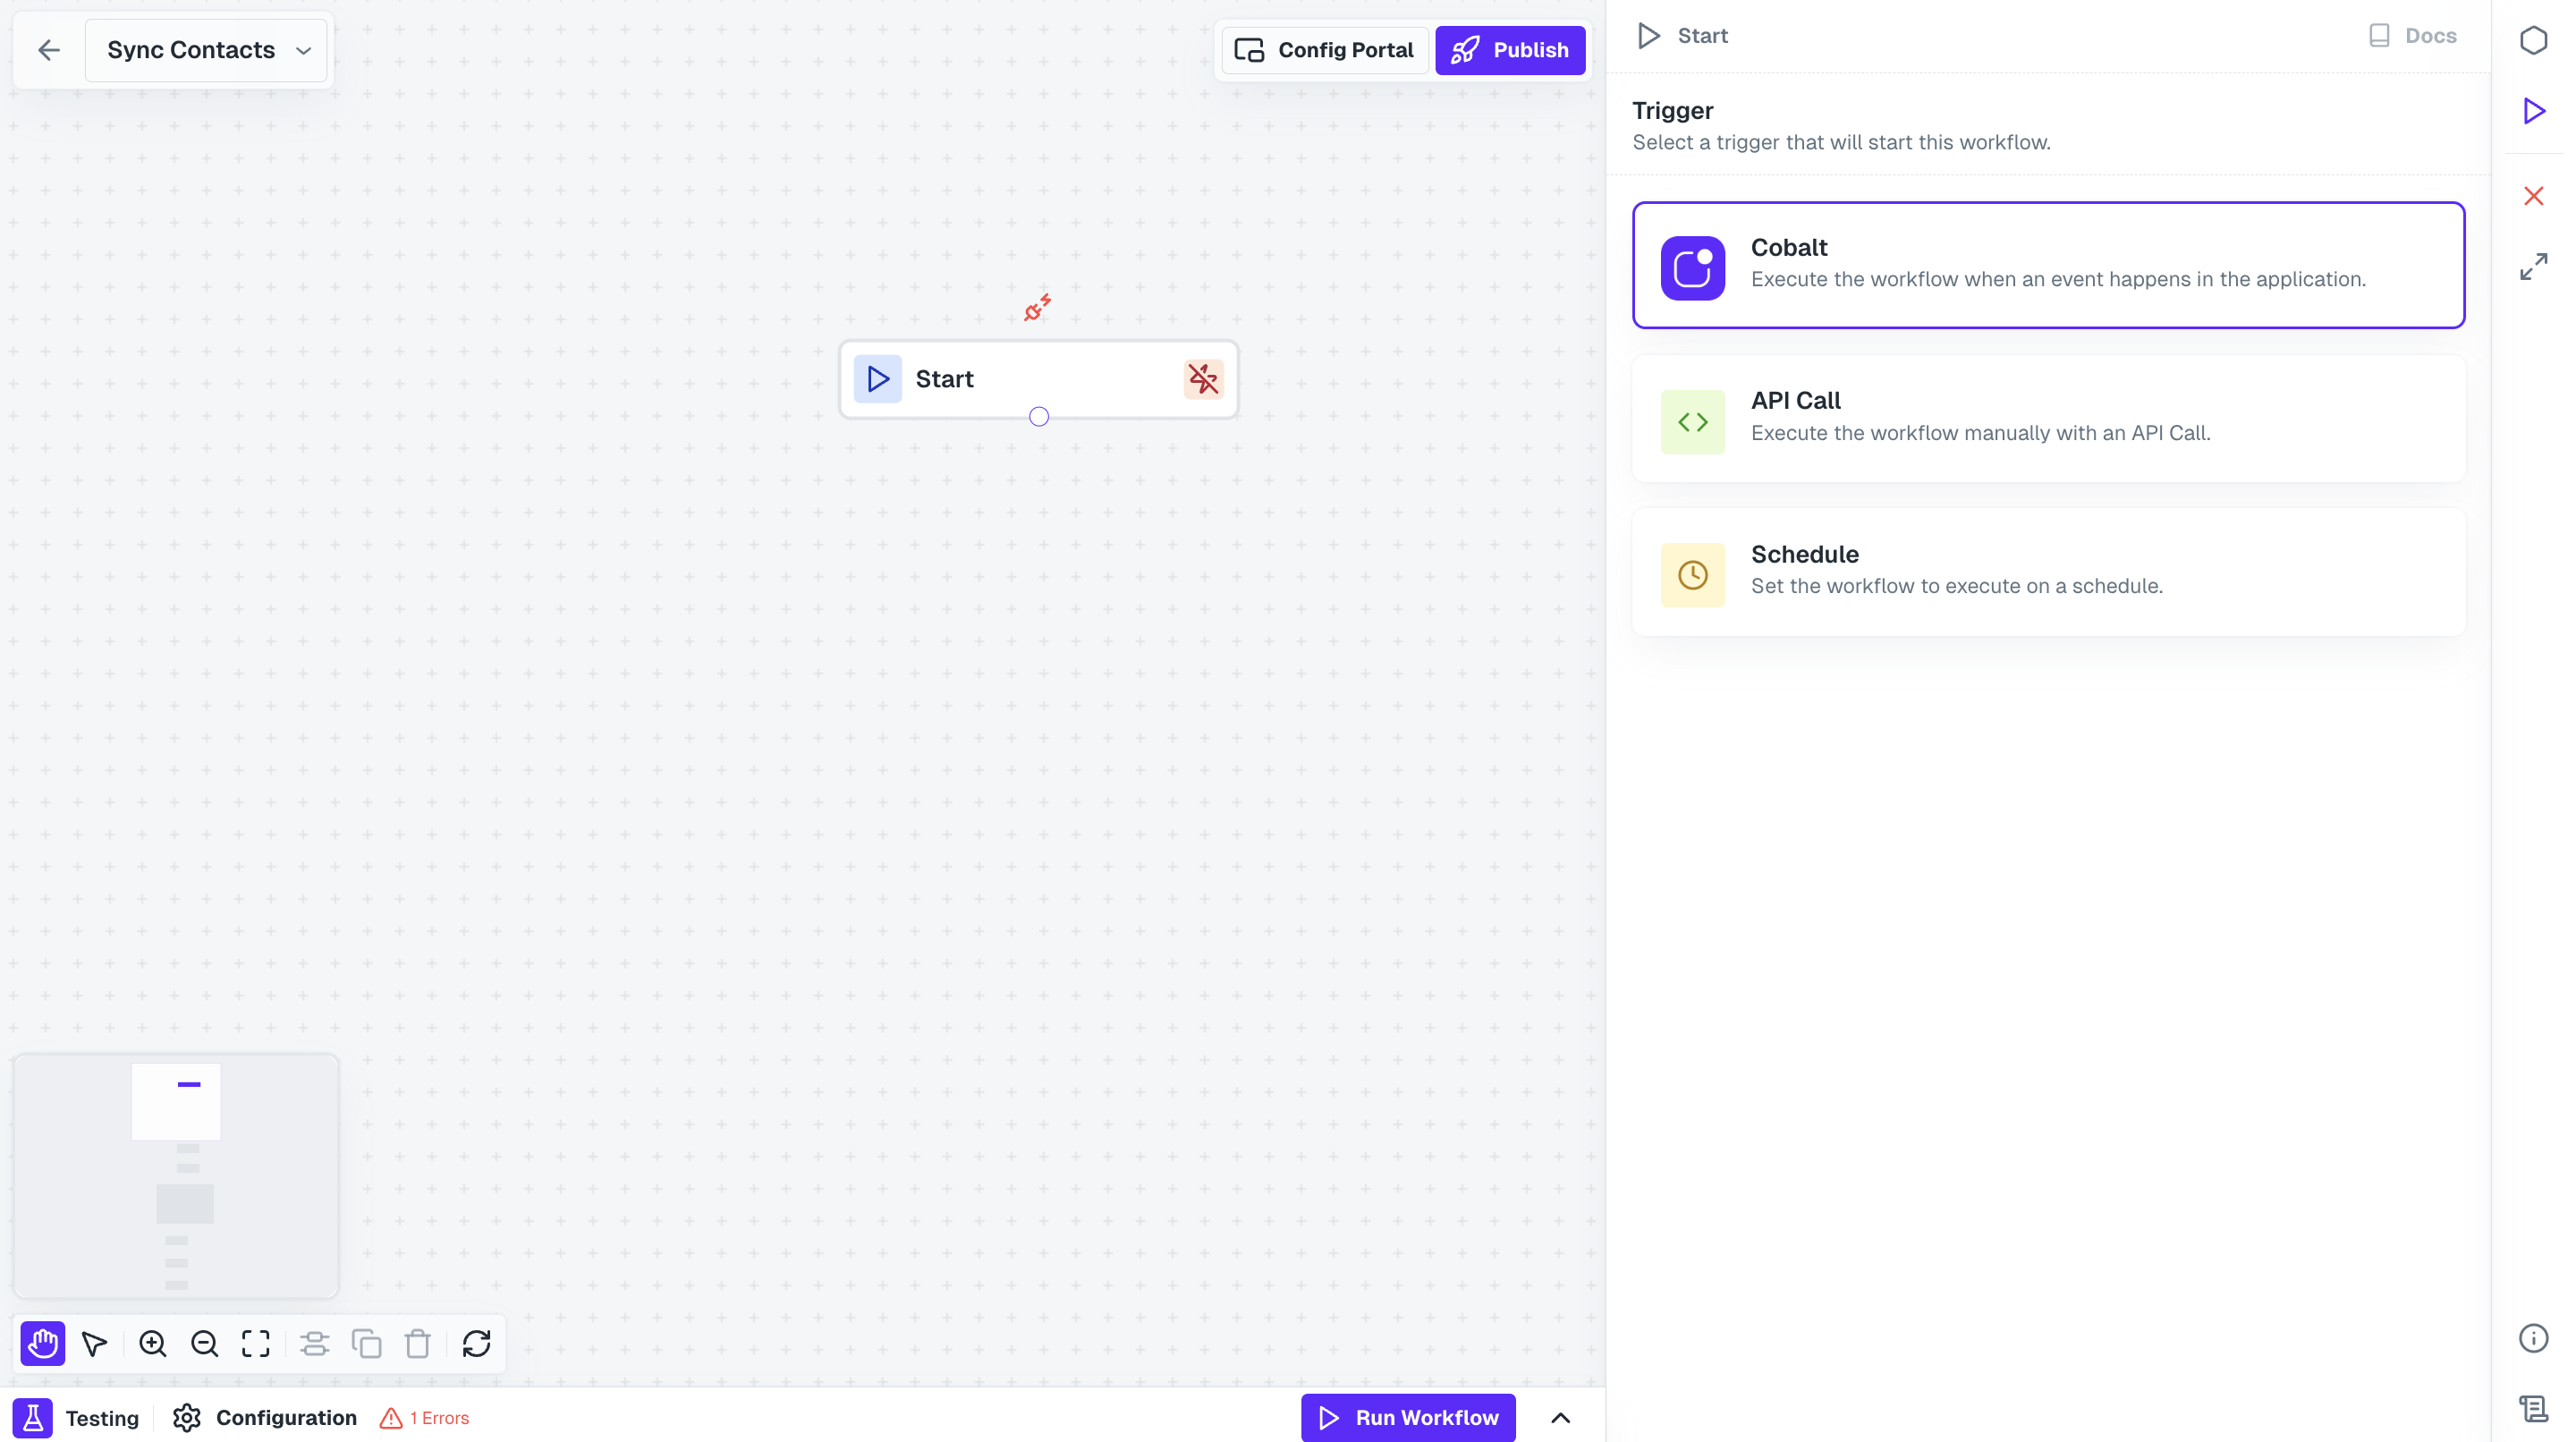
Start Node, select your native app option and click on + Create New Event.Add NetSuite Node
Now to fetch all the contacts present in your user’s account, we need to call NetSuite API.Click on 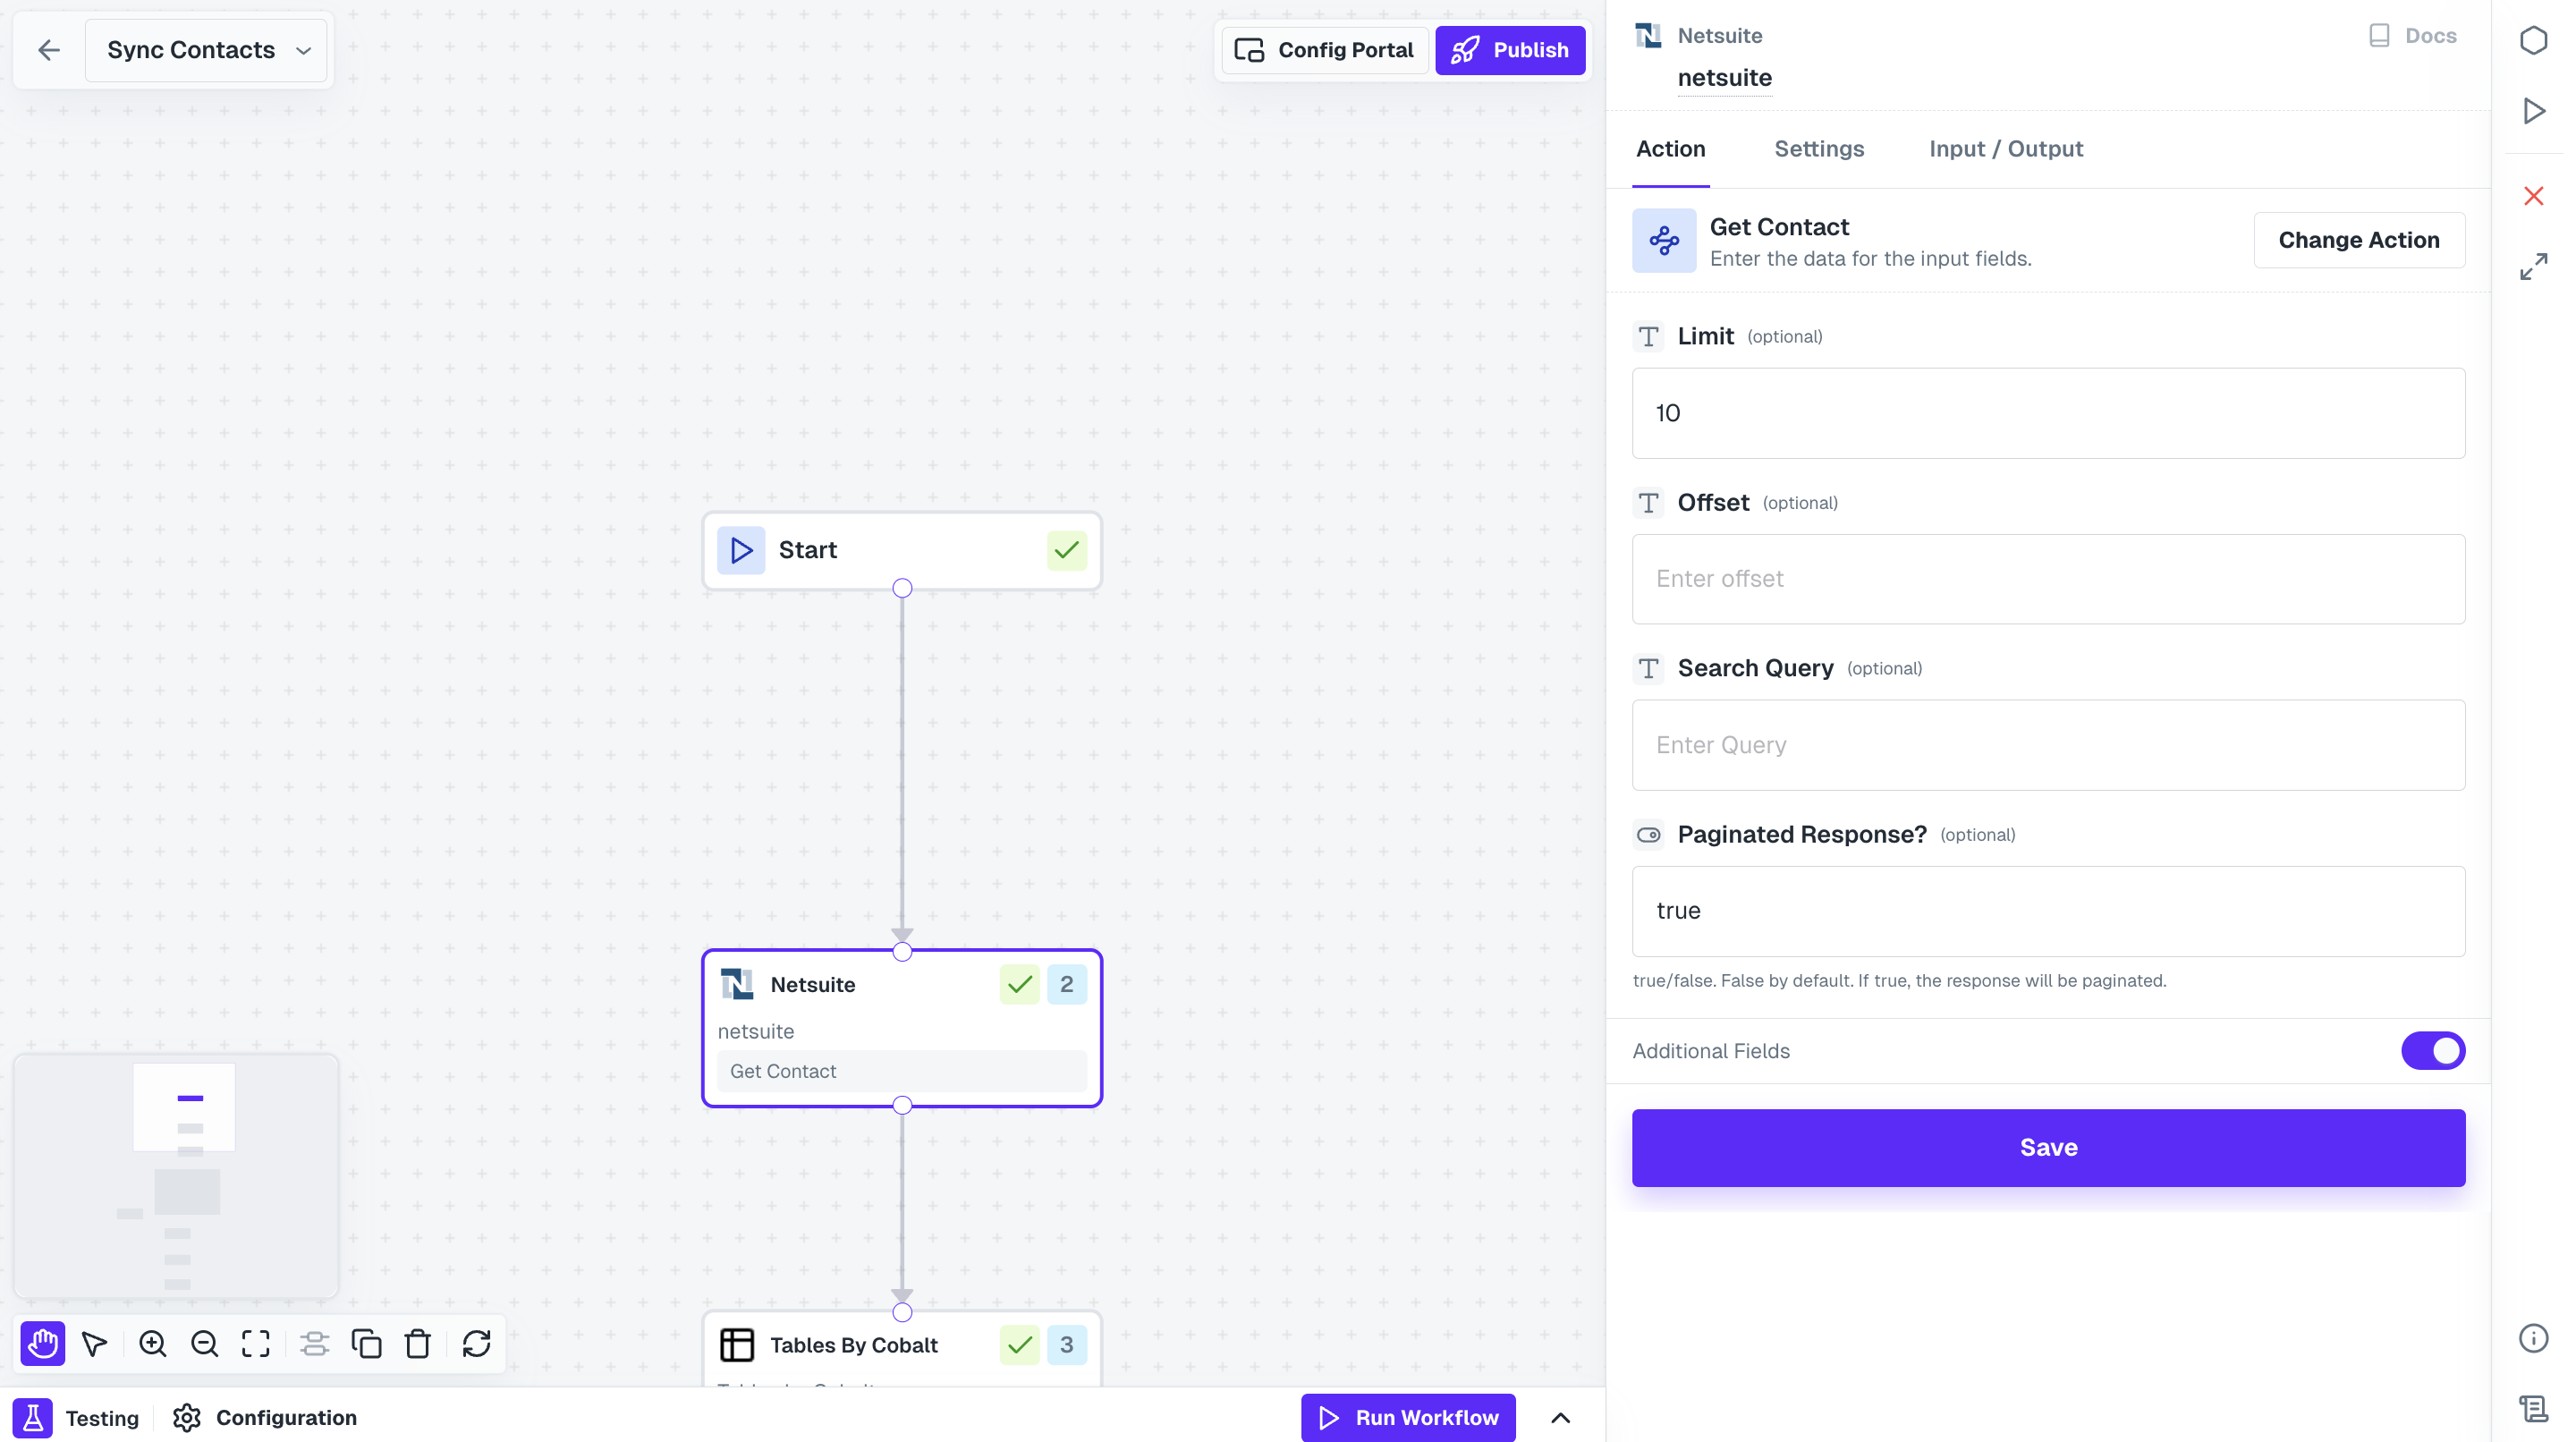
Nodes option in the top right and drag the NetSuite Node from Native Apps section to the workflow builder. Connect this node with Start Node and select Get Contact action in the node.Add Loop node
We fetched all the contacts data from NetSuite, but NetSuite API only sends the IDs of the contacts in the API response, so now we need to loop through all the IDs and get contact data.Drag the Loop Code from the Utility Nodes section onto the workflow builder and connect it with NetSuite node.
Setup Loop Node
To setup how many iterations the loop node will do, click on it and select 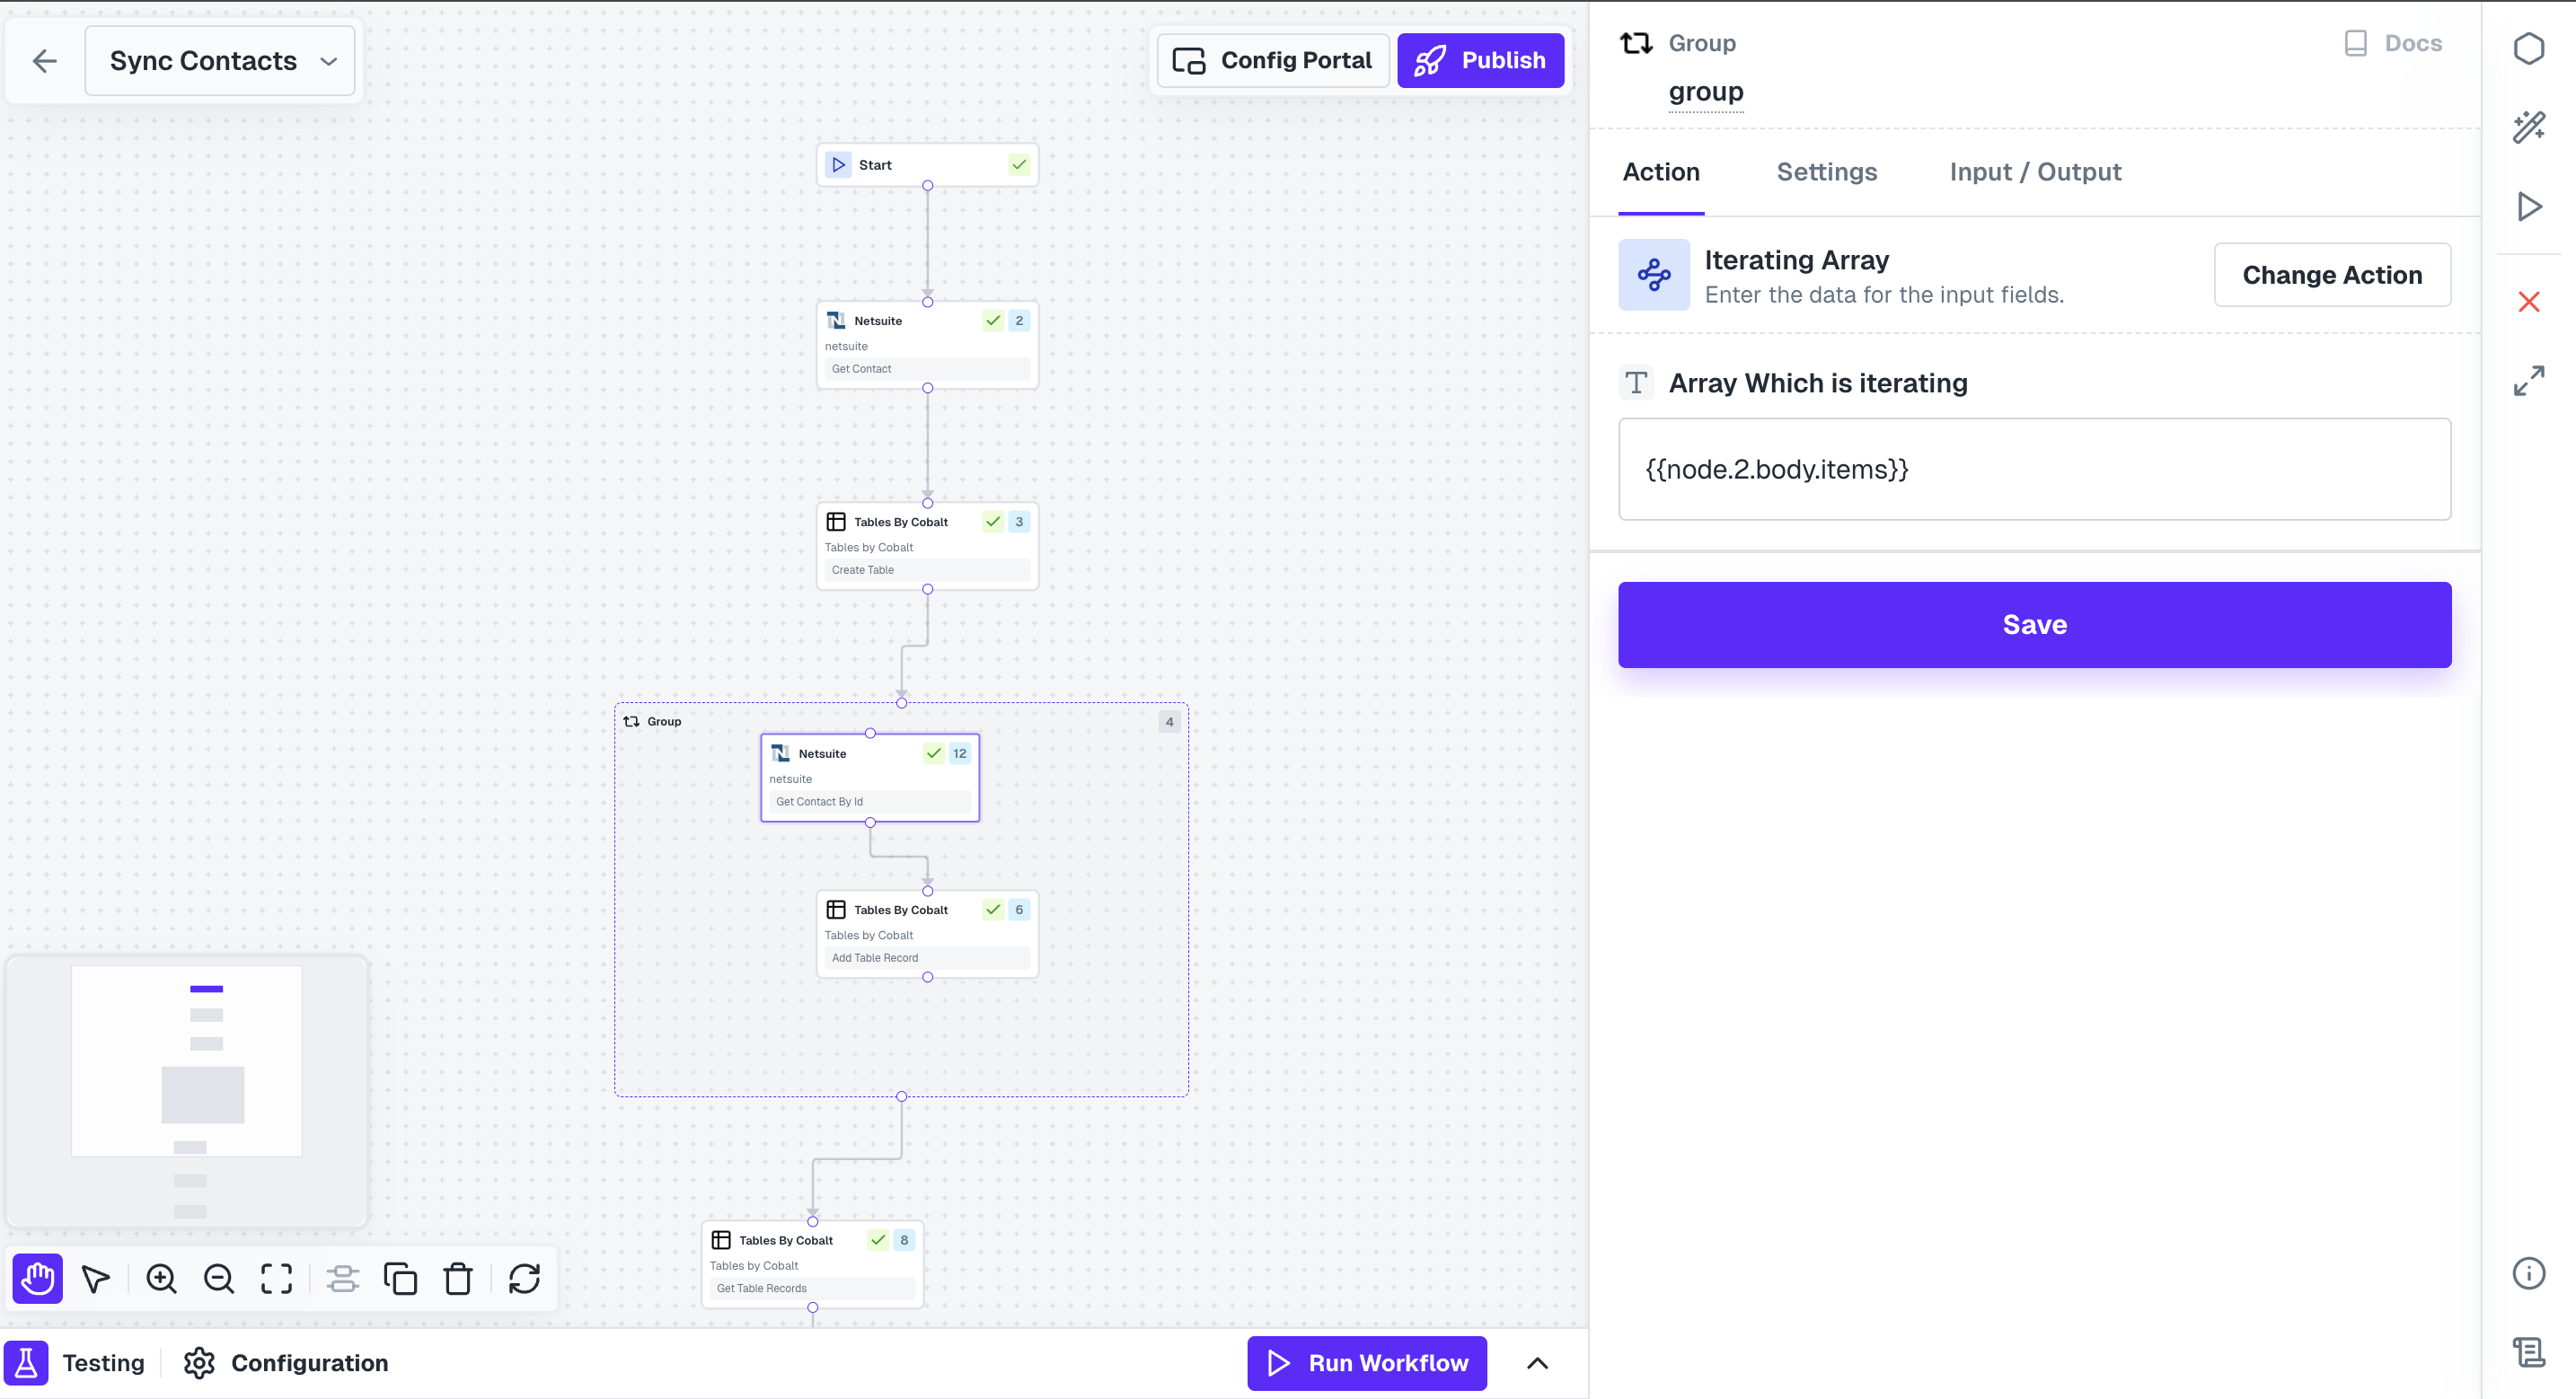
Array Iteration as action and provide the array of IDs that you received from the NetSuite node.Get Contact by ID action where you provide a dynamic id based on array item by templating {{node.<Loop_node_no.>.body.array_item.id}}.Table Node addition
We are looping through the NetSuite nodes, but we need to store that response in a temporary storage so that we can use it outside the loop. For this purpose, we will use the Table node.Add a Table Node inside the Loop node and select action 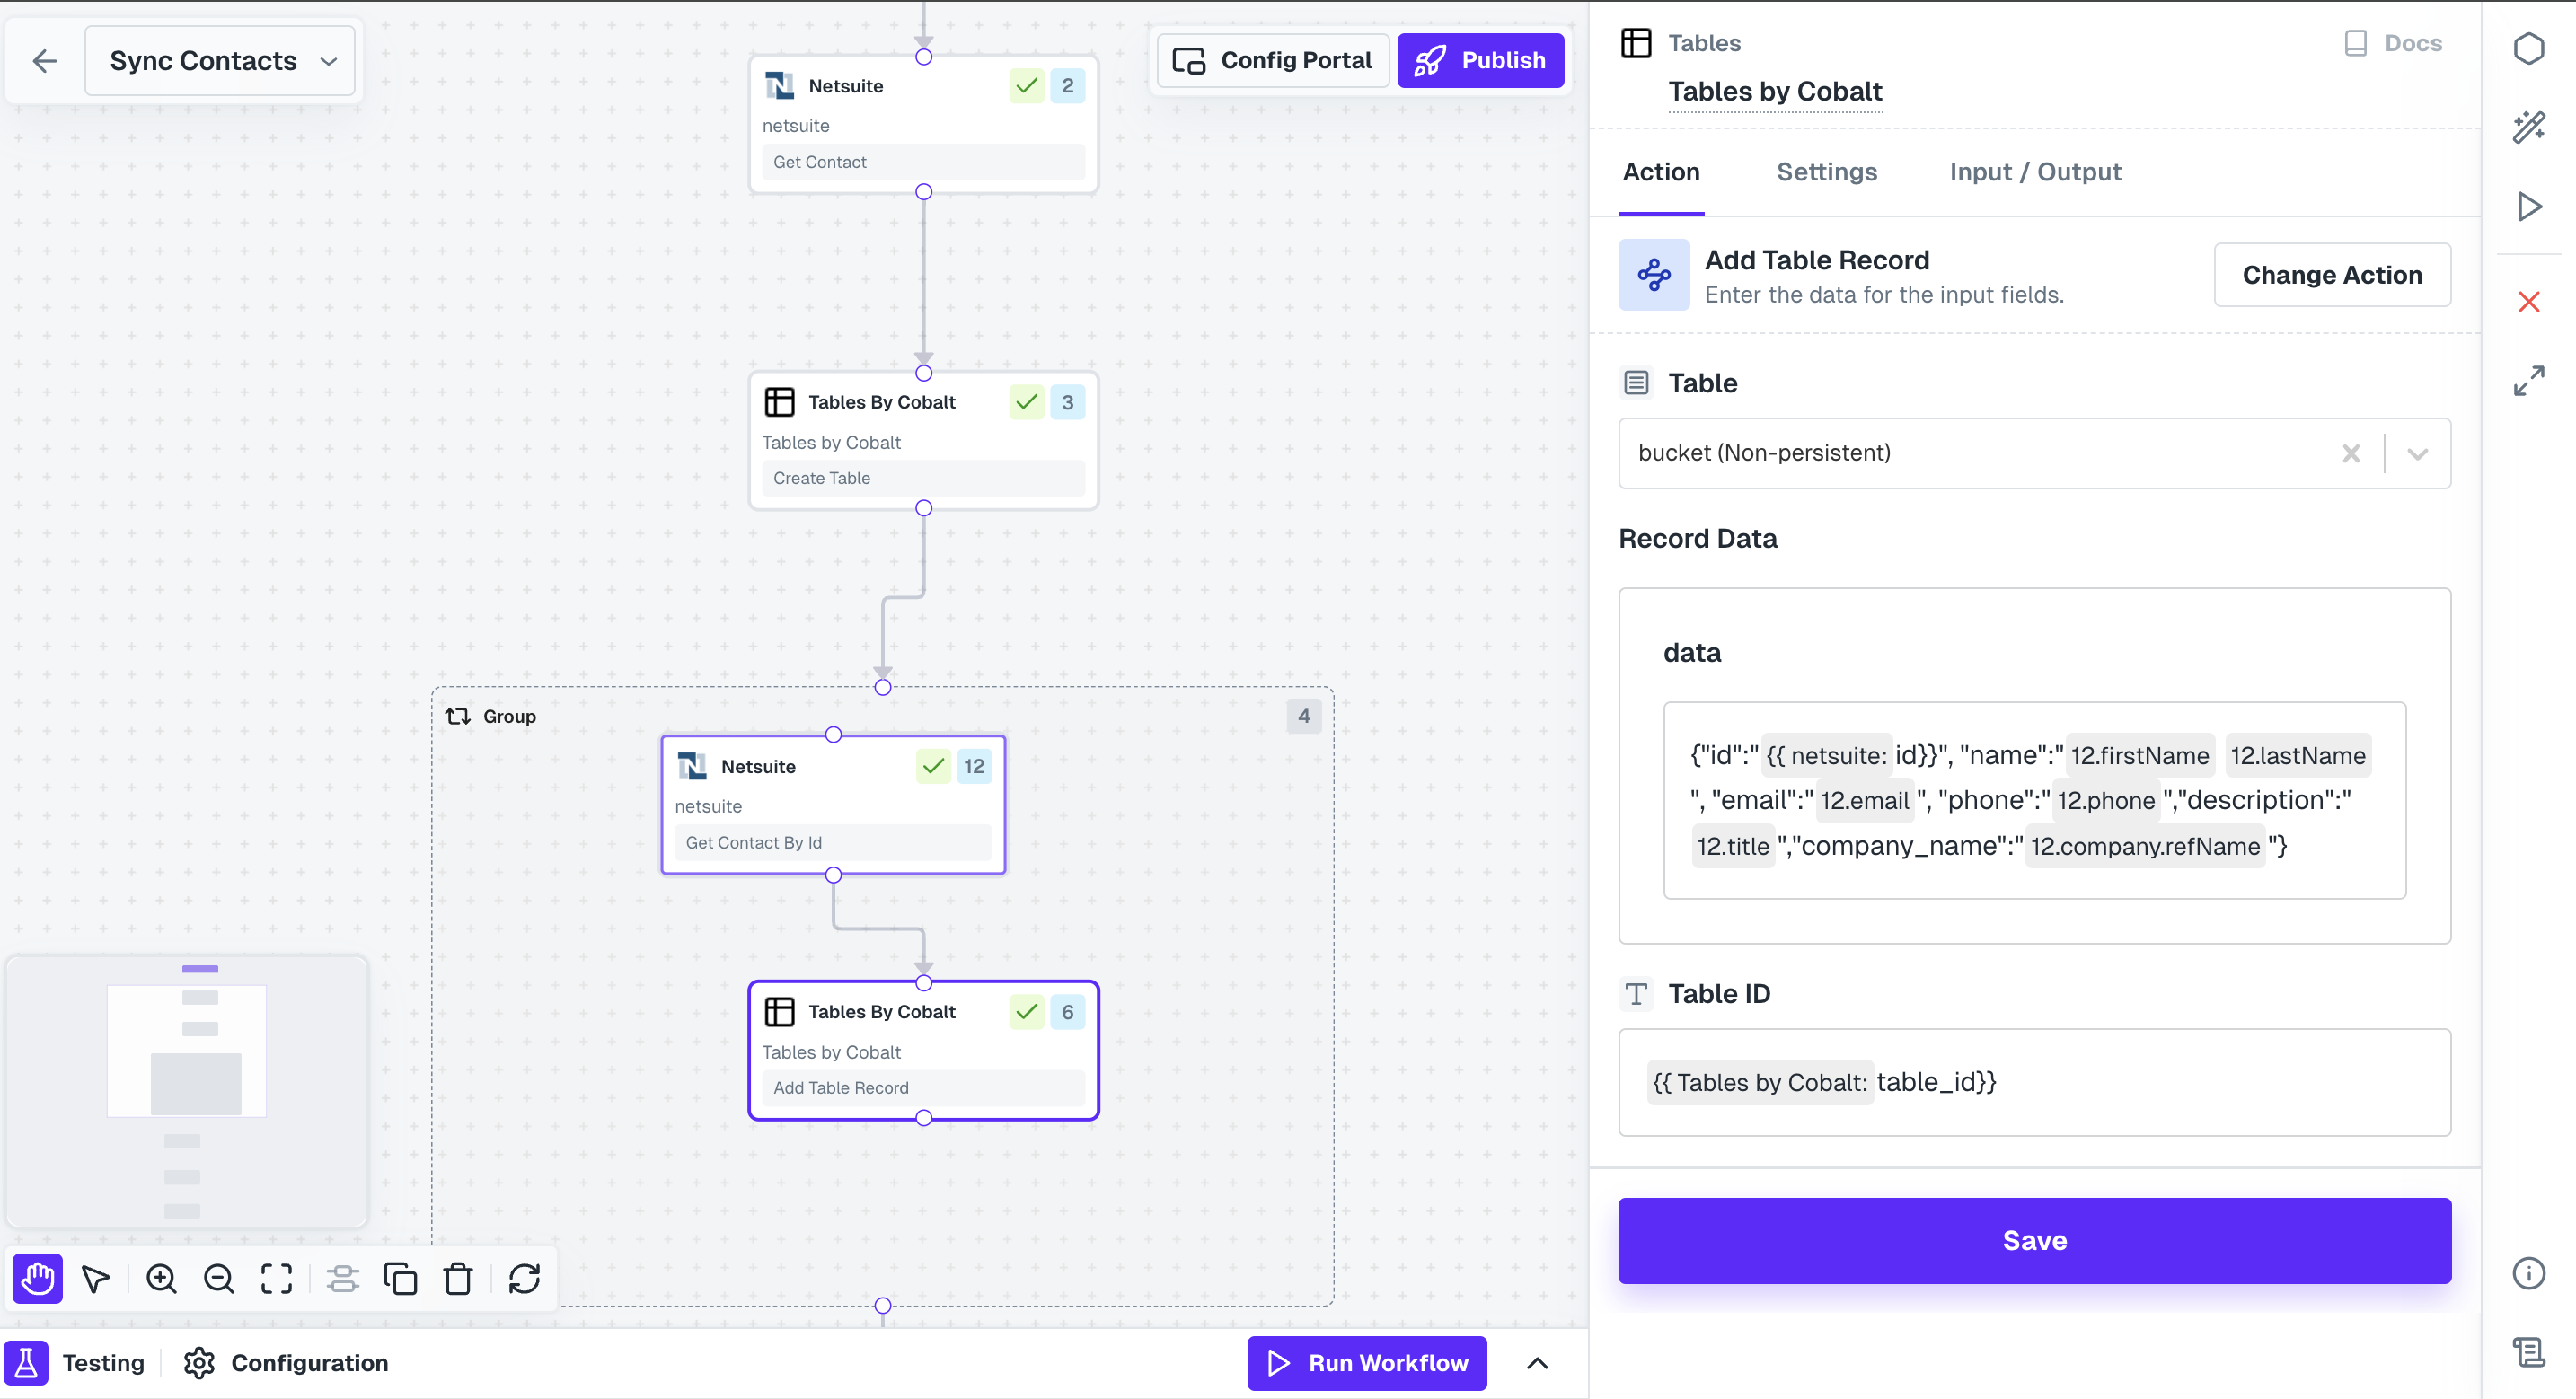
Add Table Record to create new rows of data in it.Fetch all records
Once the iterations are finished, you need to fetch all the records that were added to the Table.Add a Table node to the Loop node and select 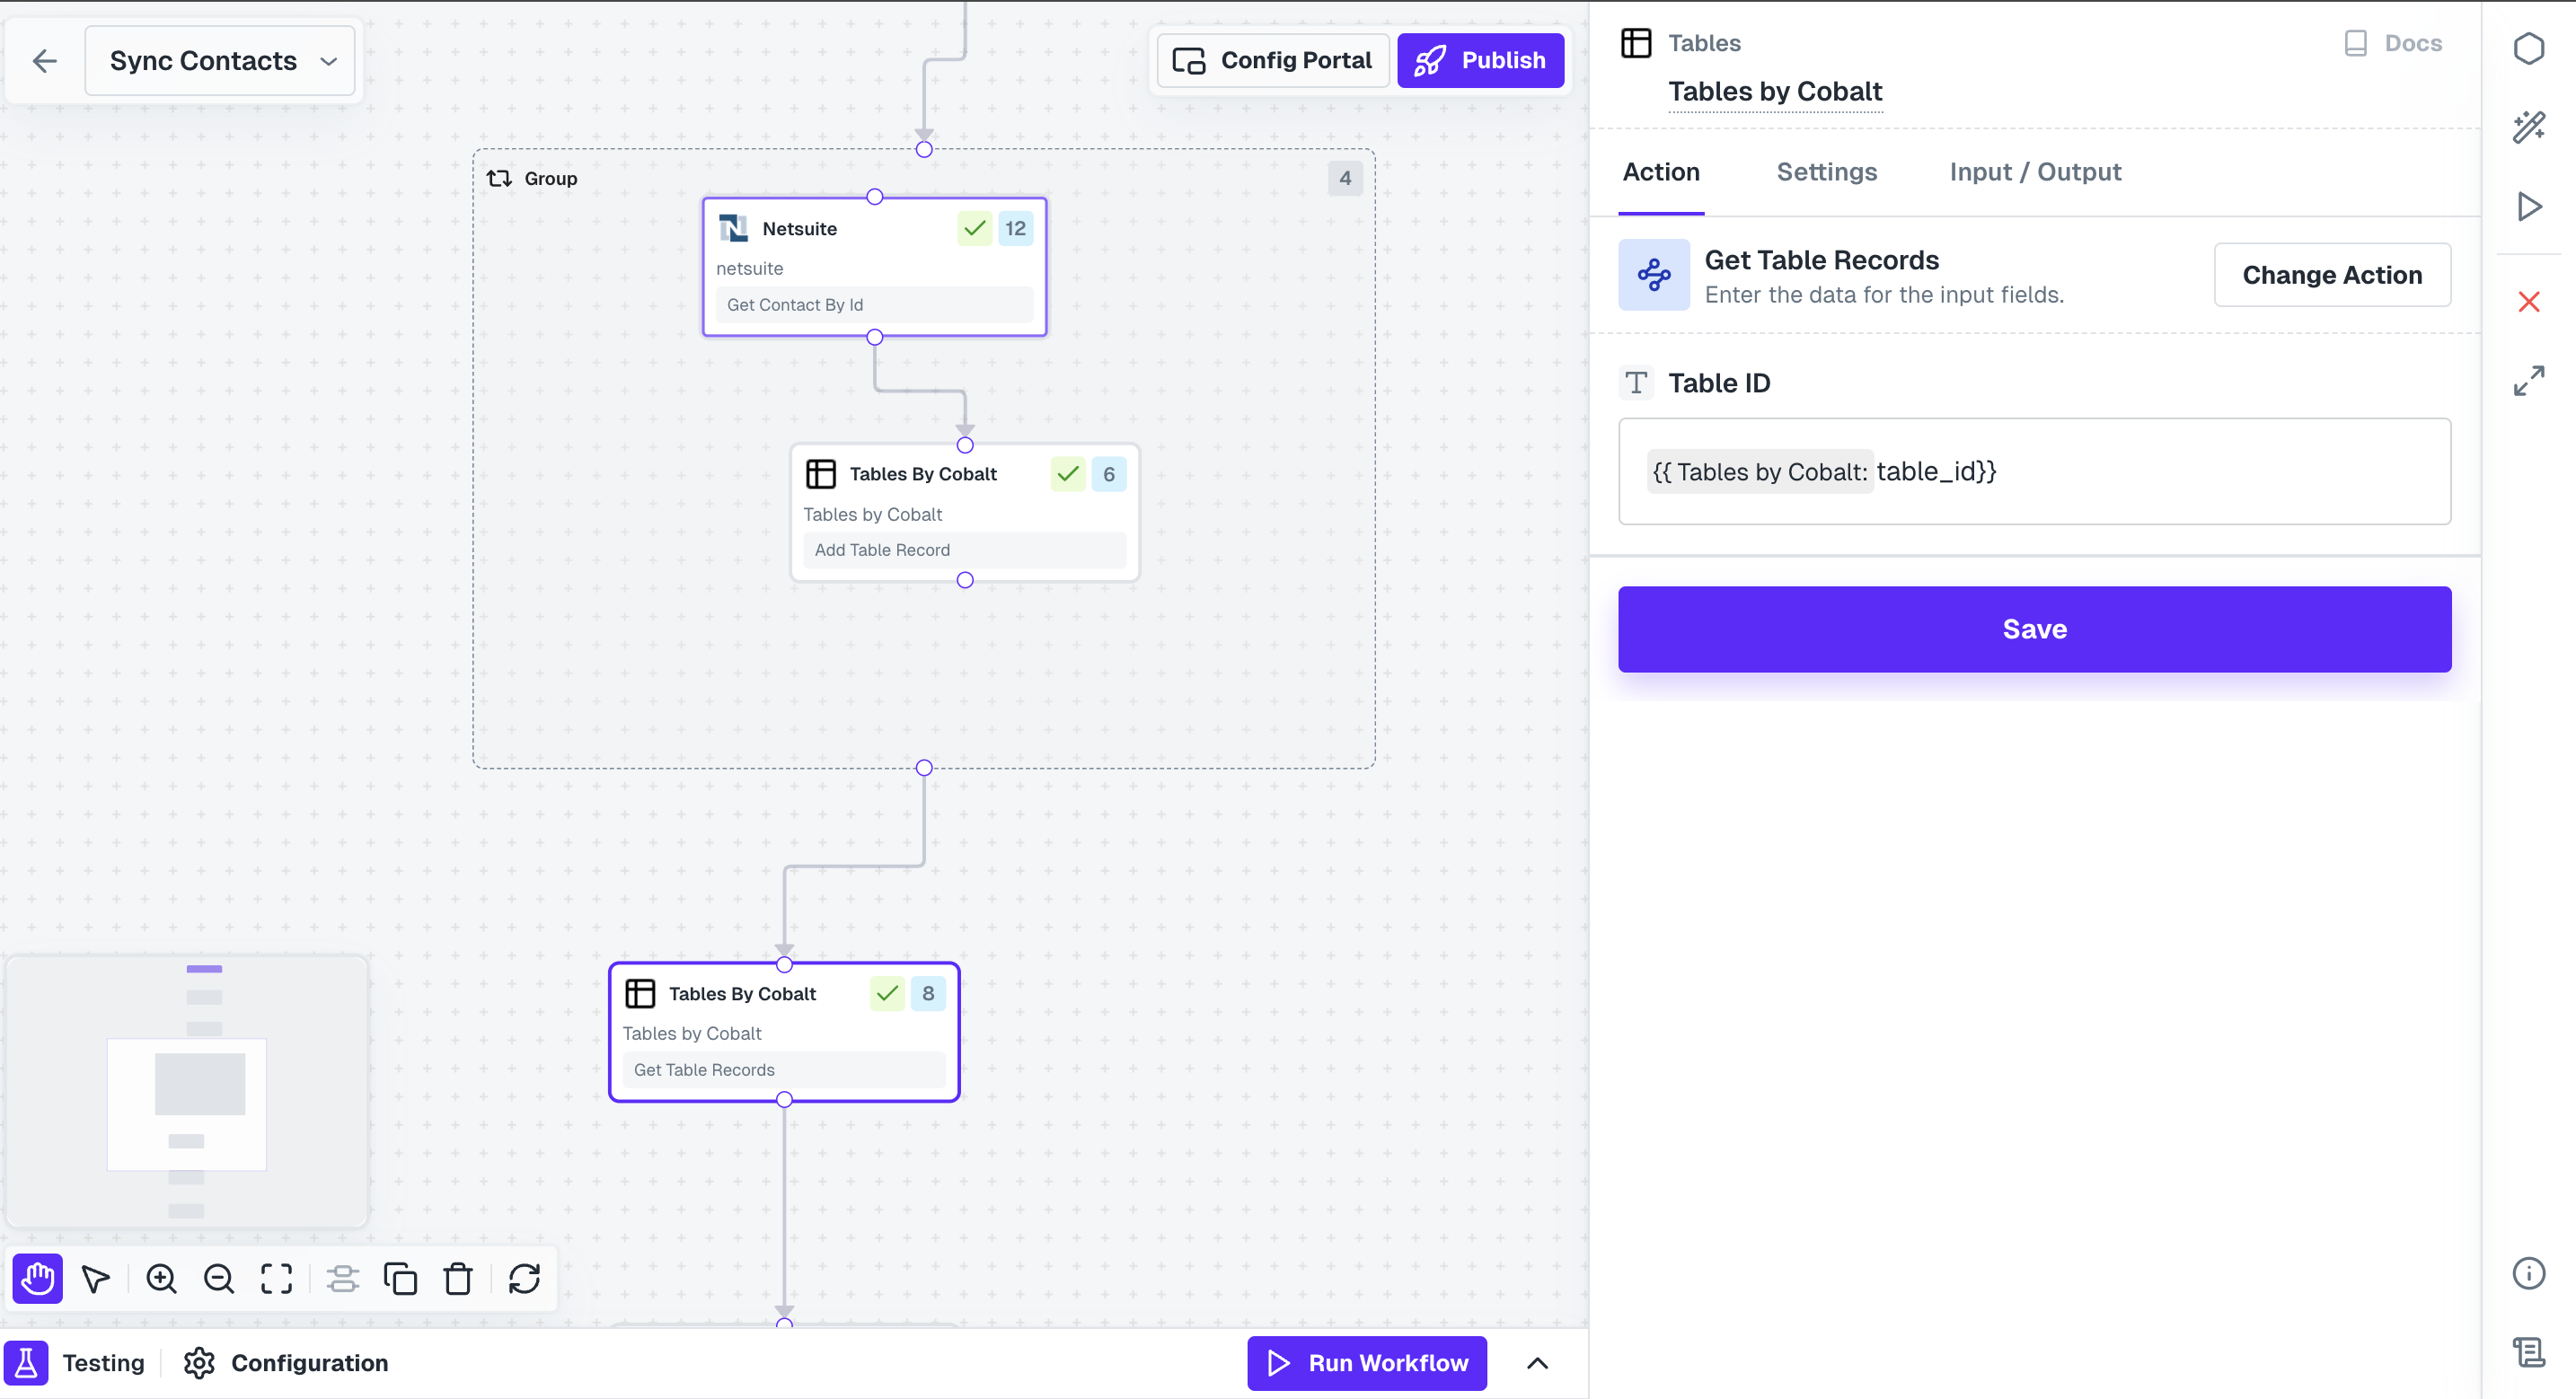
Get Table Records action and provide the ID of the table where you added records.Mapping Contact fields
Click on 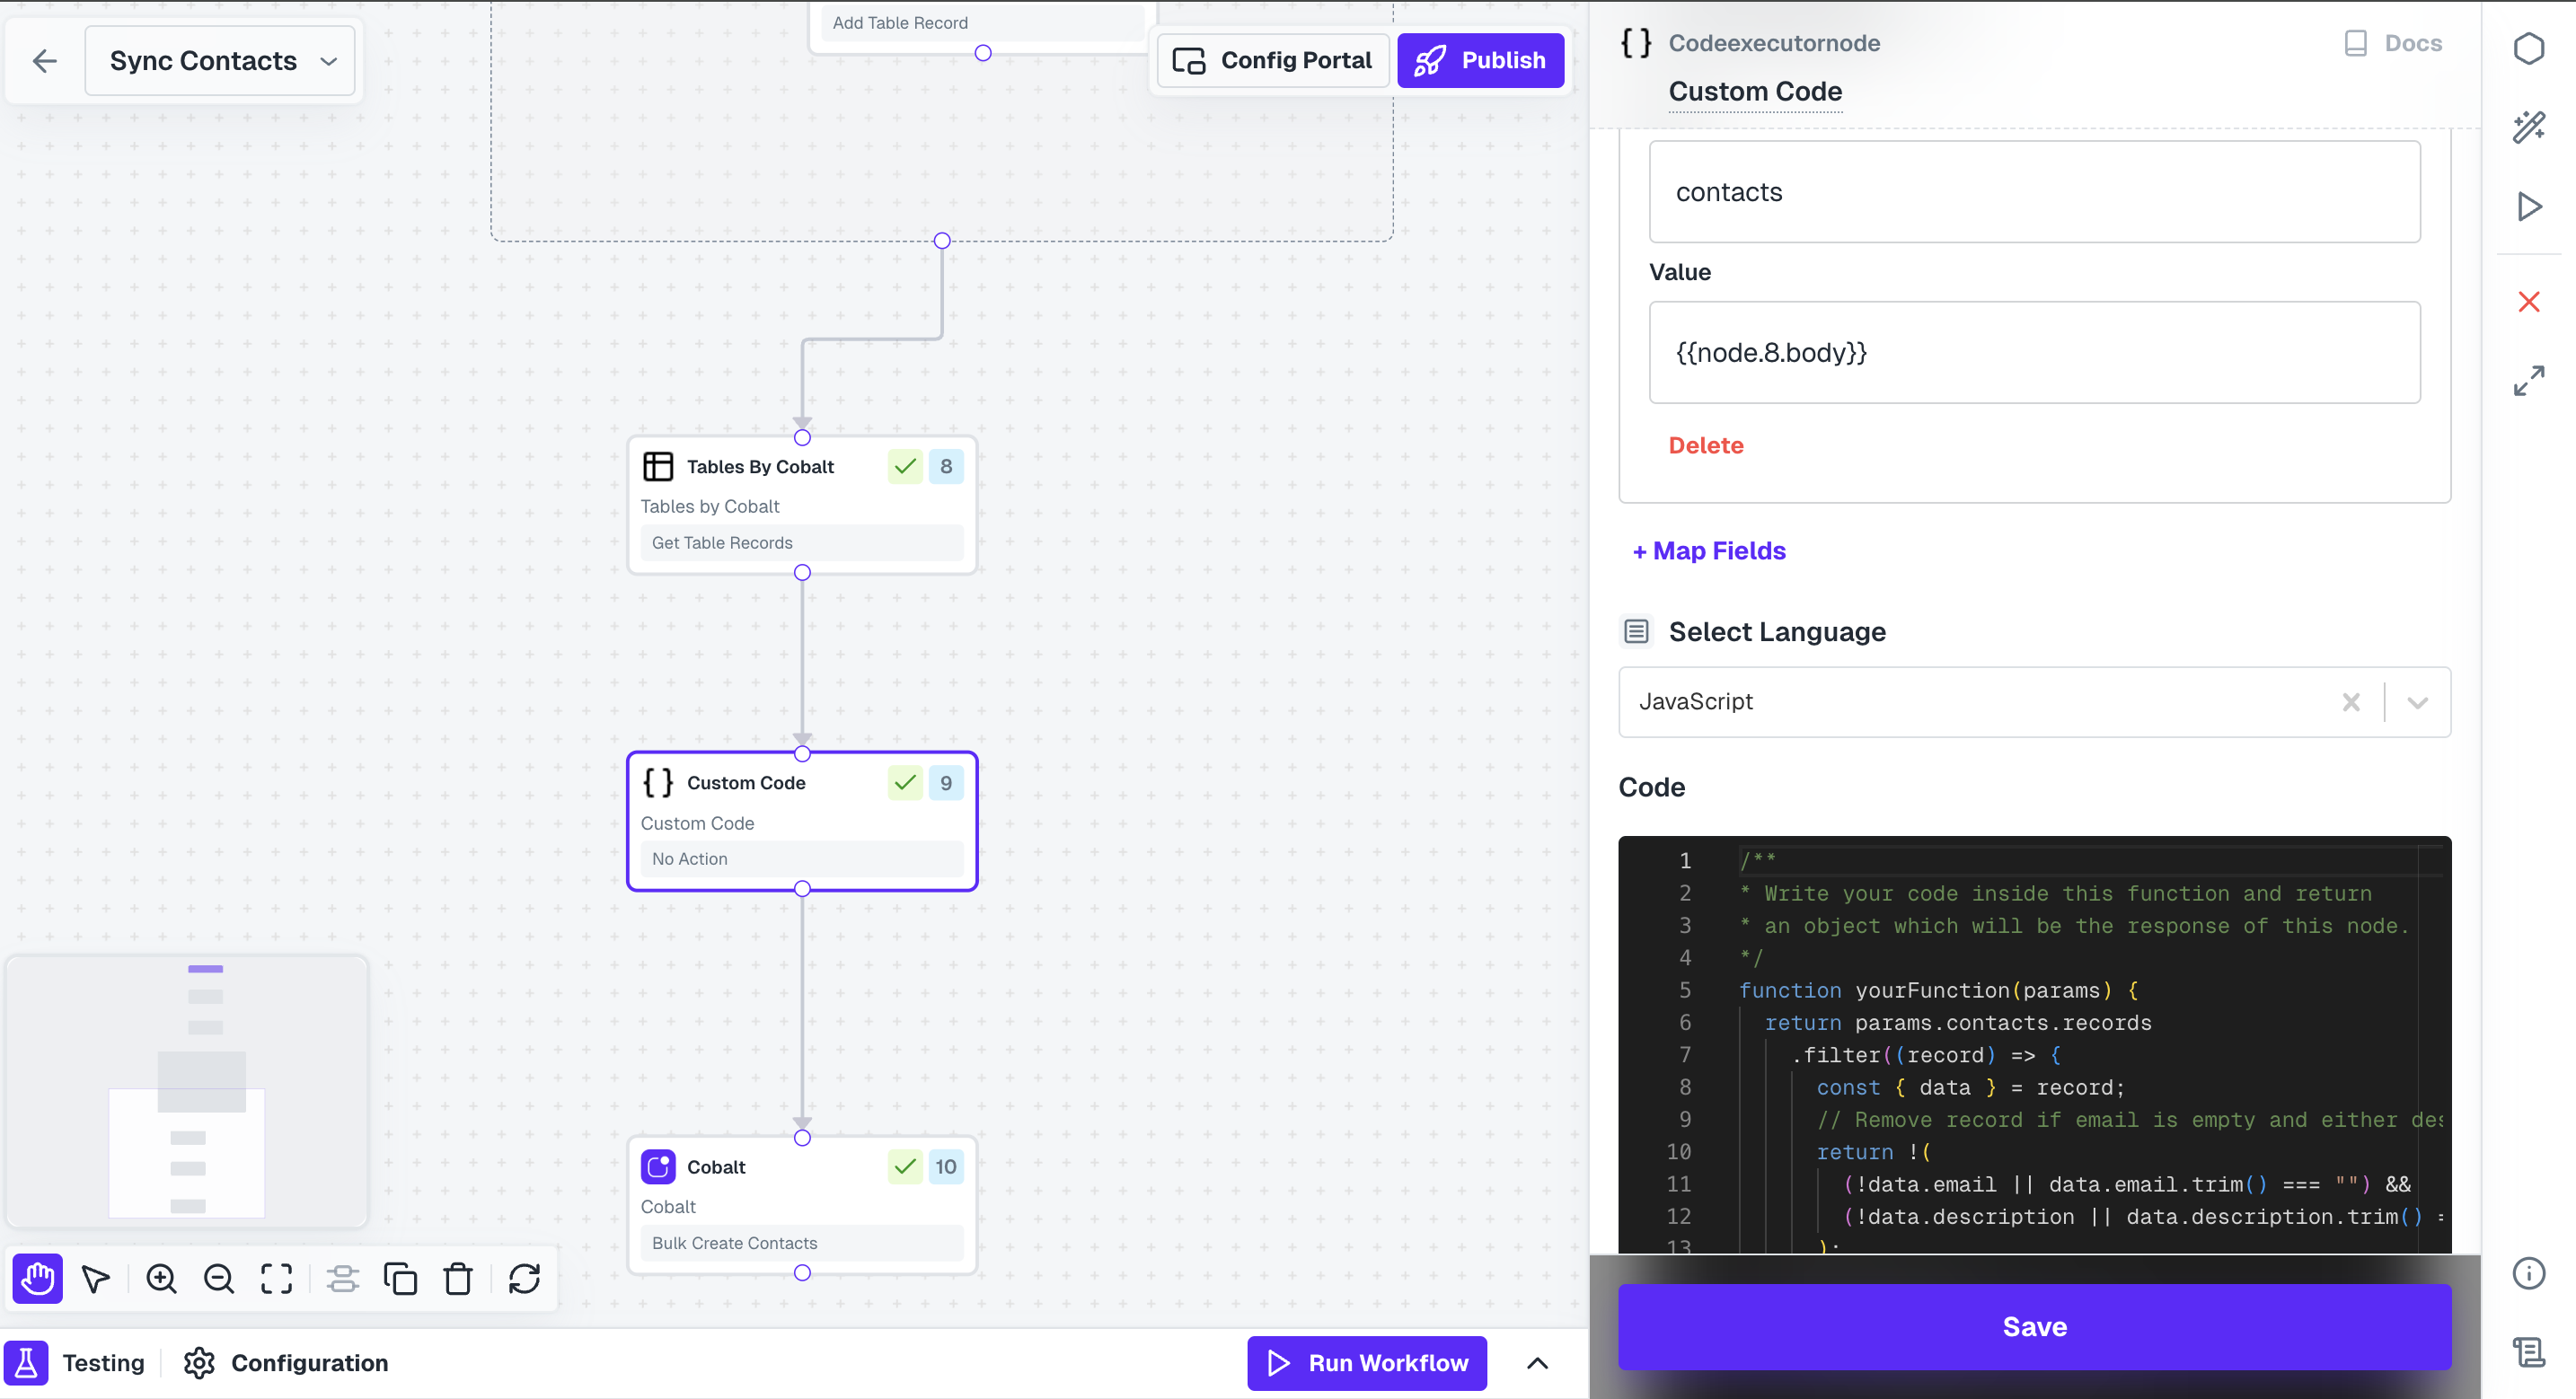
+ Map Fields under Input Parameters, add key name as contacts and in value we will provide the response received through Table node which will be restructured.In Value, select Nodes tab under Insert Variable and click on + of the Table Node where you fetched all records.yourFunction
API Proxy in Workflow
You have successfully fetched all contacts and structured the payload. Now to receive it in your server, you need to configure an API Proxy.In Refold Dashboard, navigate to 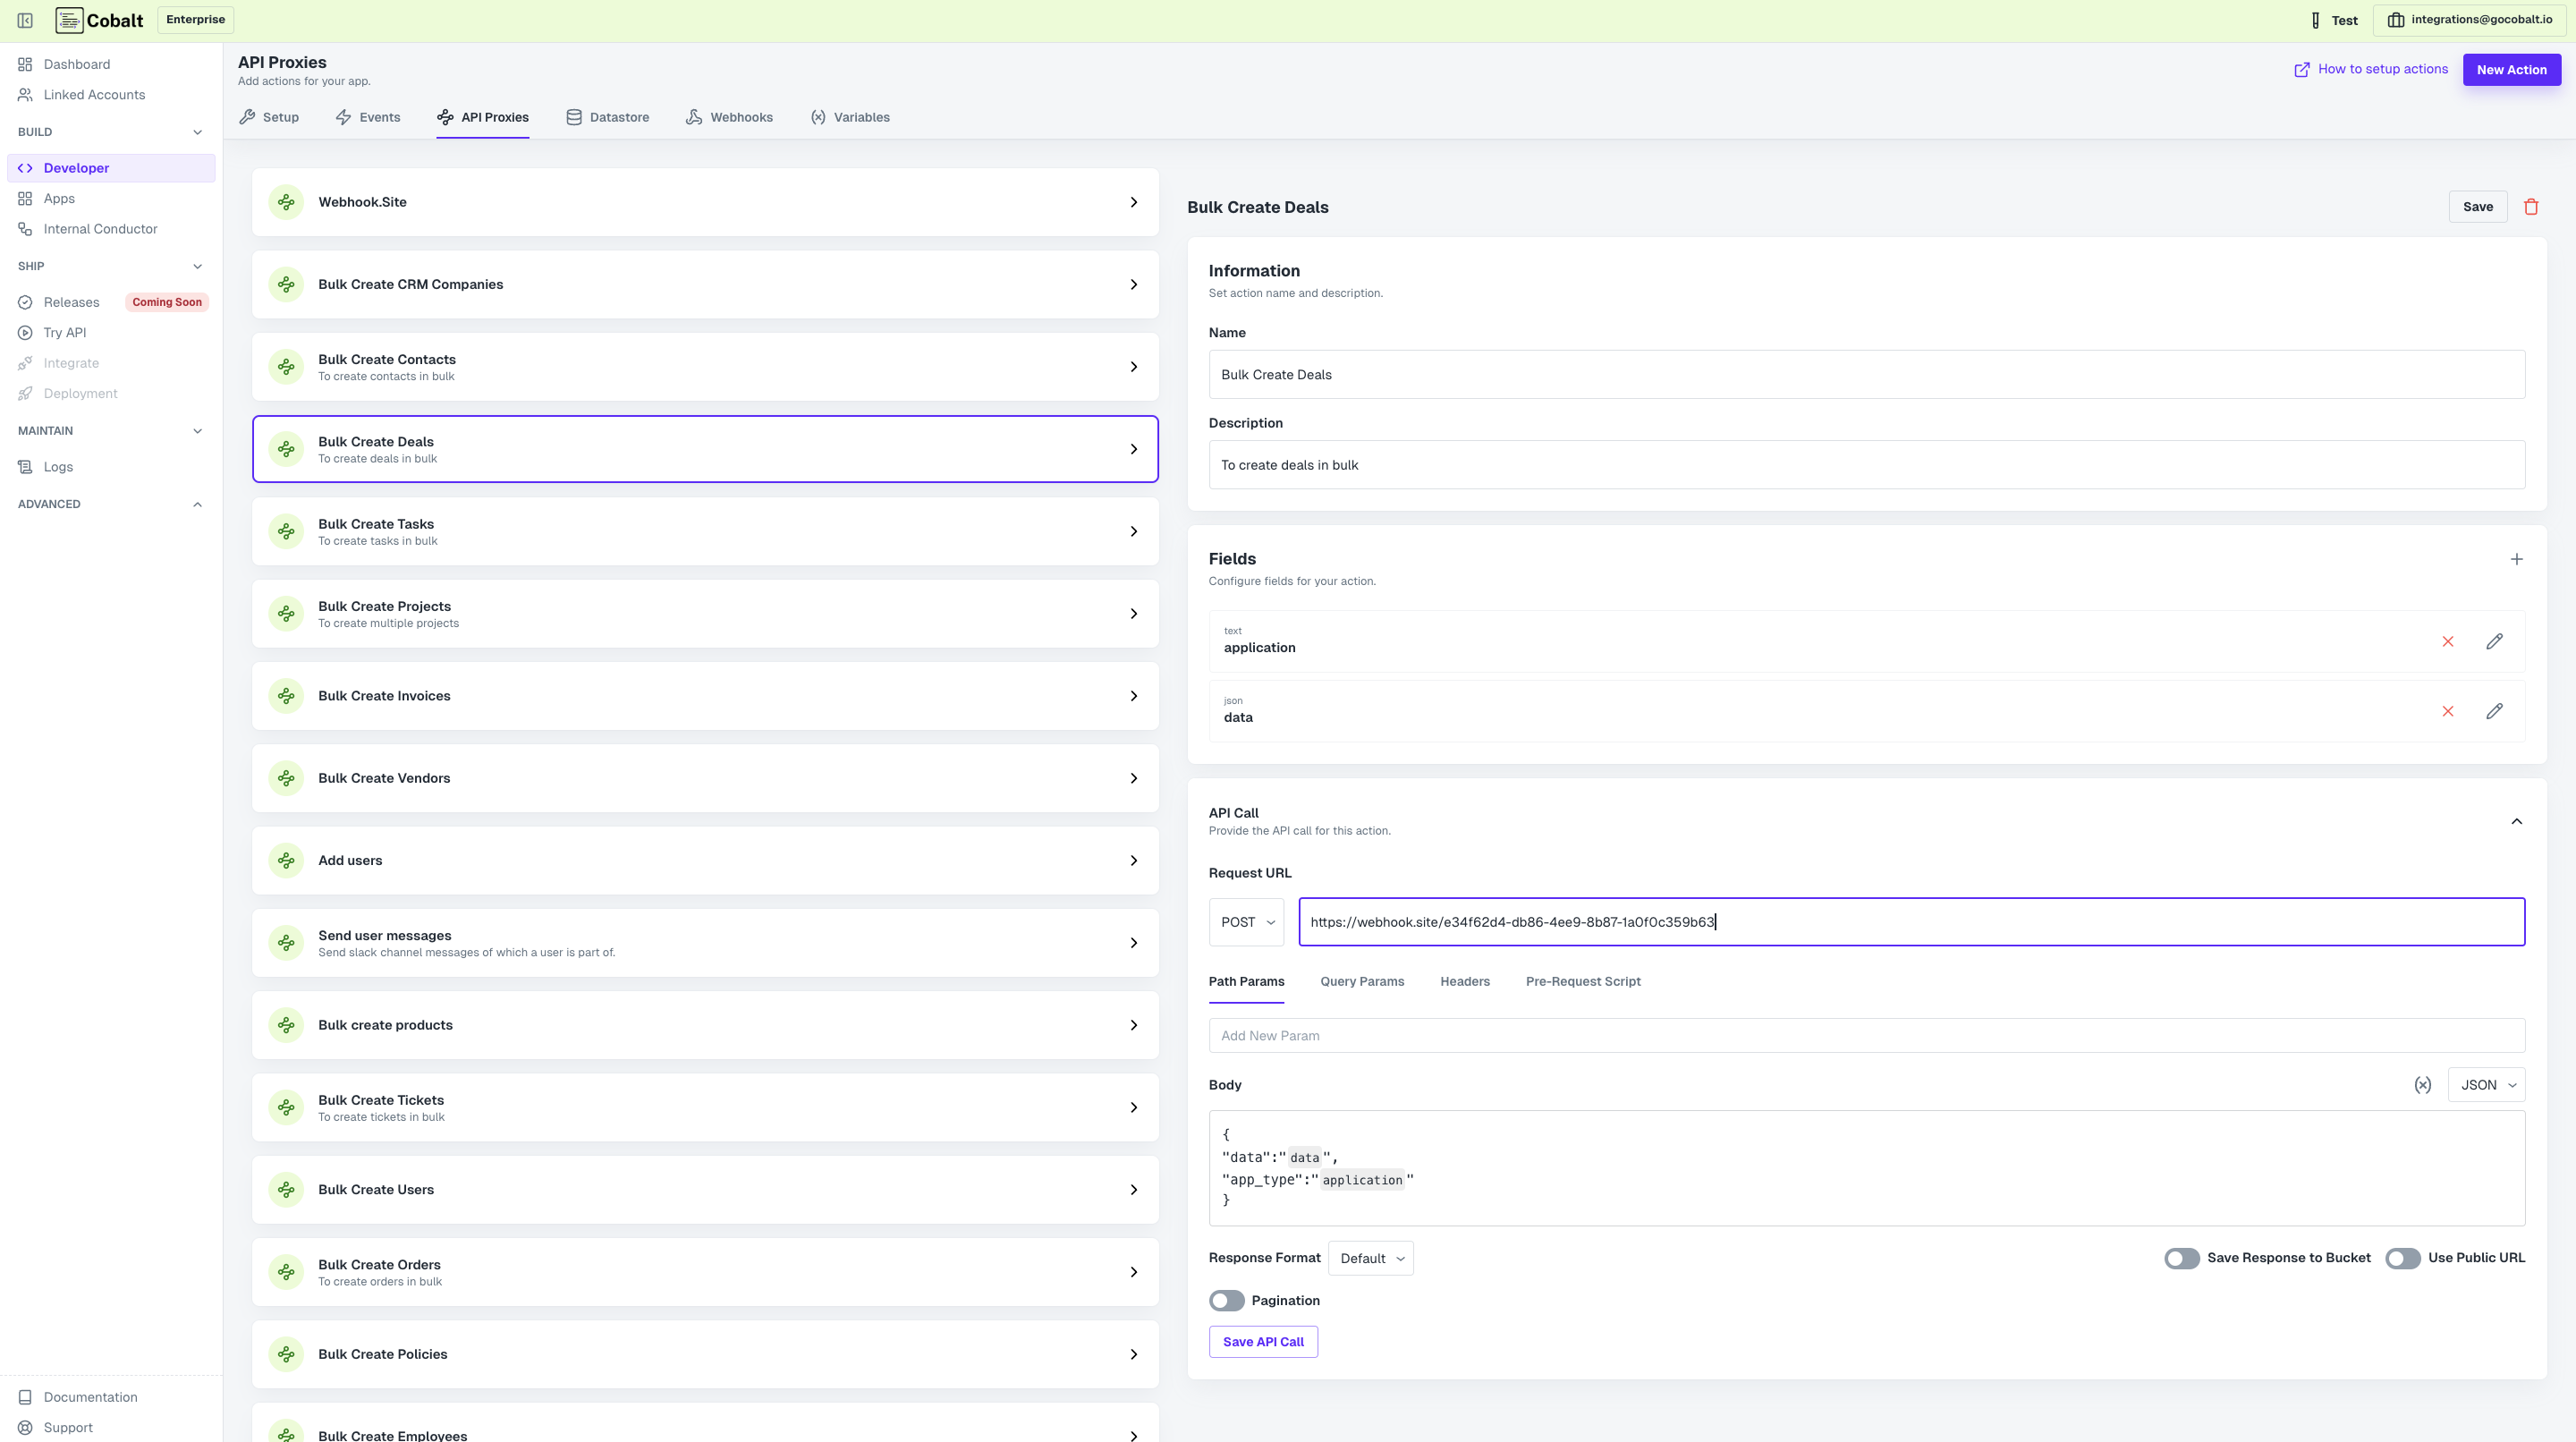
Developer > API Proxies and click on New Action. Configure an API endpoint, where you want to receive the response.If you want to test, go to webhook.site and copy Your unique URL and configure this as a POST Request and Save.Use API Proxy in Workflow
From Native Apps nodes, add your org’s Node and connect it with Custom Code.Click on the node and select the API Proxy that you created from the Actions. Add the response from Custom Code node in data field and click on 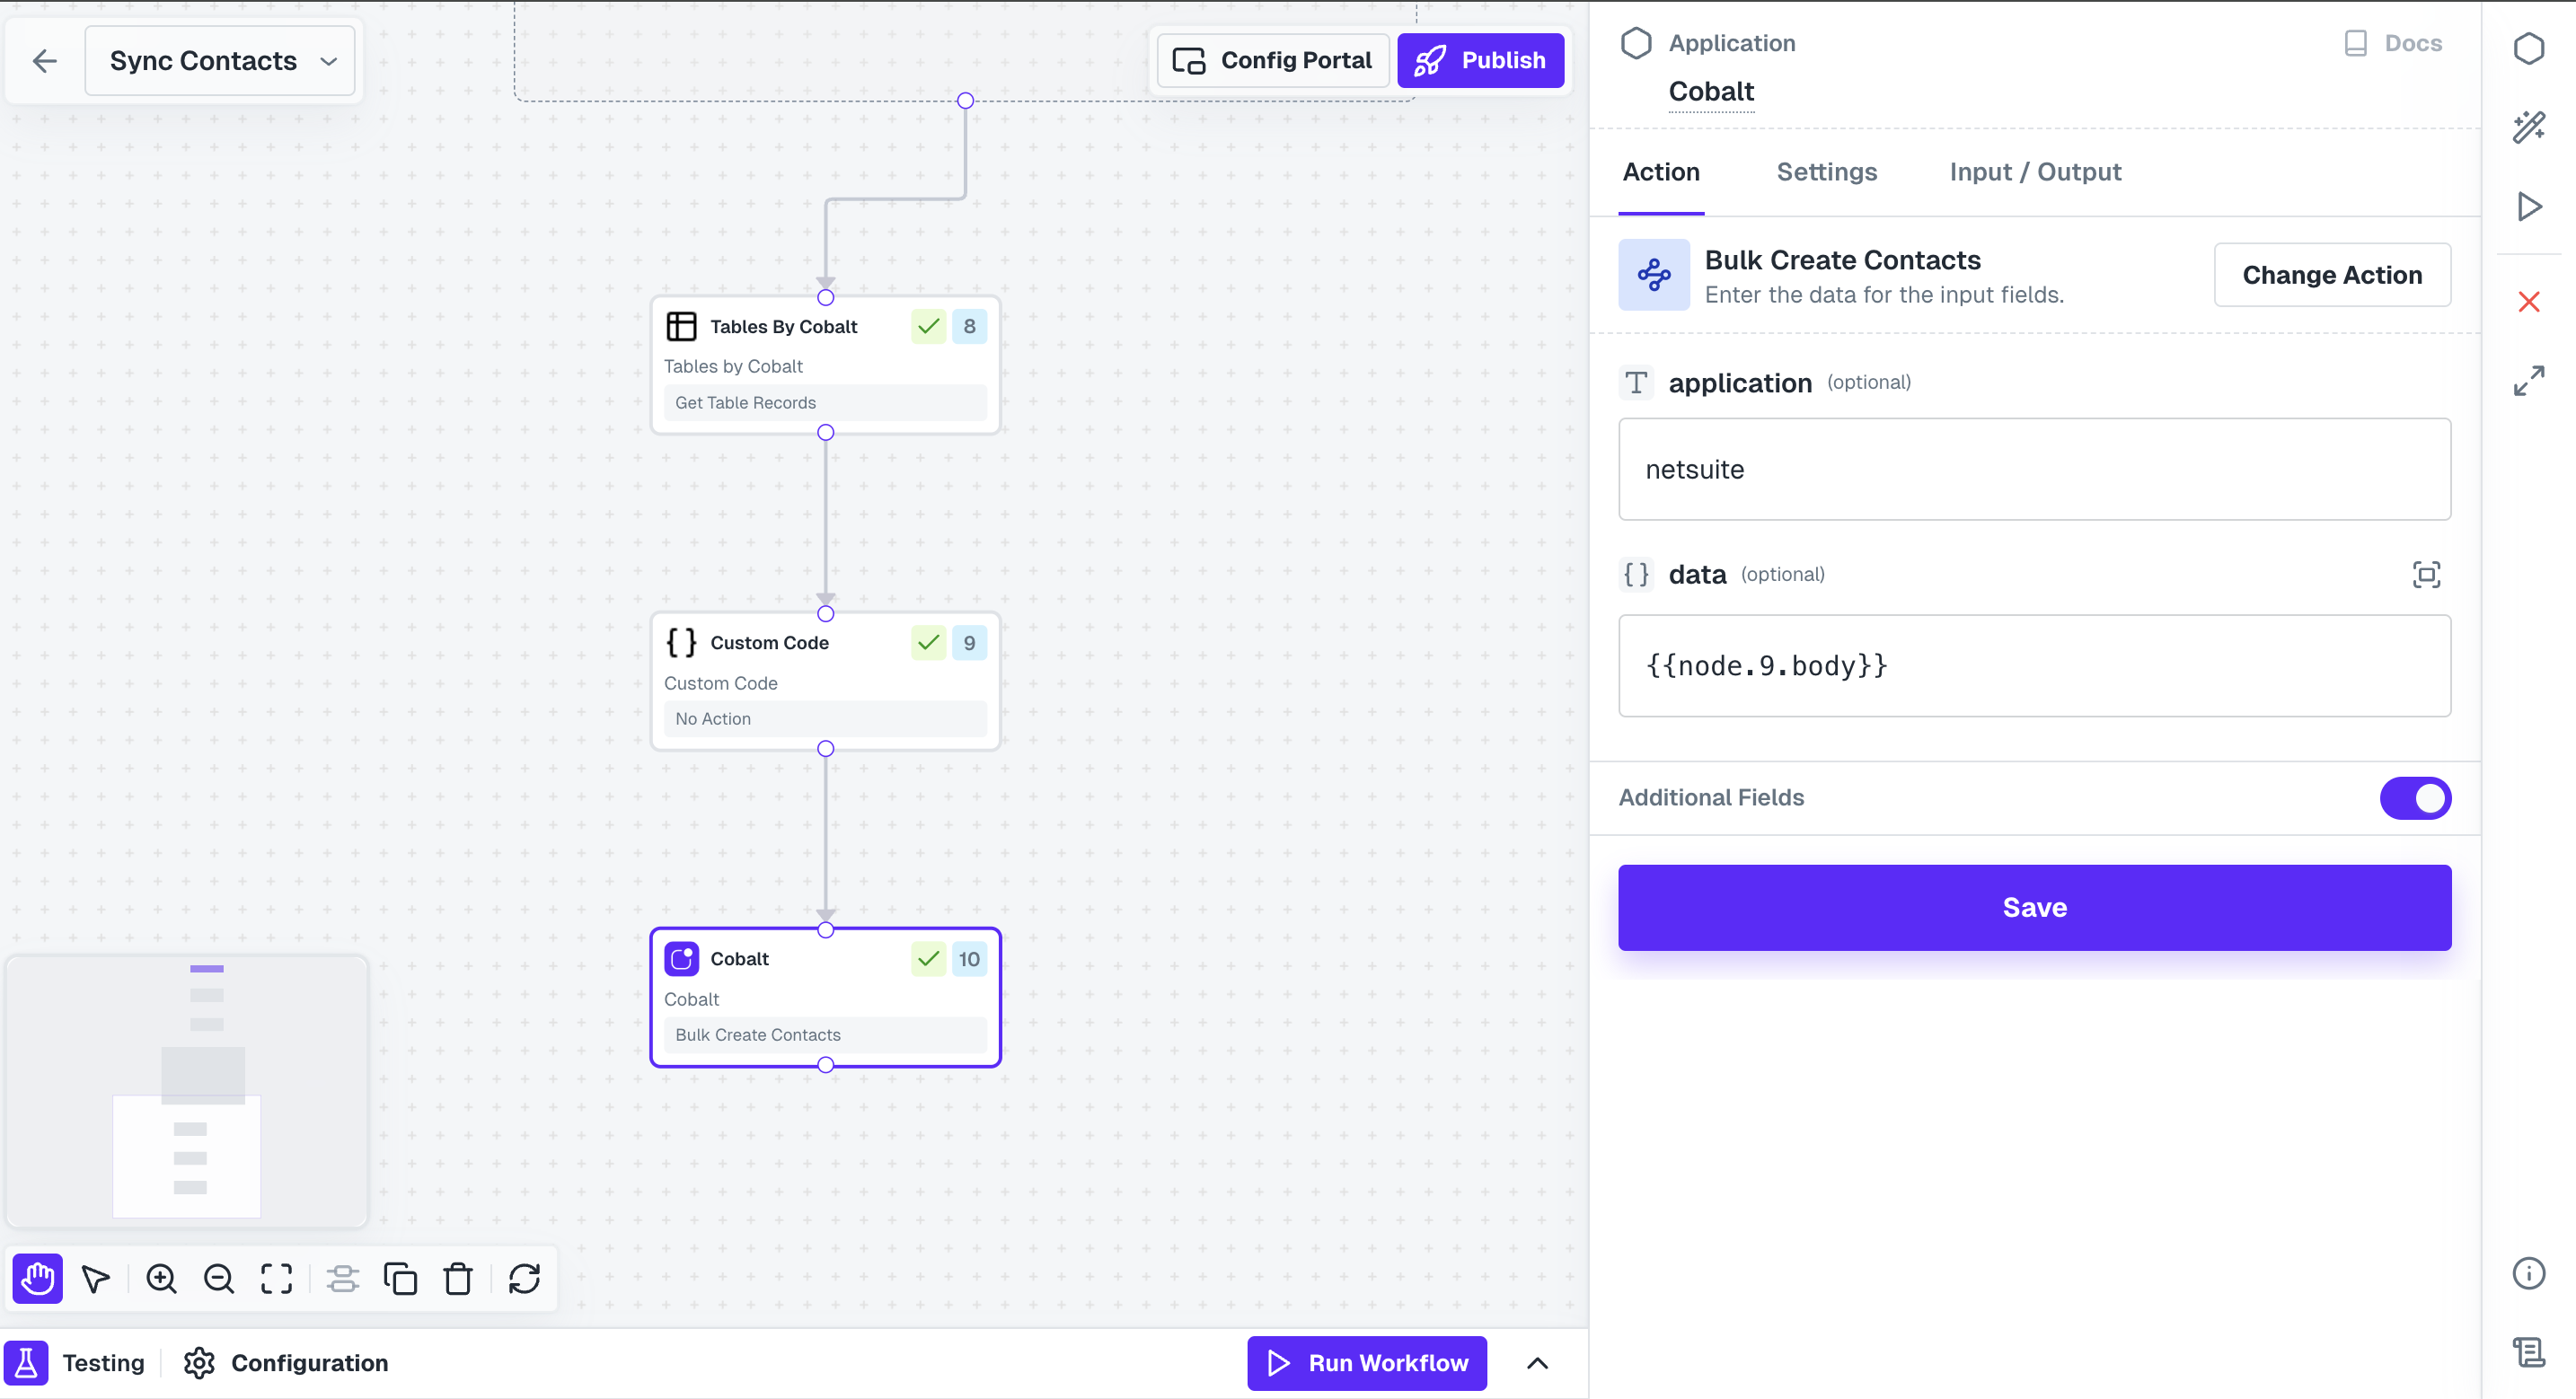
Save.Ensure that you add a field in the API Proxy where you can pass the JSON data and then added it to the API Call body as well in the POST request.
Hurray!!You have successfully created a NetSuite workflow to sync all the contacts to your system.
Push Data to NetSuite
Consider a use-case where you want to create a contact present in your system to NetSuite. This workflow will be fired when you send an Event with the payload of the contact to be added. In the NetSuite integration, go toWorkflows and create a new workflow by clicking on +Add Workflow button and name it as Create New Contact.
Push Data to NetSuite
Push Data to NetSuite
Follow the steps given to build the workflow:
Add Trigger in Start Node
All workflows start with a trigger, which determines when the workflow will run and how data is passed into the workflow.
For this workflow we will use the Event Based trigger.Click on the 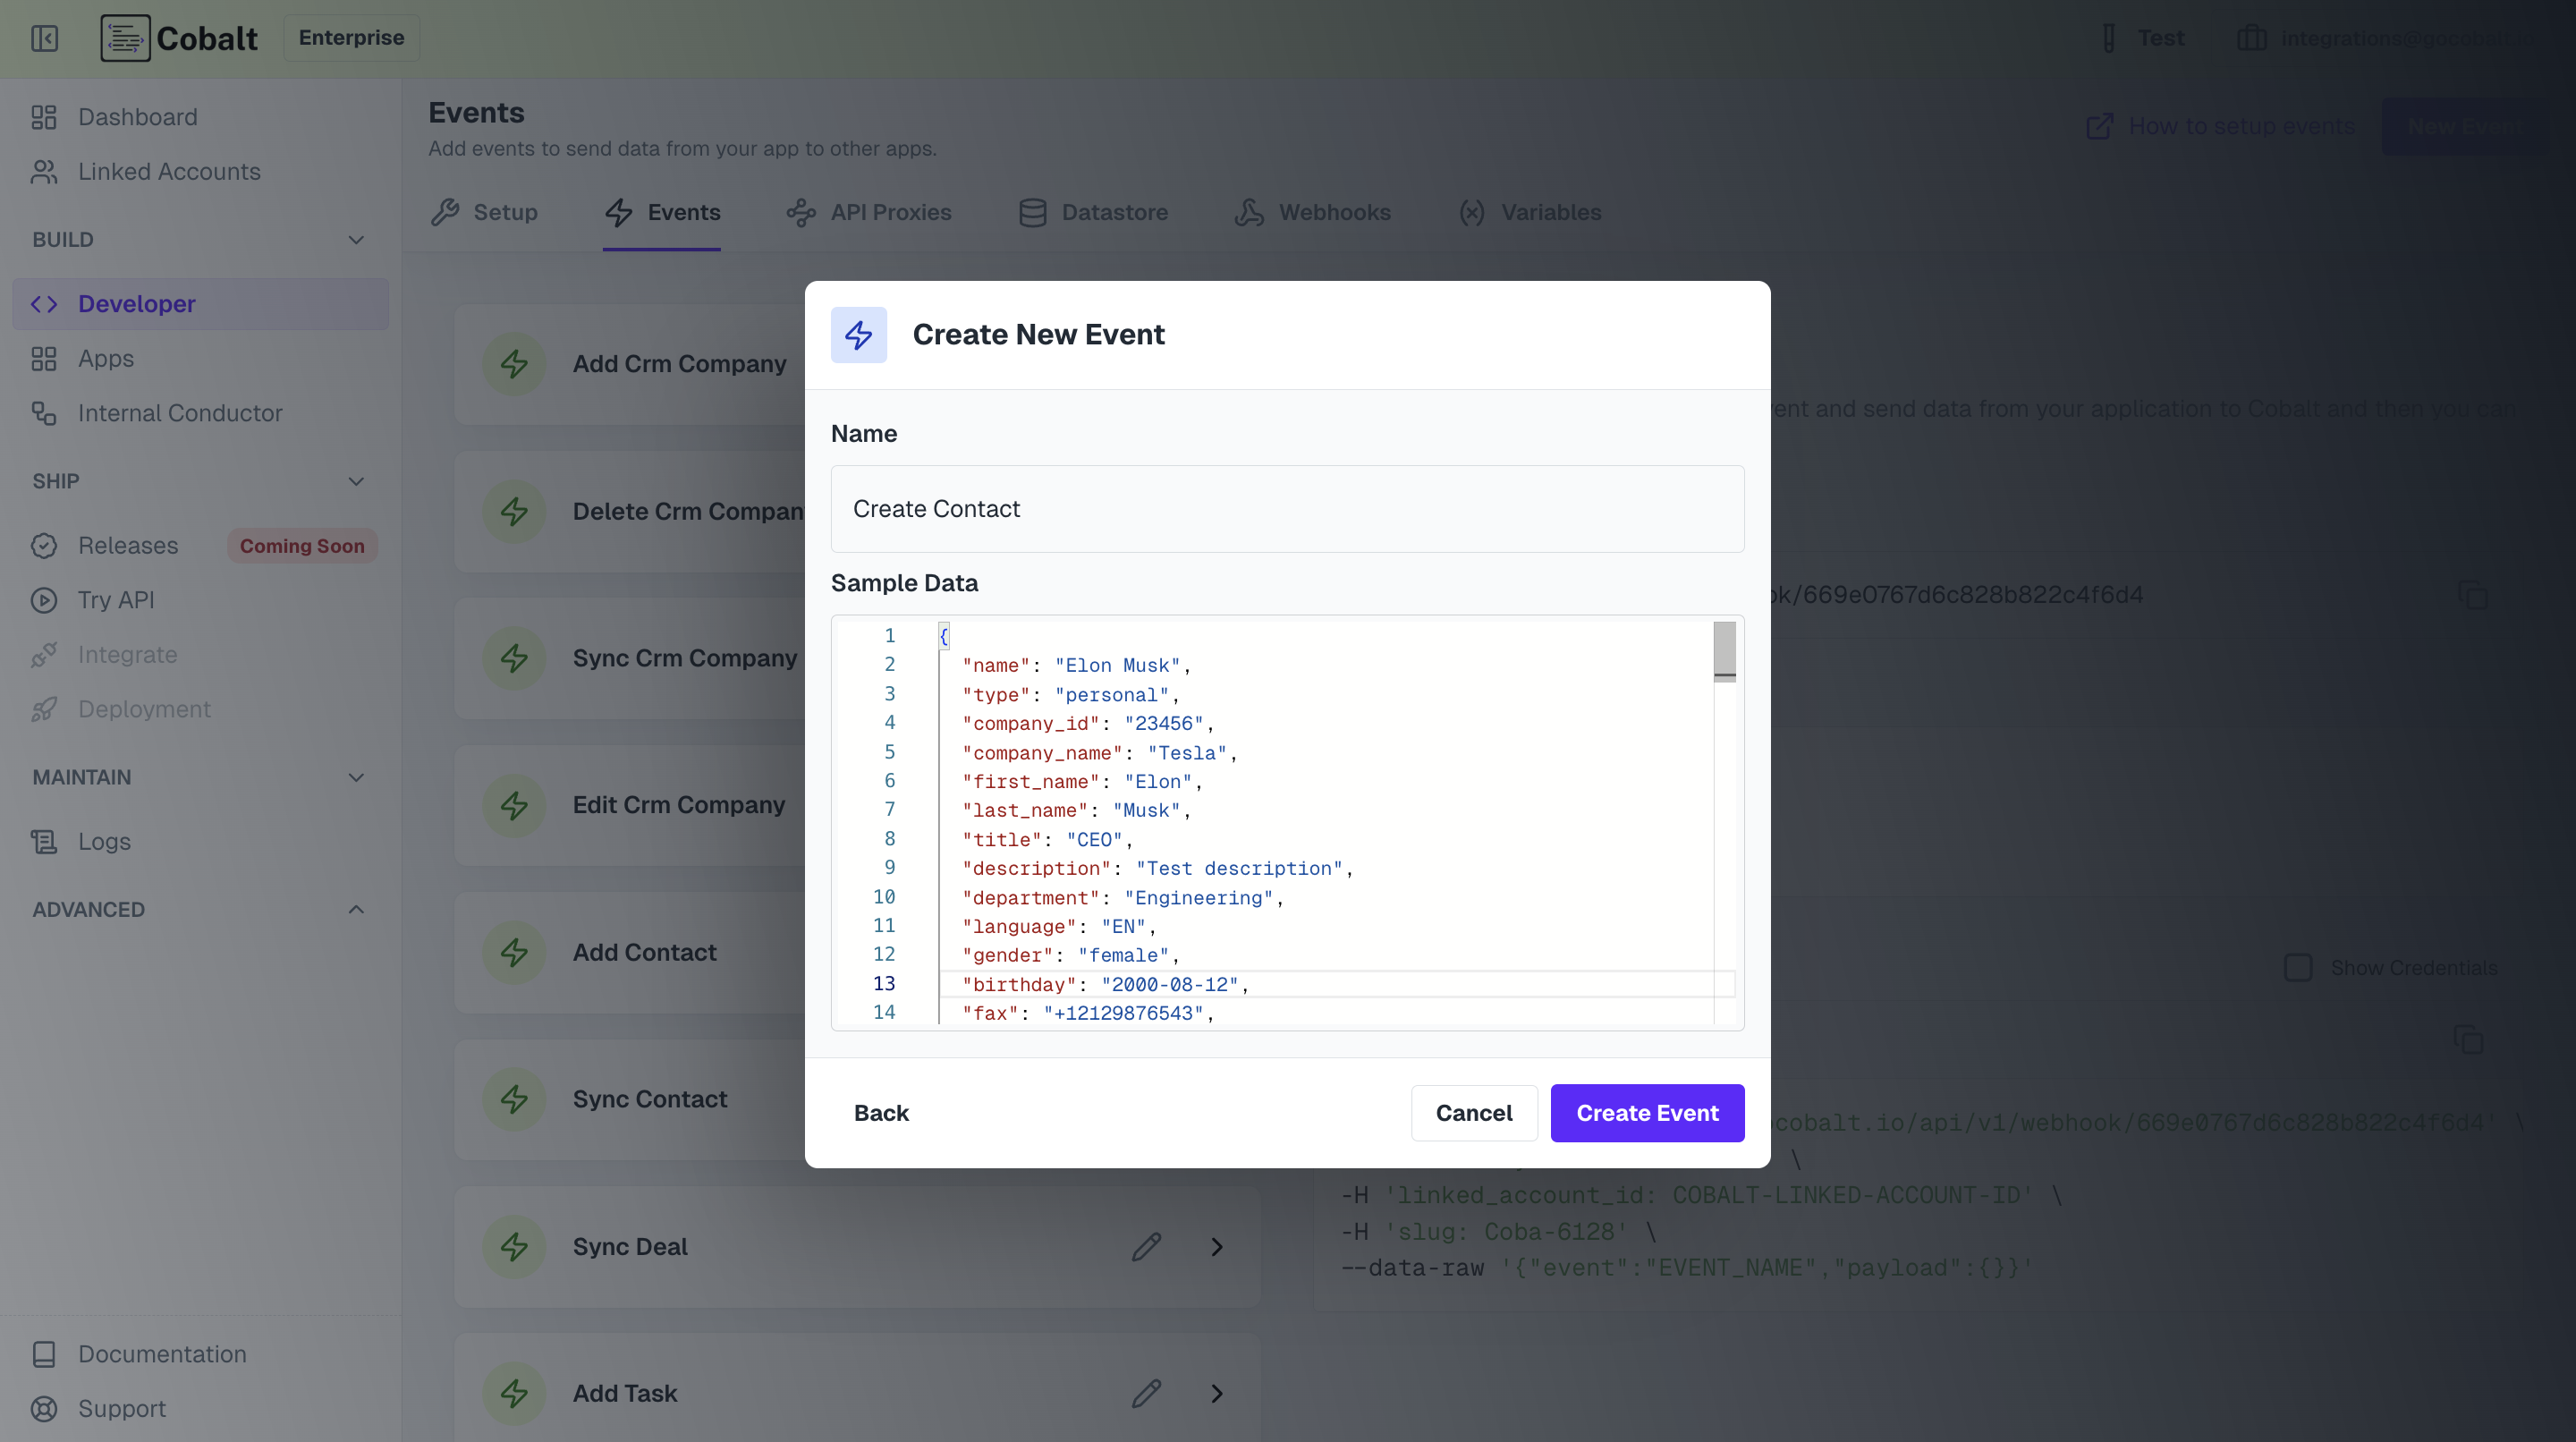
Start Node, select your native app option and click on + Create New Event.Add NetSuite Node
Now to create a new contact in NetSuite, we need to call NetSuite API.Click on
Nodes option in the top right and drag the NetSuite Node from Native Apps section to the workflow builder. Connect this node with Start Node.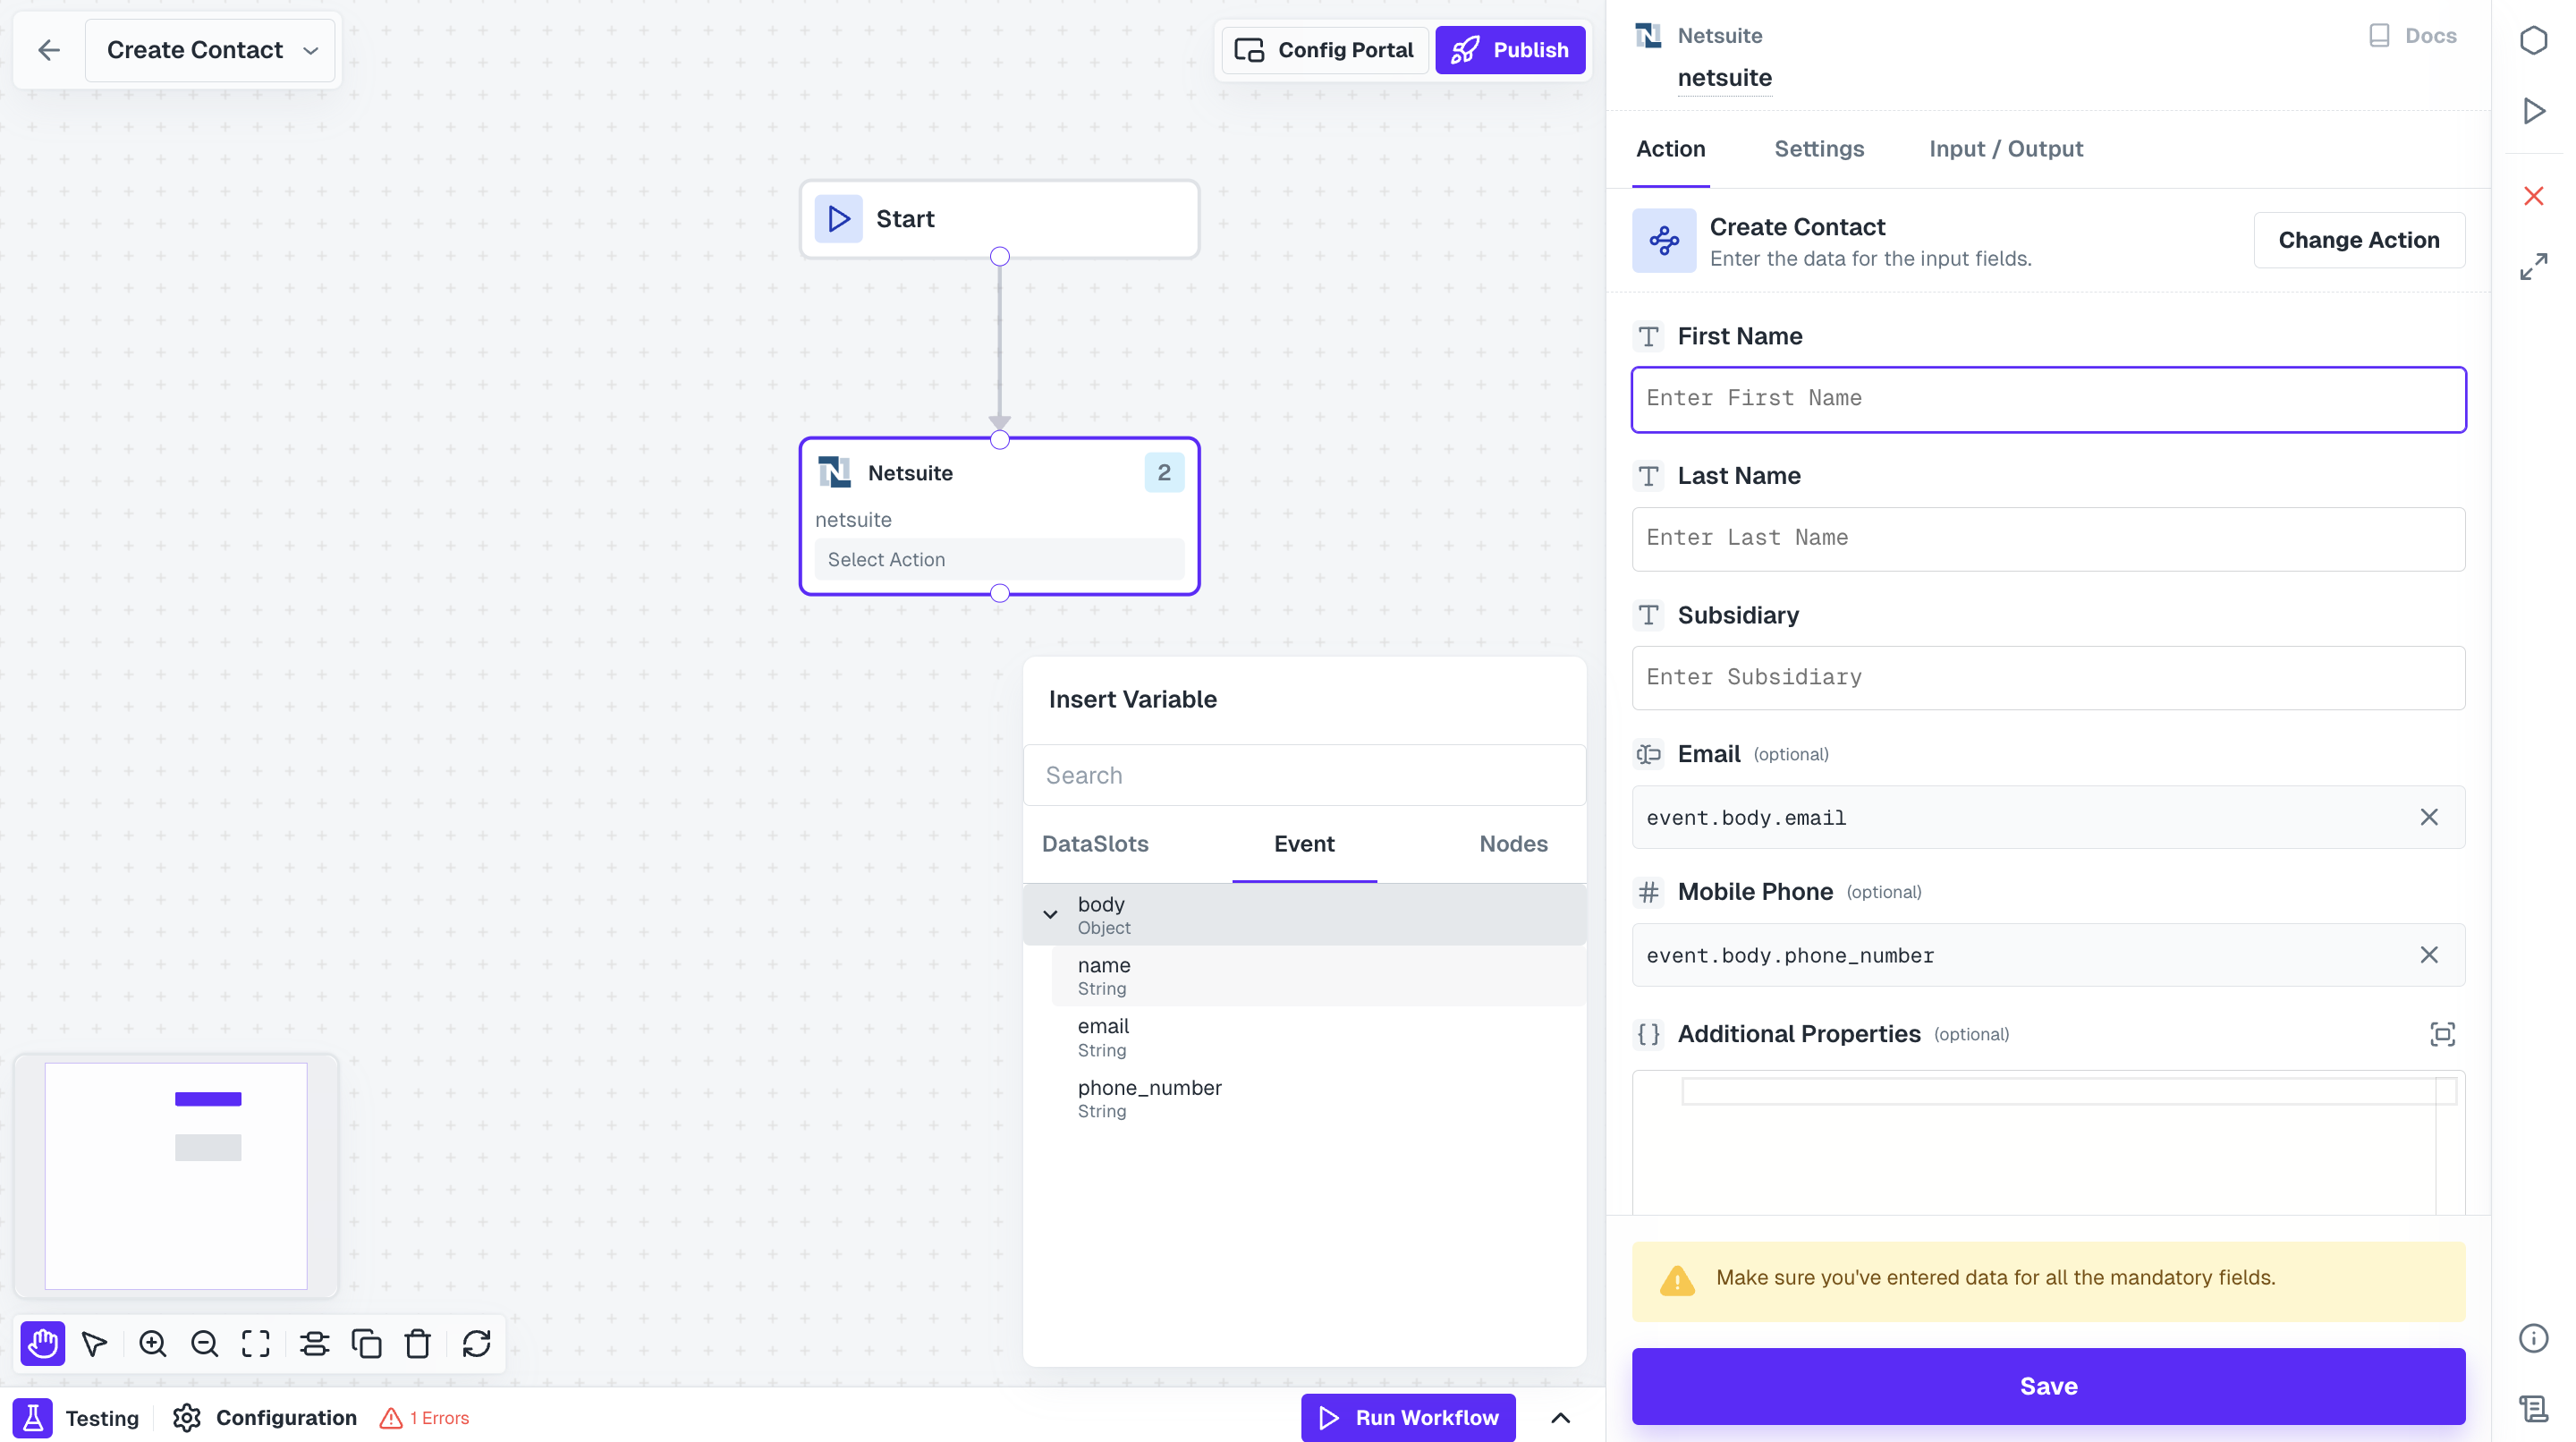
Hurray!!You have successfully created a NetSuite workflow to create a new contact.
You have successfully created the workflows for your use case.Next step is to enable and execute those workflows for your Linked Accounts.
Executing the Workflows
To run these workflows for your users or Linked Accounts, you need to do the following steps:Create Config for Linked Account
Config is a customization that you store for each integration of your end-customers.It will return information about config of the application for the Linked Account and provides you with all the published workflows and settings input for the user required to execute the workflow.
Create Config
You can create config for the Linked Account through the Hosted Portal SDKs or using the APIs.You can use the .config() method or the Create Config API which returns the specified config or creates one if it doesn’t exist for the Linked Account.Make a request with theApplication Slug and linked_account_id as mandatory fields for it. You can request in the following way:Response
Enable Workflow
Now you need to enable the workflow for your Linked account. You can either ask the user to enable them or you can do so for them by using the Update Config API or .updateconfig() method.Make the following request:In response, you get the updated config information for the application.
Third Step
Once the required workflows are enabled, you need to fire event to start execution. You can use the Trigger Event for app API with the following request:
cURL
Check Execution Logs
Once the workflow execution has been fired, you can check the Logs of the workflow here.
Congratulations!!You have successfully created a NetSuite integration and executed it for your users.