Pre-requisites
- Salesforce Developer Account.
- Pardot Business Unit setup completed. Know more about how to do this here.
- Required Settings for the App. You can find it in Overview.
Creating an app in Pardot
To create a Pardot app and acquire the app credentials, please follow the steps mentioned below:- Log in to your Salesforce dashboard with your developer account credentials.
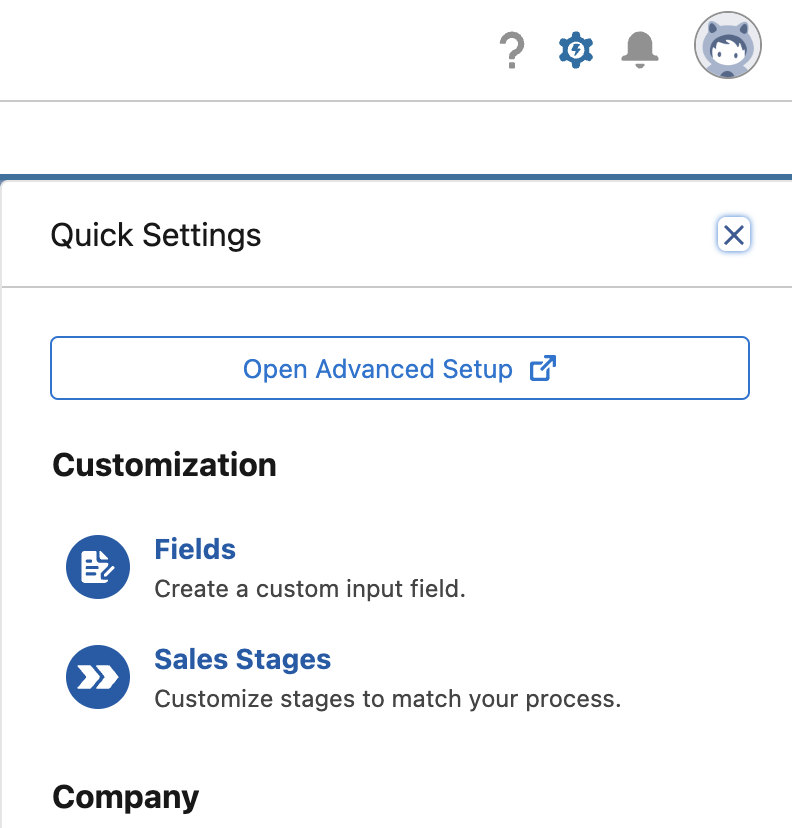
- Click on the
Gearicon in the top right and selectOpen Advanced Setupbutton.
- Select
Apps>App Manageroptions from the left side menu underPlatform Toolssection. - Select
New Connected Appbutton in the setup page. - Enter the basic details of your application
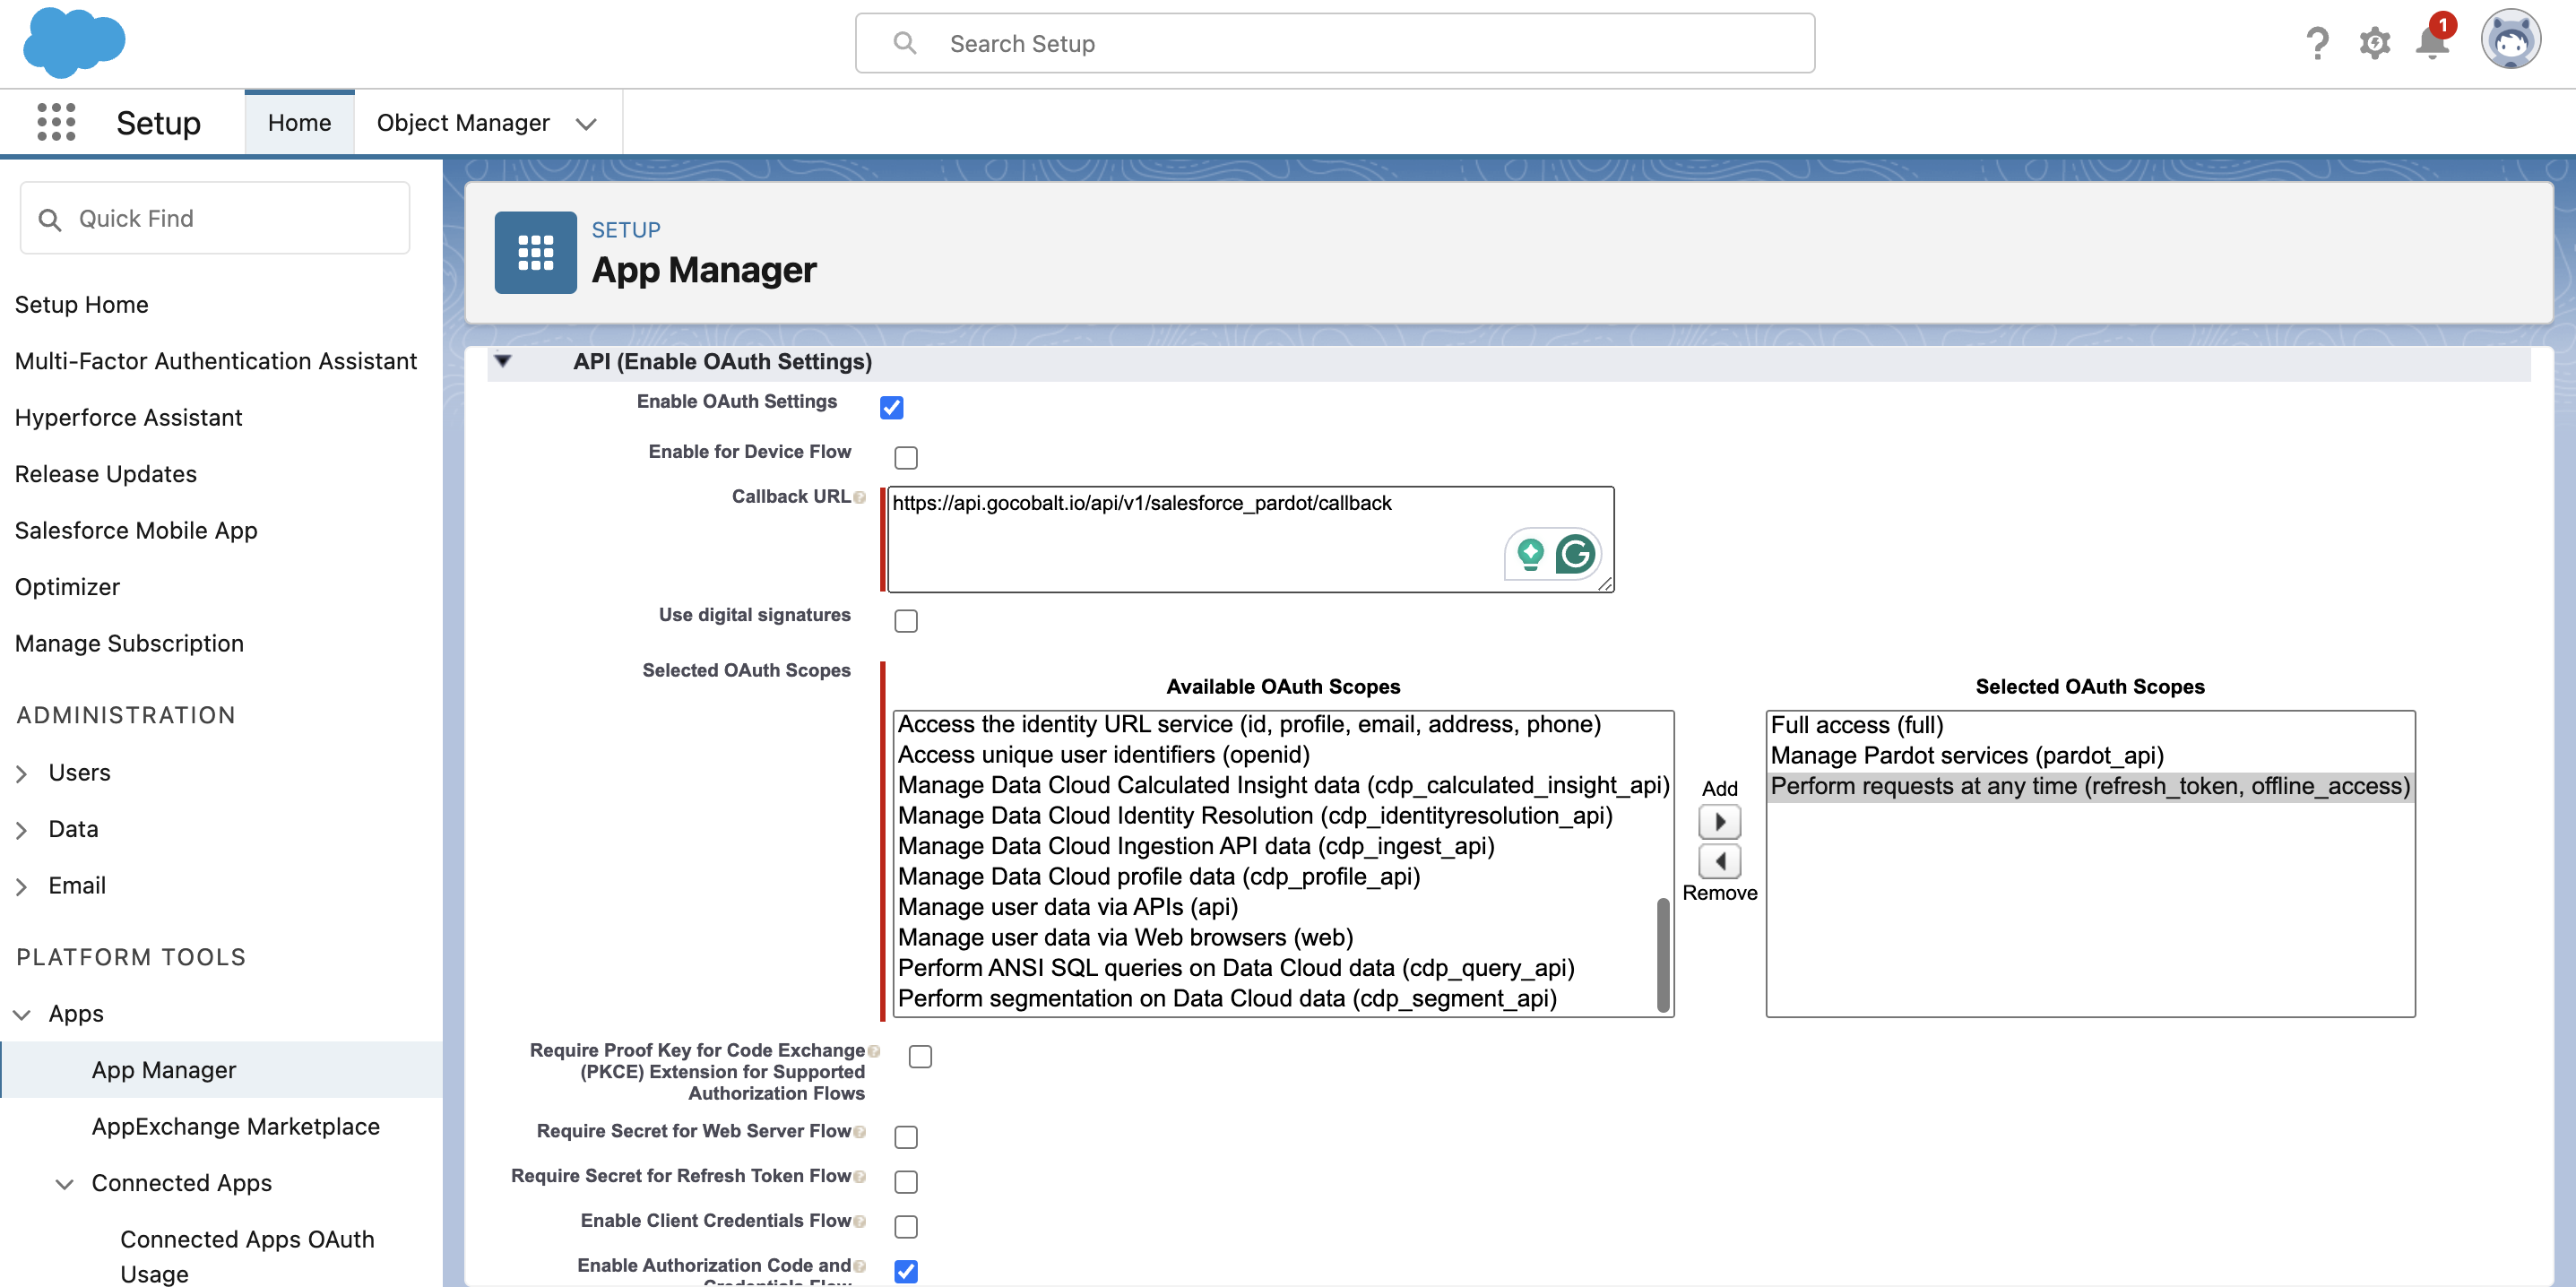
- Under API (Enable OAuth Settings), mark the
Enable OAuth Settingscheckbox. - Enter the Callback URL as provided in your Pardot settings page in Cobalt. Go to your
Apps catalog> Search forPardot>Settings>Use your credentials>Callback Url. - Select the required scopes, atleast the scopes selected in your Cobalt Pardot settings page.
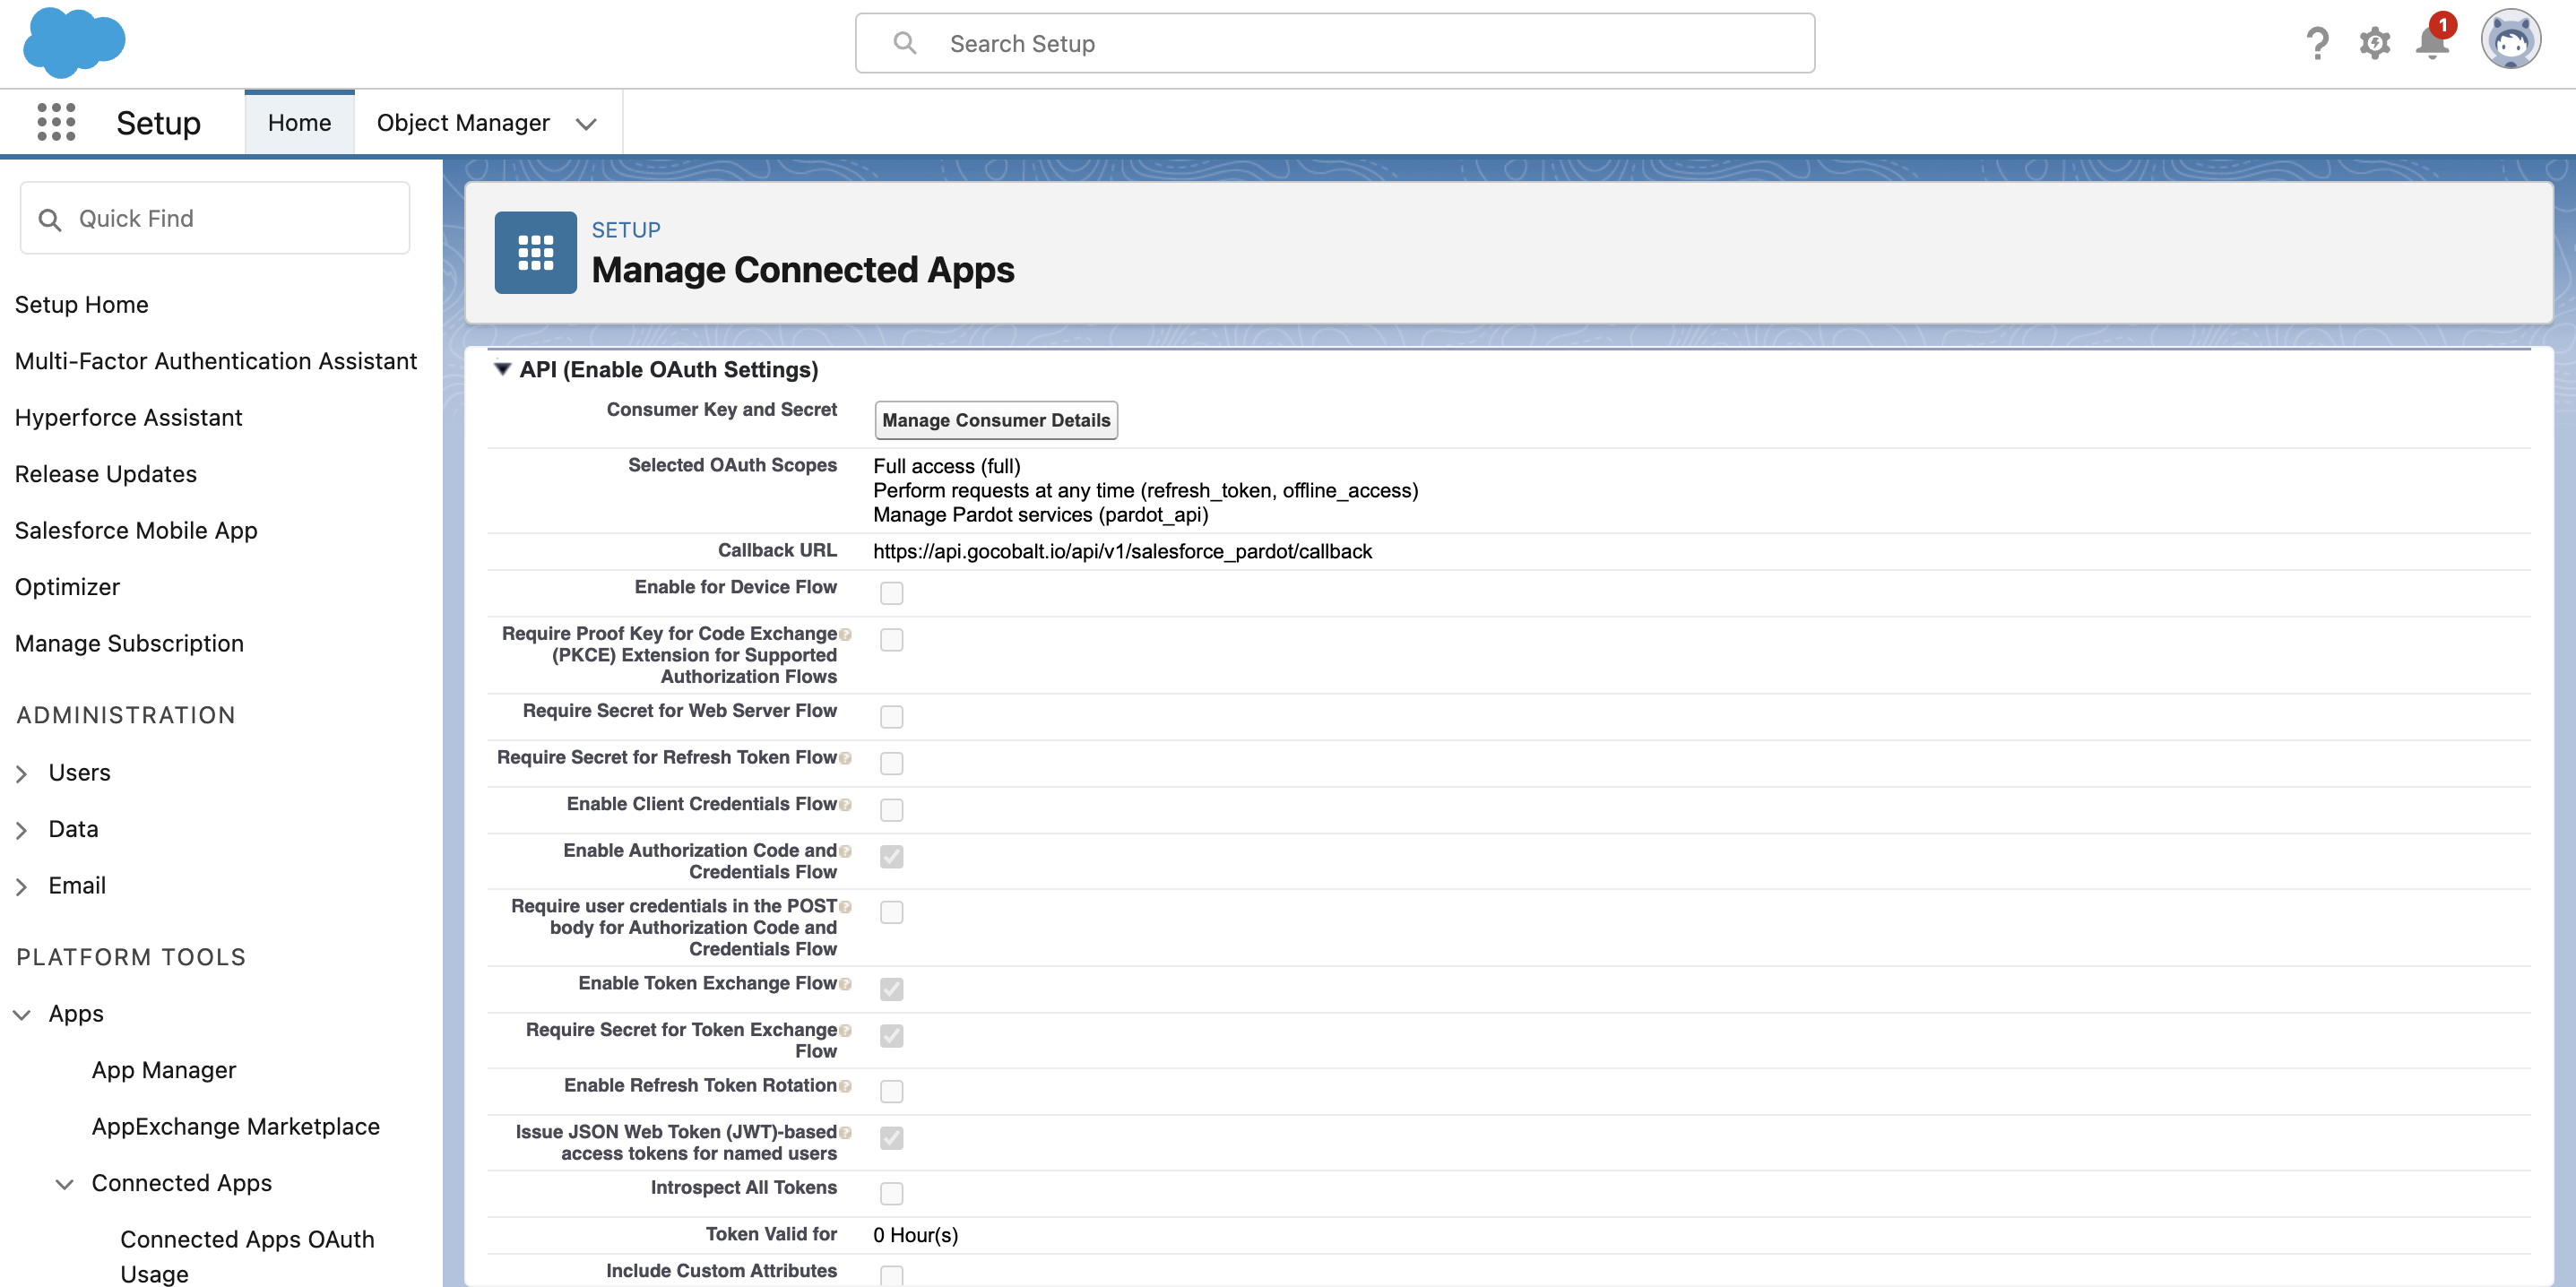
- Enable the following App Settings, click on the
Savebutton and clickContinue.- Require Secret for Refresh Token flow
- Enable Authorization Code and Credentials Flow
- Enable Token Exchange Flow
- Require Secret for Token Exchange Flow
- Issue JSON Web Token (JWT)-based access tokens for named users
- Click on the
Manage Consumer Detailsbutton under the API (Enable OAuth Settings) section, verify your identity and copy the Consumer Key and Consumer Secret.
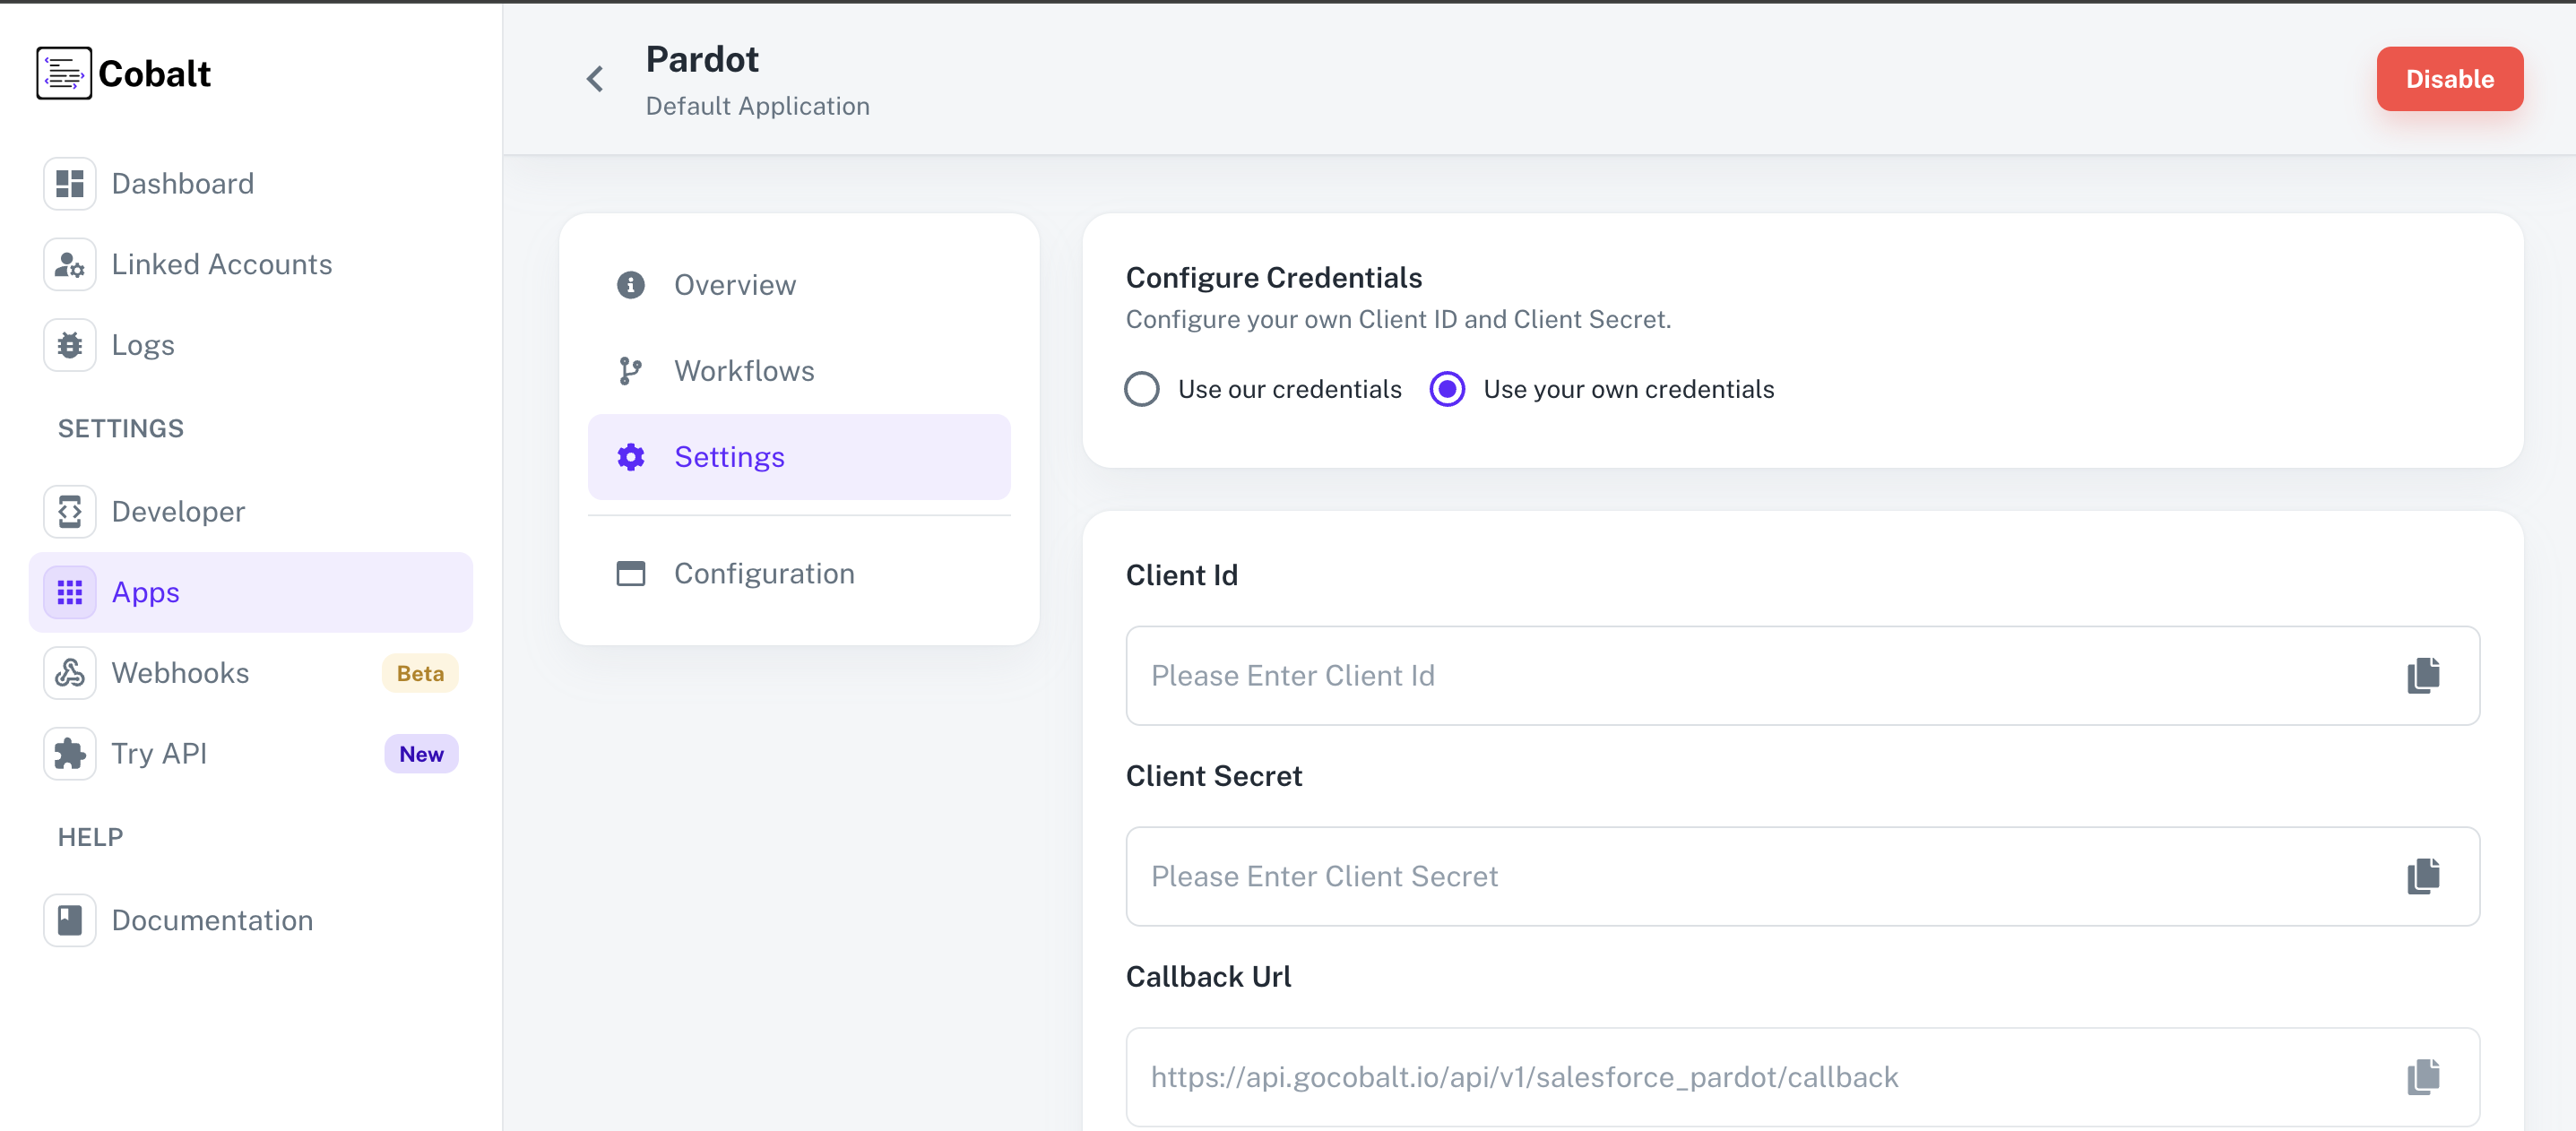
Configuring credentials in Cobalt
App settings page lets you configure the authentication settings for anOAuth2 based application. For your customers to provide you authorization to access their data,
they would first need to install your application. This page lets you set up your application credentials.
Configuring Scopes
Cobalt lets you configure what permissions to ask from your users while they install your application. The scopes can be added or removed from the App settings page, underPermissions & Scopes
section.
For some applications Cobalt sets mandatory scopes which cannot be removed. Additional scopes can be selected from the drop down. Cobalt also has the provision to add any
custom scopes supported by the respective platform.
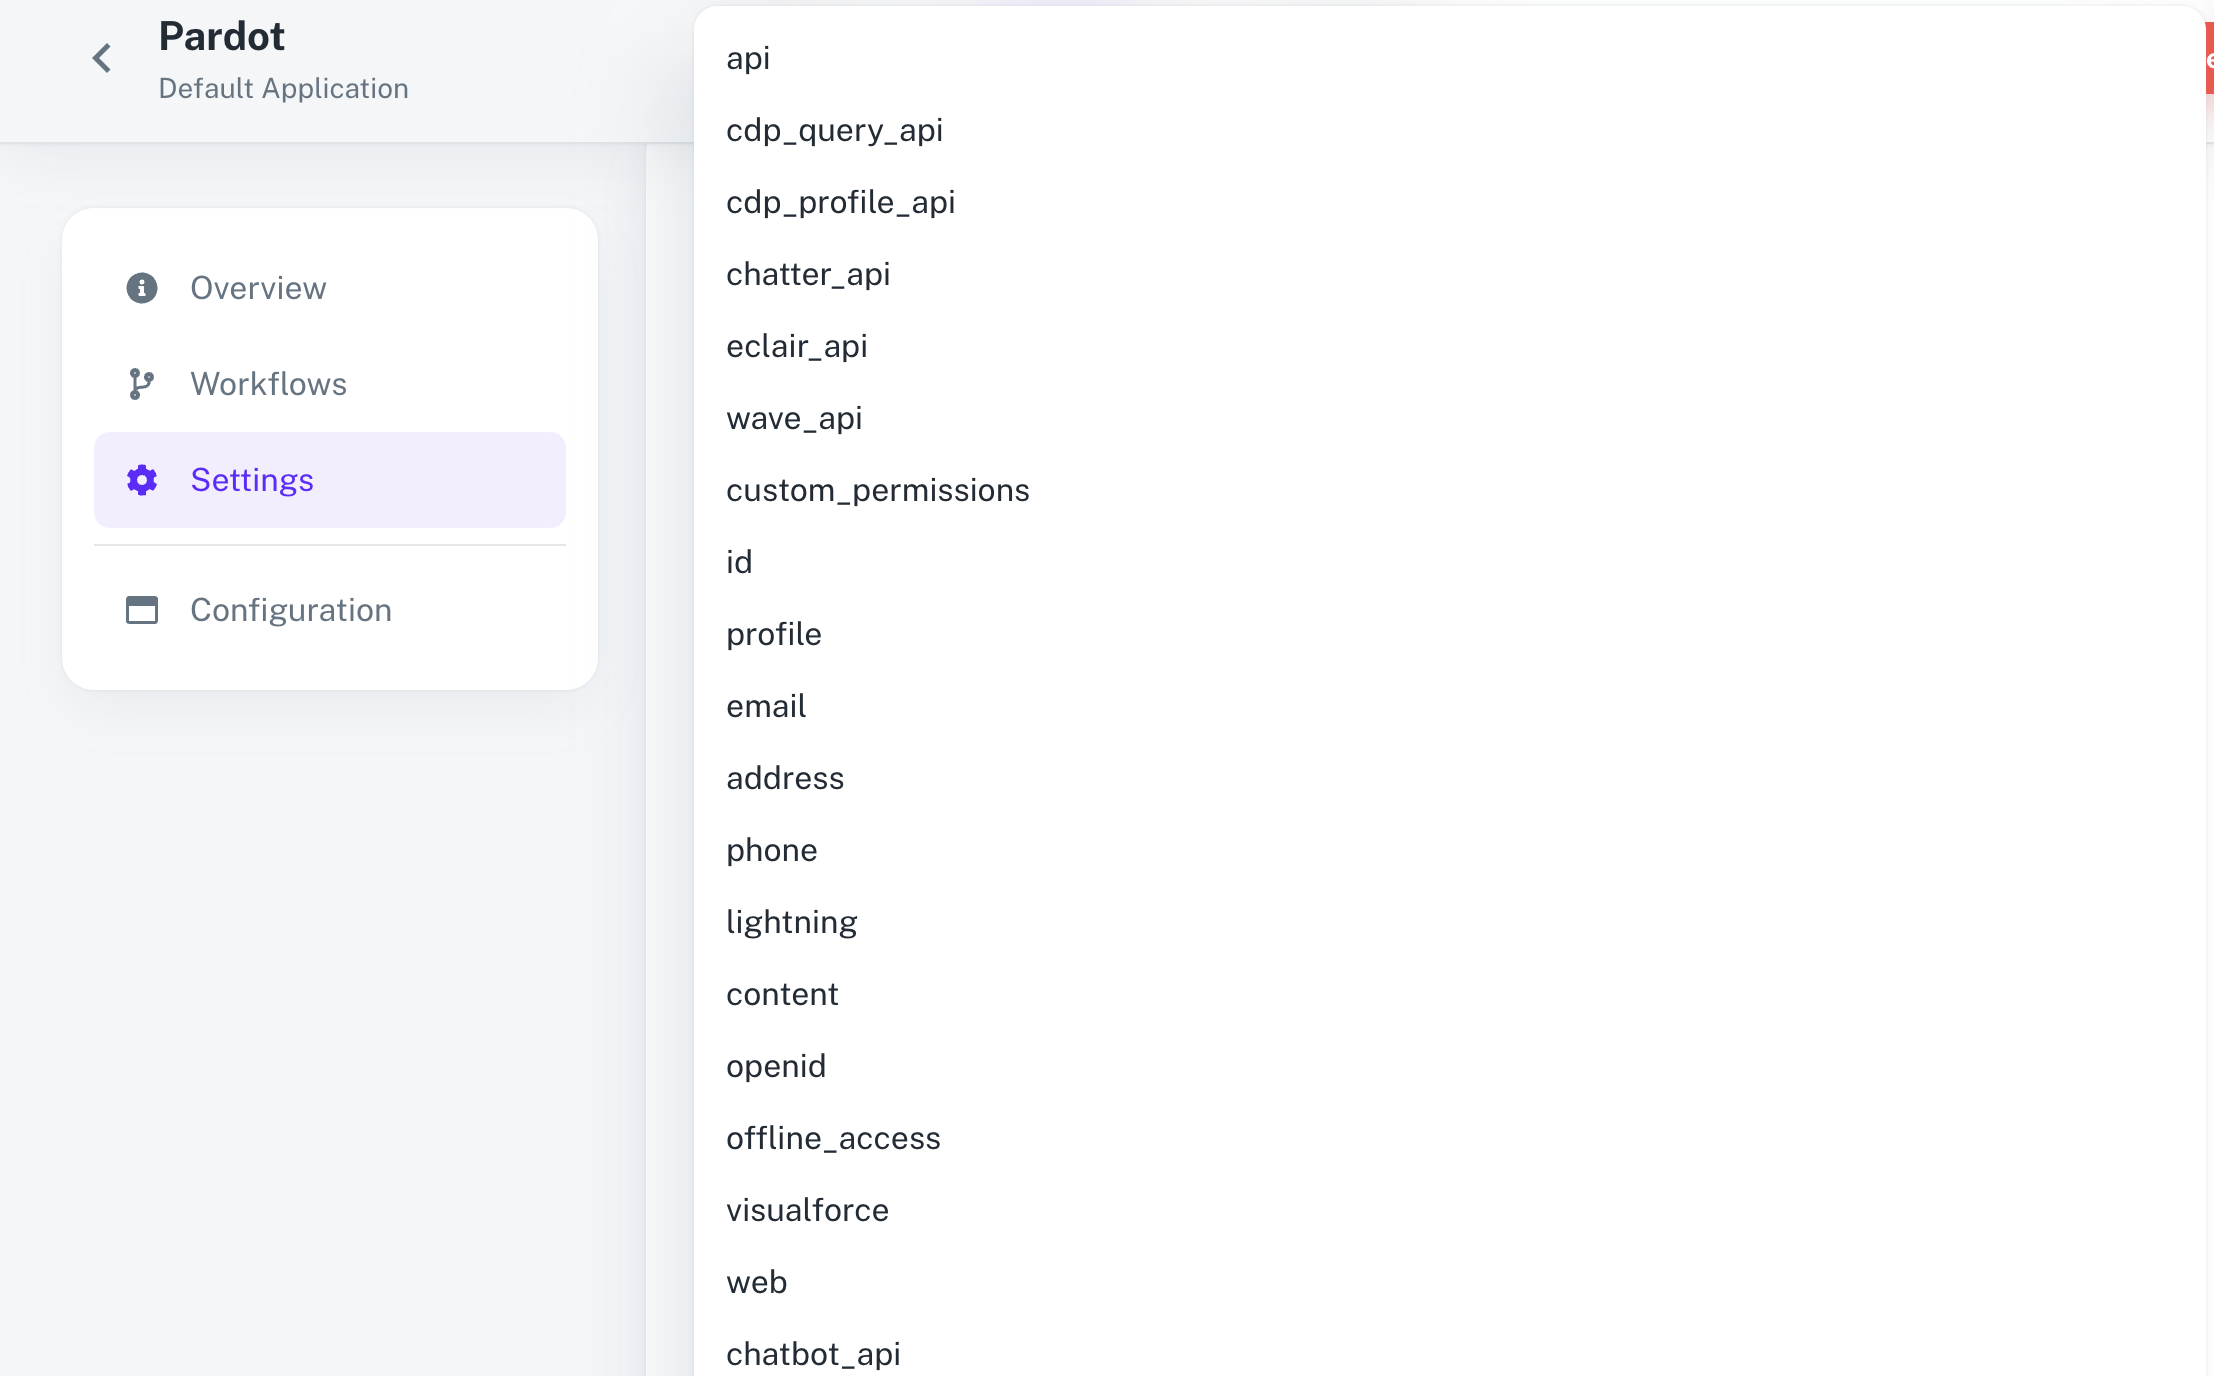
Apps > App Manager > Select the OAuth App created for Cobalt > Click on the dropdown menu > Select Edit > Selected OAuth Scopes > Add the scopes as added in Cobalt and click on Save.