To set up your Freshservice integration in Refold, you will need the following credentials from your Freshservice account:Documentation Index
Fetch the complete documentation index at: https://docs.refold.ai/llms.txt
Use this file to discover all available pages before exploring further.
- API Key
- Freshservice Domain
Getting API credentials in Freshservice
To acquire the above mentioned credentials from Freshservice, please follow the steps mentioned below:- Log in to your Freshservice account at
https://<your_domain>.freshservice.com. - Click on your profile picture on the top right corner of the dashboard.
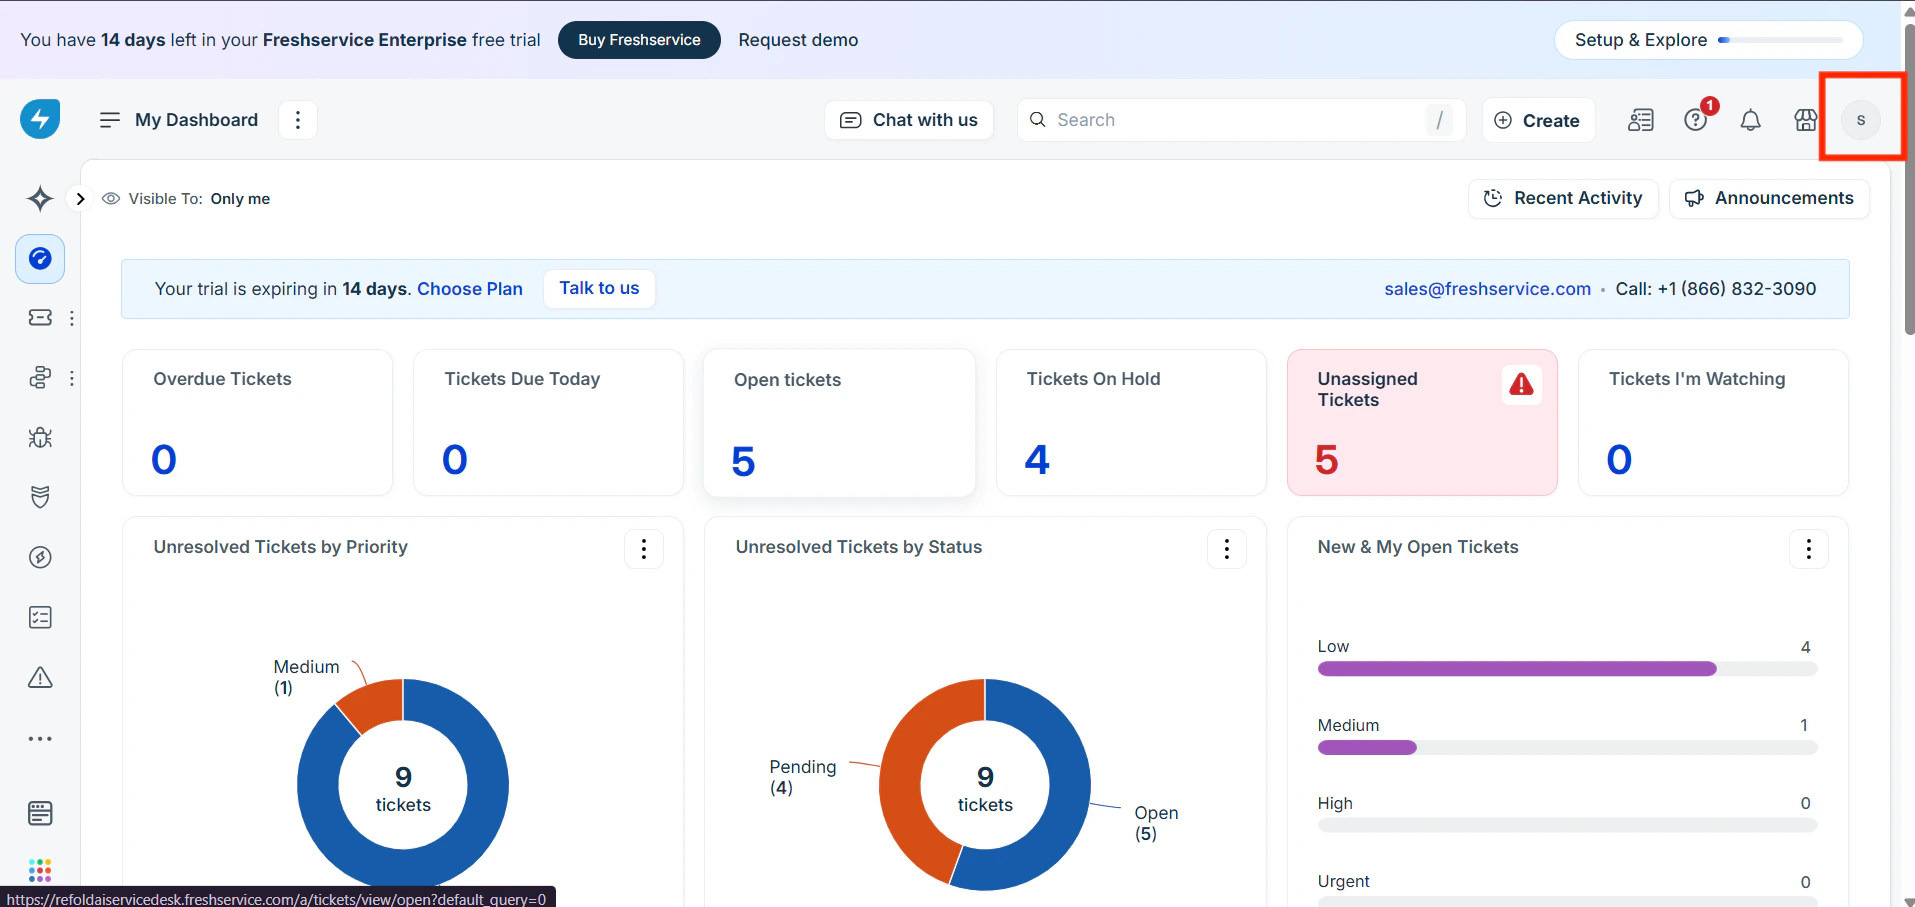
- Select Profile Settings from the dropdown menu.
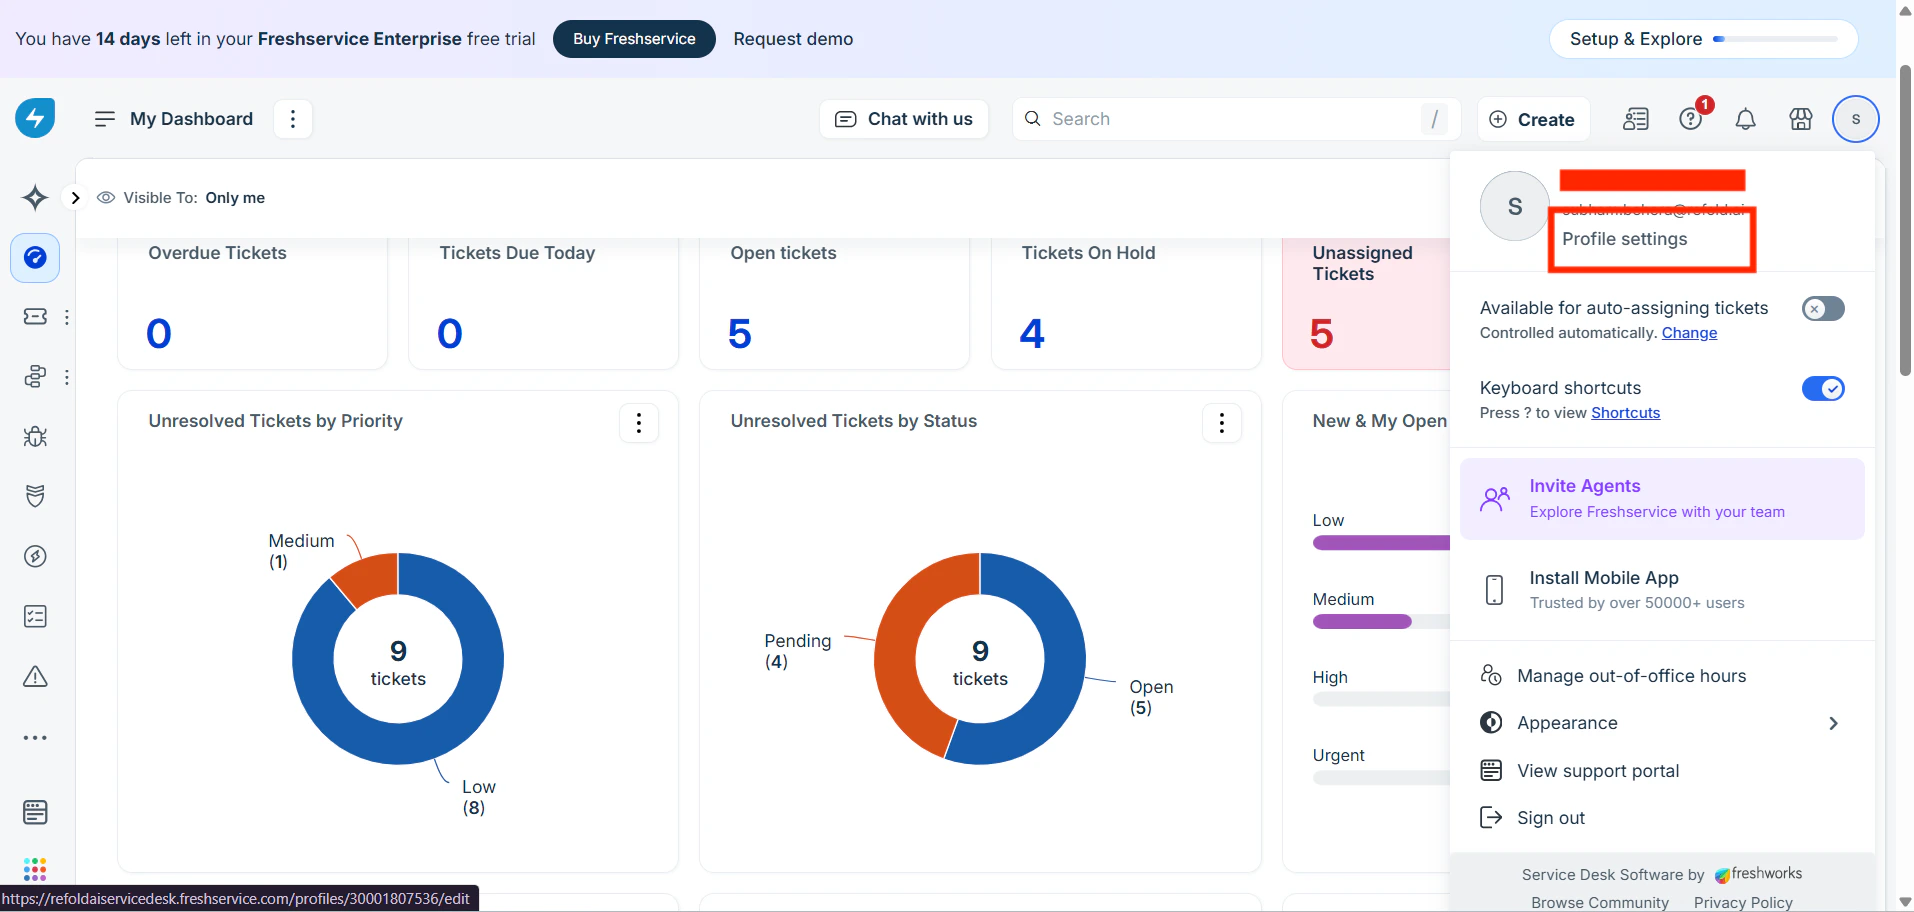
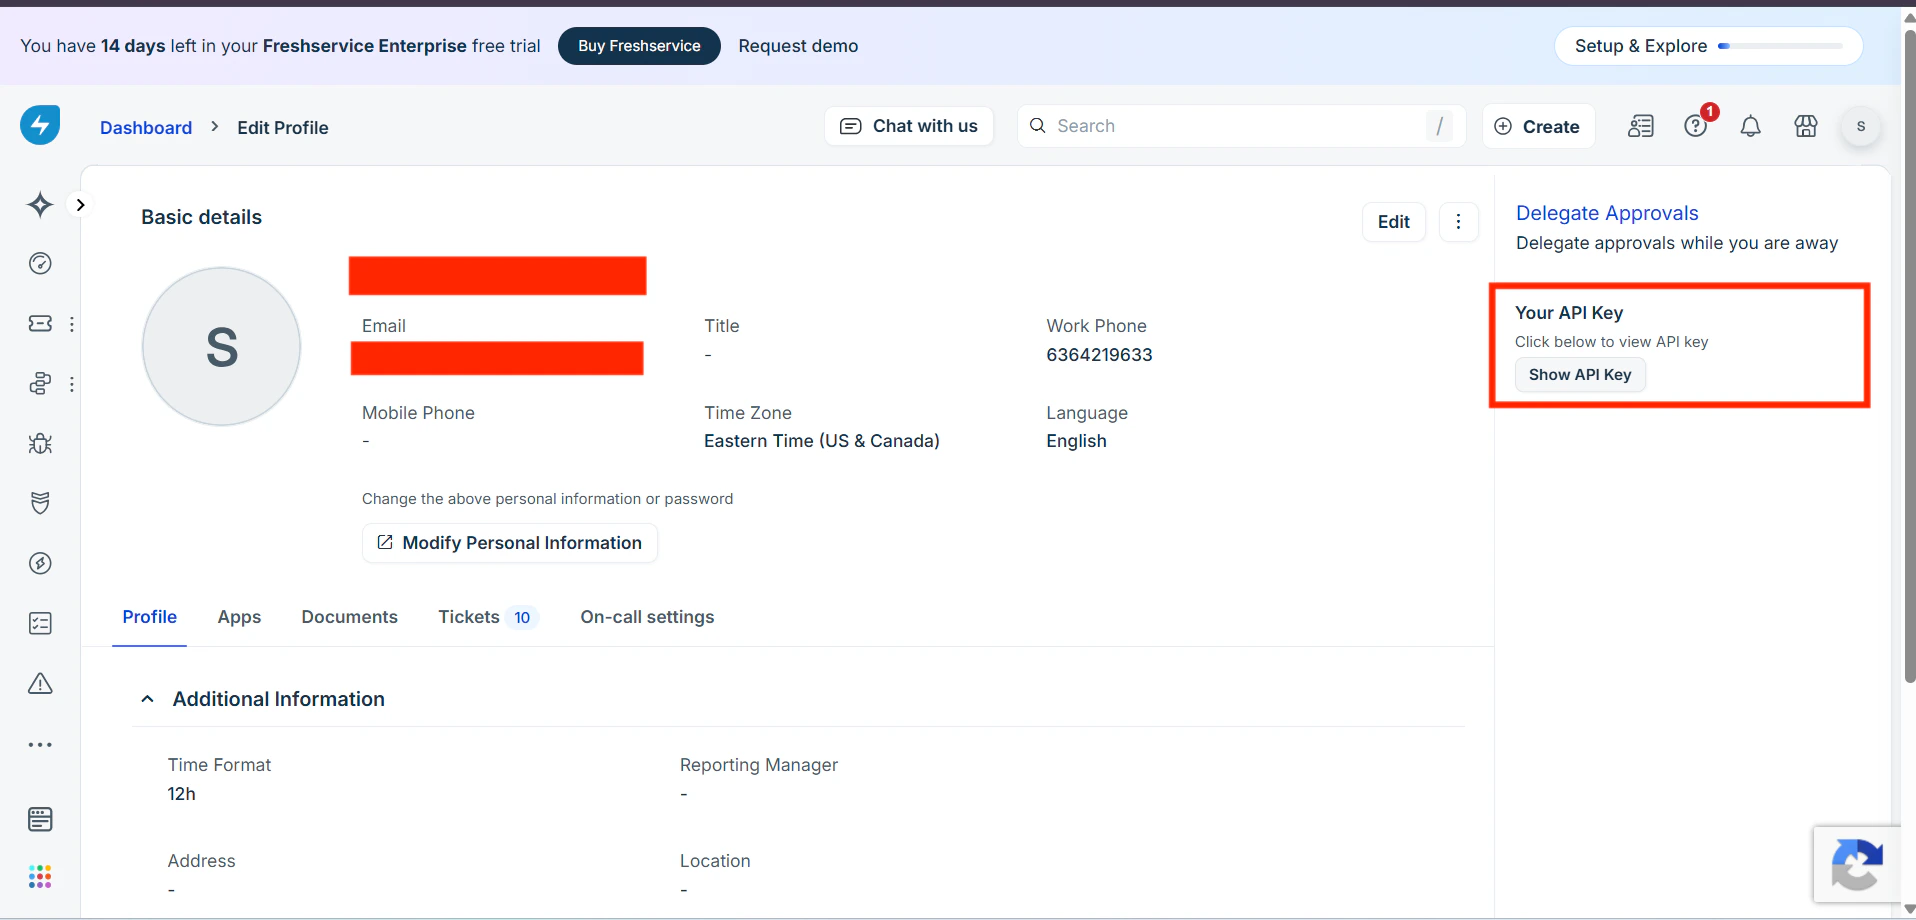
- On your Profile Settings page, scroll down to locate your API Key. Copy it and store it securely.
- Note your Freshservice Domain — this is the subdomain of your account URL (e.g., if your URL is
https://yourcompany.freshservice.com, your domain isyourcompany).
Configuring credentials in Refold
Navigate to the Freshservice app settings page in Refold and provide the API Key and Freshservice Domain you retrieved above, then save.Webhook Setup
Freshservice triggers in Refold are powered by Workflow Automator webhooks — Freshservice does not expose a public API for registering webhooks programmatically. You need to create one Automator rule per event type in your Freshservice account. This is a one-time configuration step.Pre-requisites
- Admin access to your Freshservice account.
- Your Refold credentials and an active linked account for Freshservice.
- The three identifiers that go into your callback URL:
org_id— your Refold Organization ID. Find this in Refold under Dashboard → Developer → Credentials → Organization ID.linked_account_id— the identifier of the Freshservice connection you created in Refoldenvironment— eithertestorproduction, depending on which Refold workspace your workflow is in
- A workflow already published in Refold with a Freshservice trigger node (e.g., Ticket Created).
Callback URL
The callback URL Refold expects follows this format:The
environment segment must match the Refold workspace where your workflow is published — test or production. A mismatch means the event is received but no workflow is triggered.Setting up the Workflow Automator in Freshservice
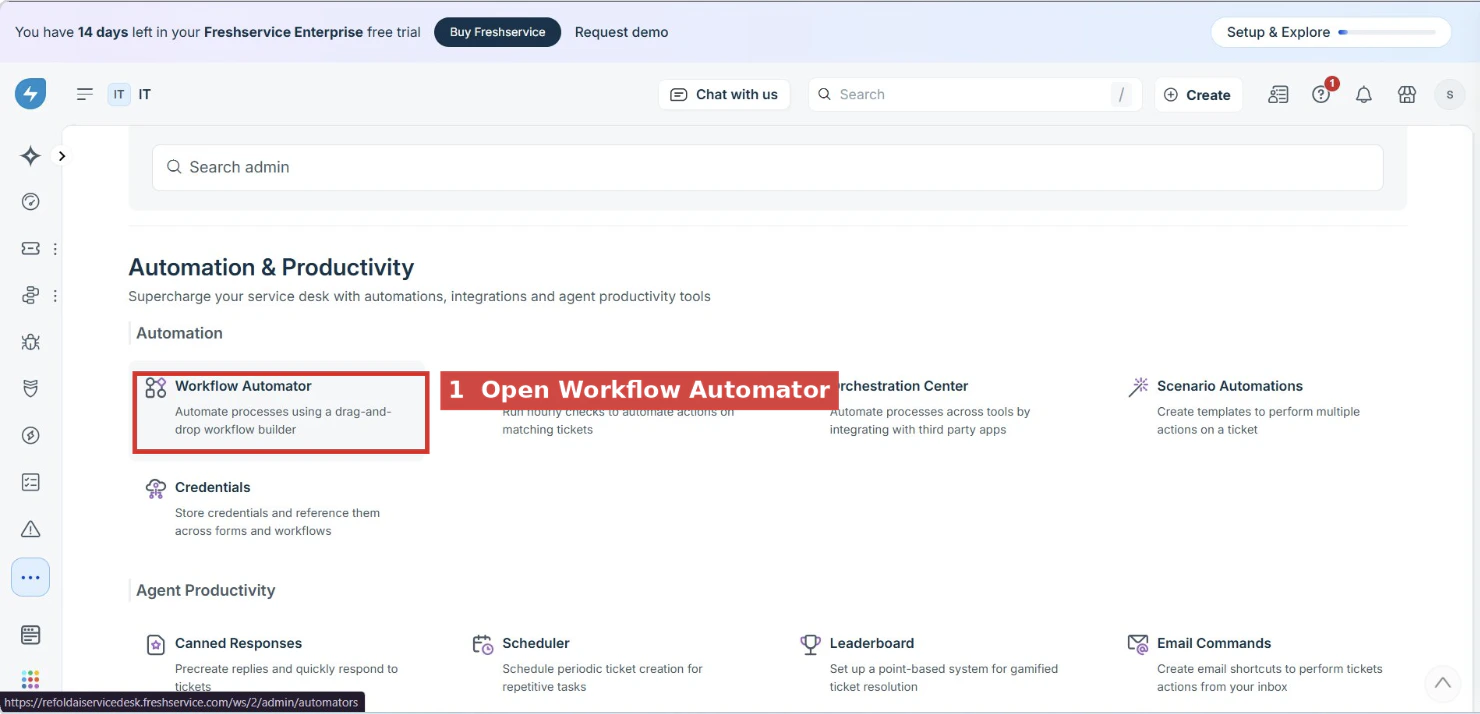
Step 1 — Open Workflow Automator
Log in to your Freshservice account. Click your avatar (or the side menu) and select Admin.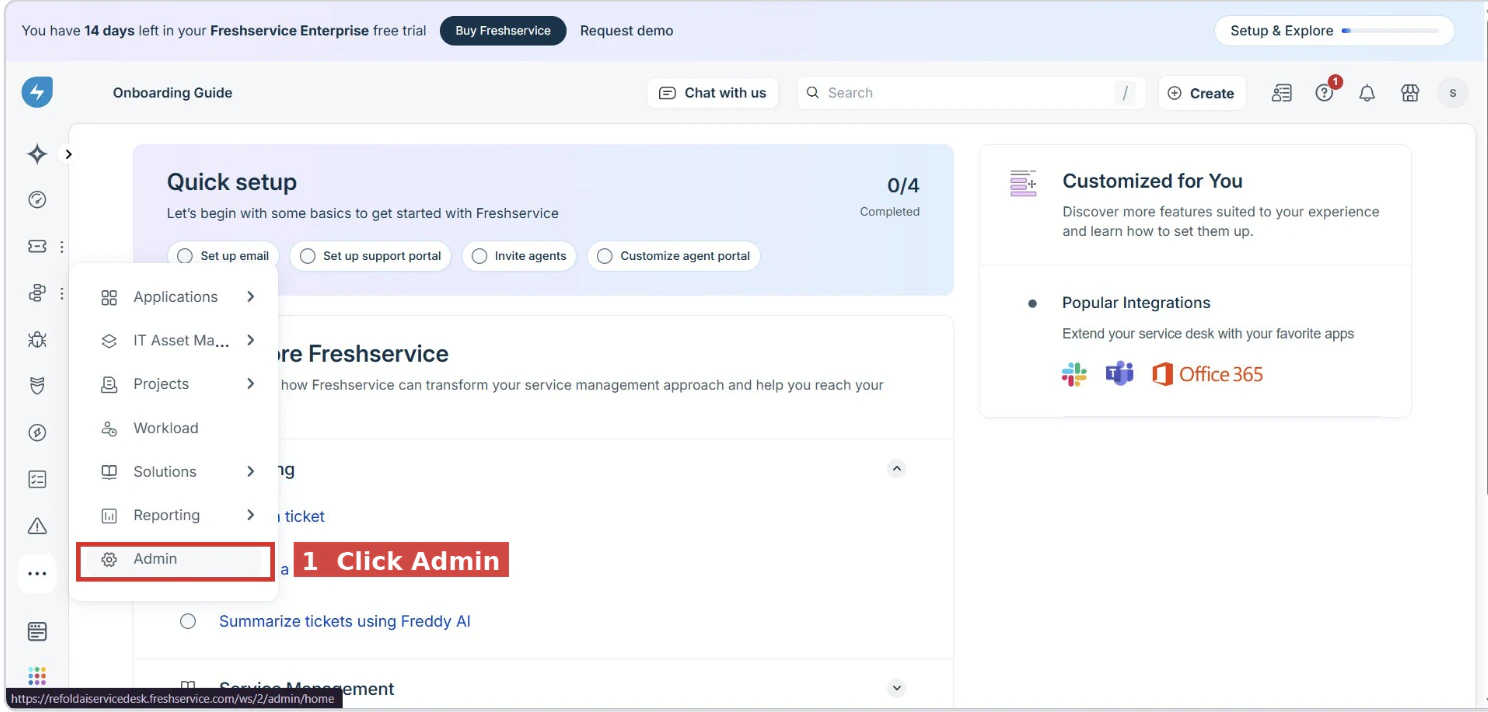
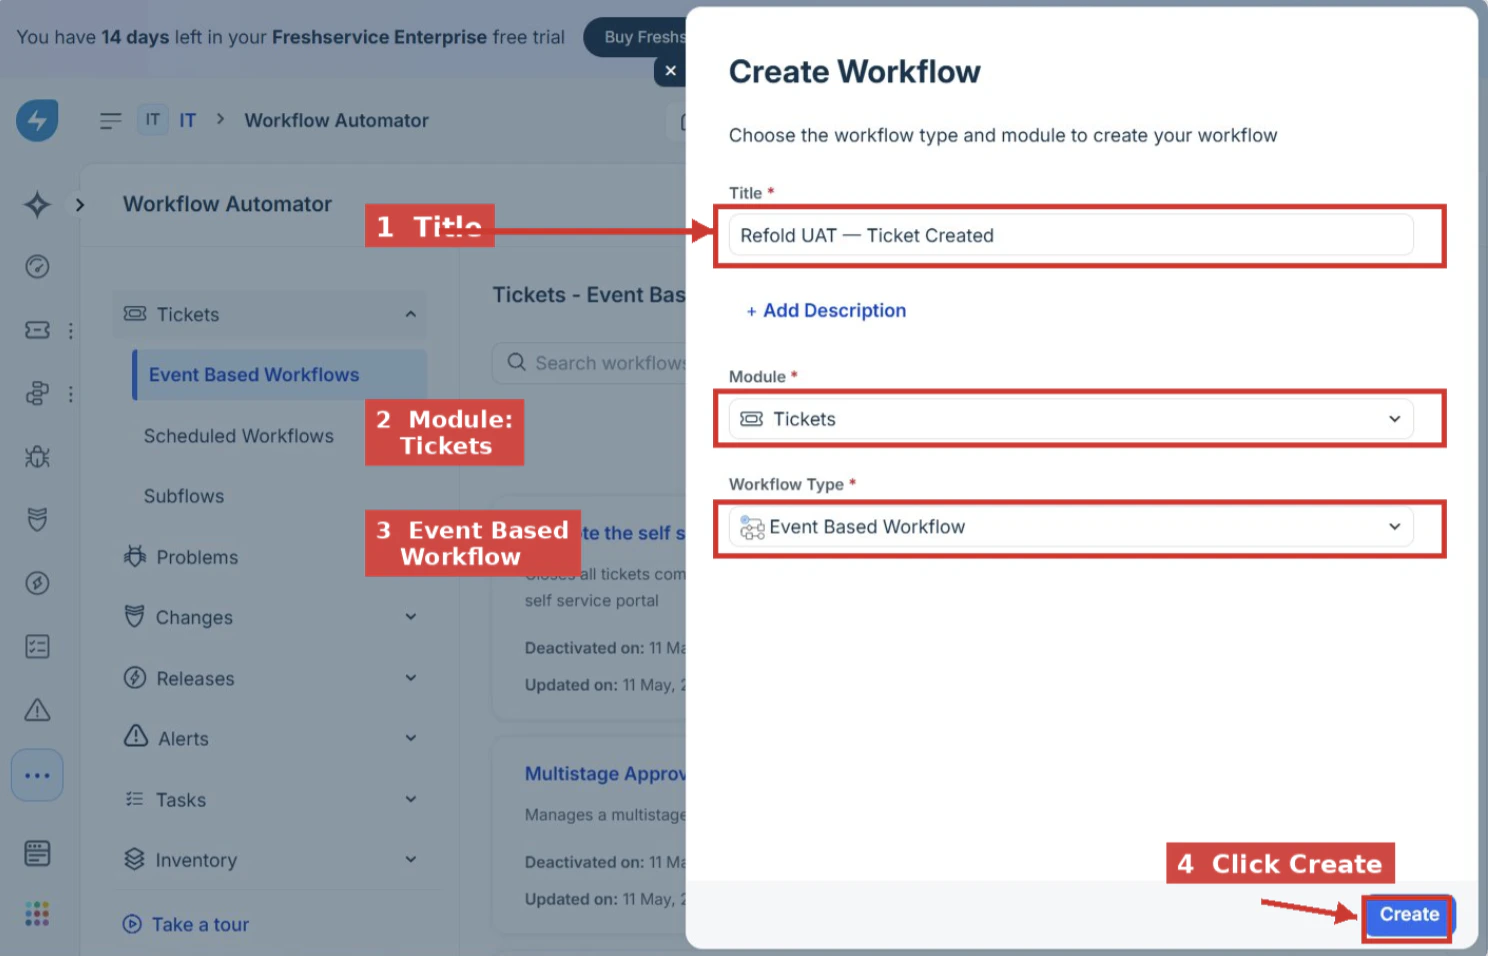
Step 2 — Create a new automator
Click Create (top right) and fill in the dialog:- Title:
Refold — Ticket Created - Module: Tickets
- Workflow Type: Event Based Workflow
Step 3 — Configure the trigger event
On the canvas, click the Event node. Set the event to Ticket is raised. Leave conditions empty for an initial test. Click Done.
Step 4 — Add the Trigger Webhook action
From the left sidebar, drag Action onto the canvas. In the action dropdown, choose Trigger Webhook.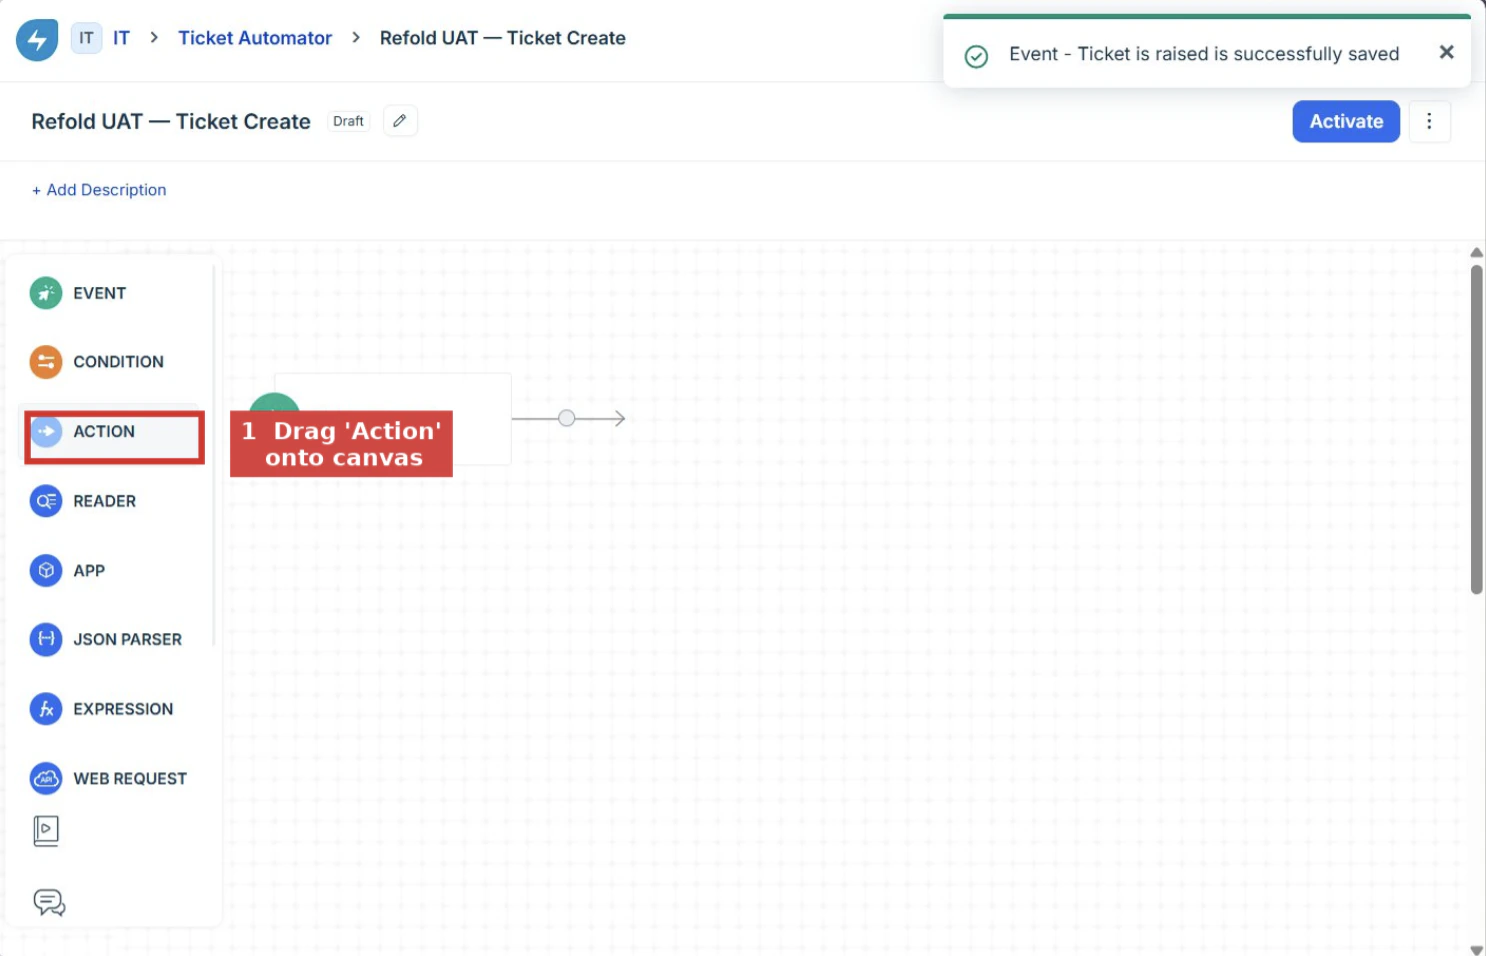
Step 5 — Fill in the webhook settings
Configure the action panel with the following values:| Field | Value |
|---|---|
| Request Type | POST |
| Callback URL | Your URL from the Callback URL section above |
| Requires Authentication | OFF (leave as default Inline Credential) |
| Encoding | JSON |
| Content | Switch to Advanced |
Step 6 — Paste the JSON body
In the Advanced content field, paste the following payload. Freshservice will substitute the{{ticket.*}} placeholders with real values when a ticket event fires.
The
event_type field tells Refold which trigger to fire. The {{ticket.*}} placeholders are Freshservice’s native template syntax — they are substituted with real values when a ticket event occurs. Note that the in-UI Test Webhook button does not expand these placeholders; you must fire a real ticket to verify the full payload.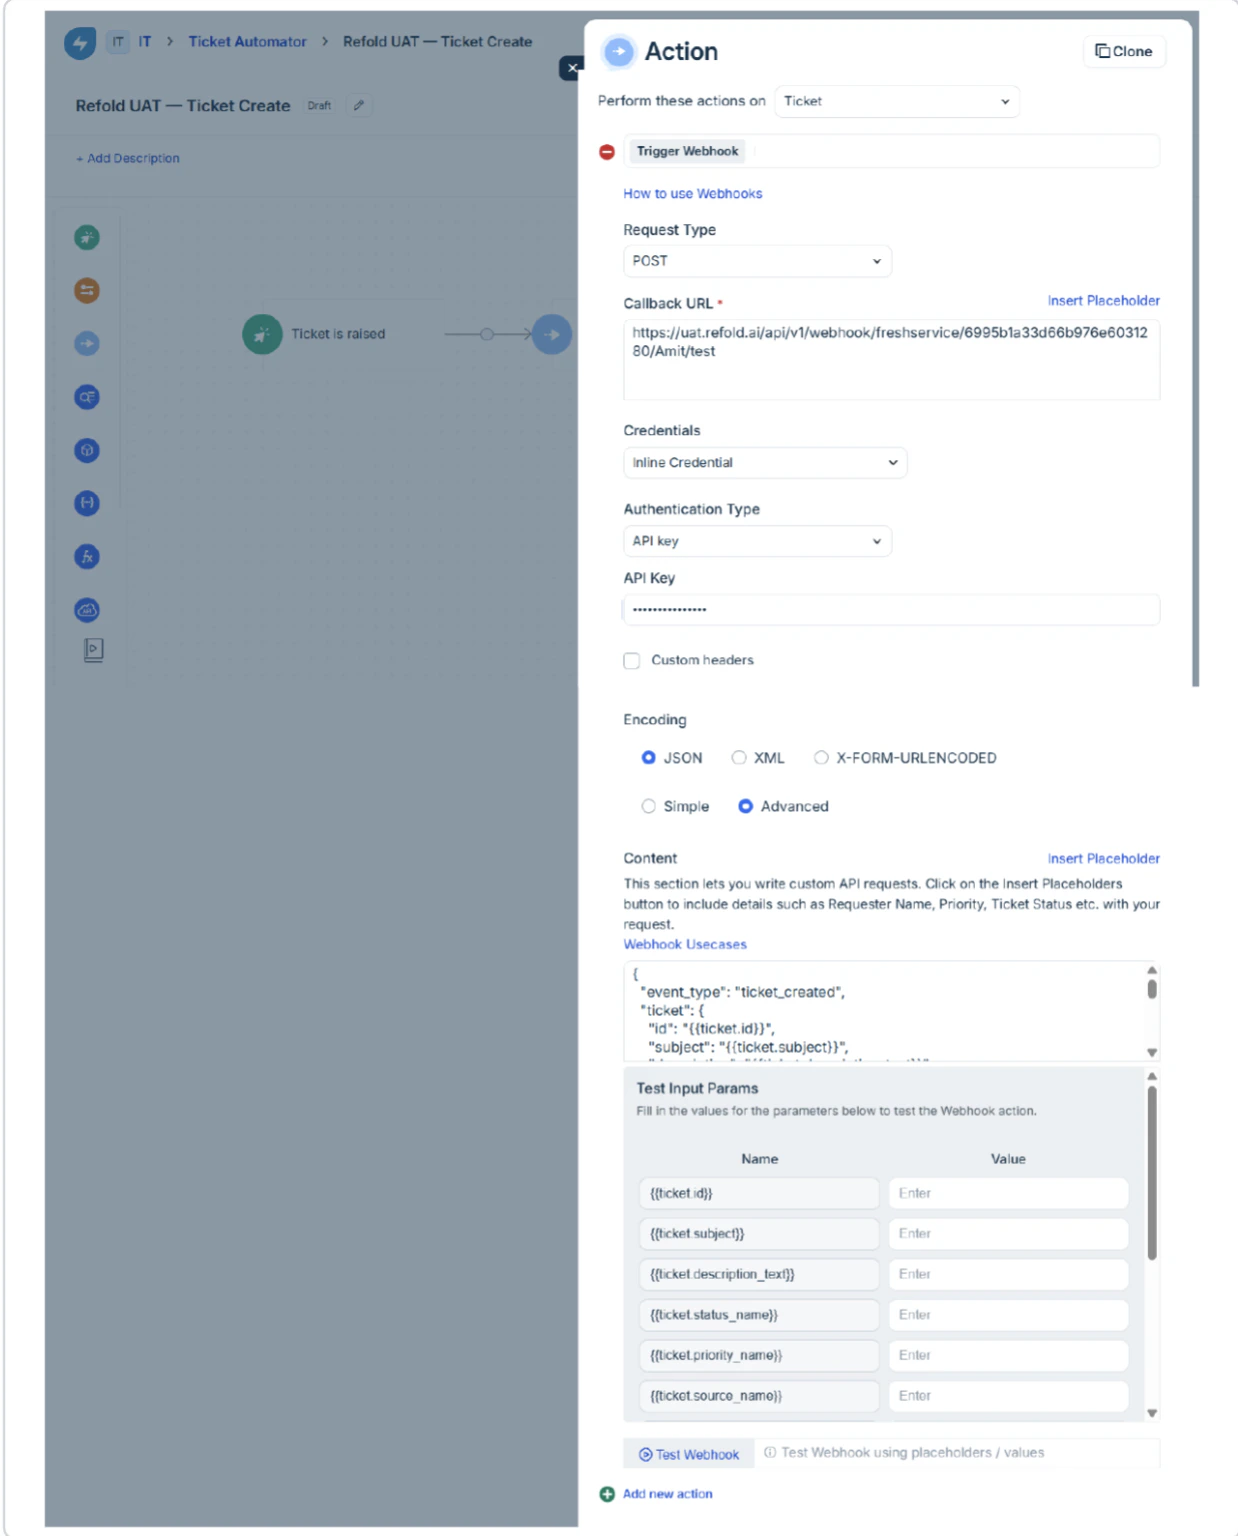
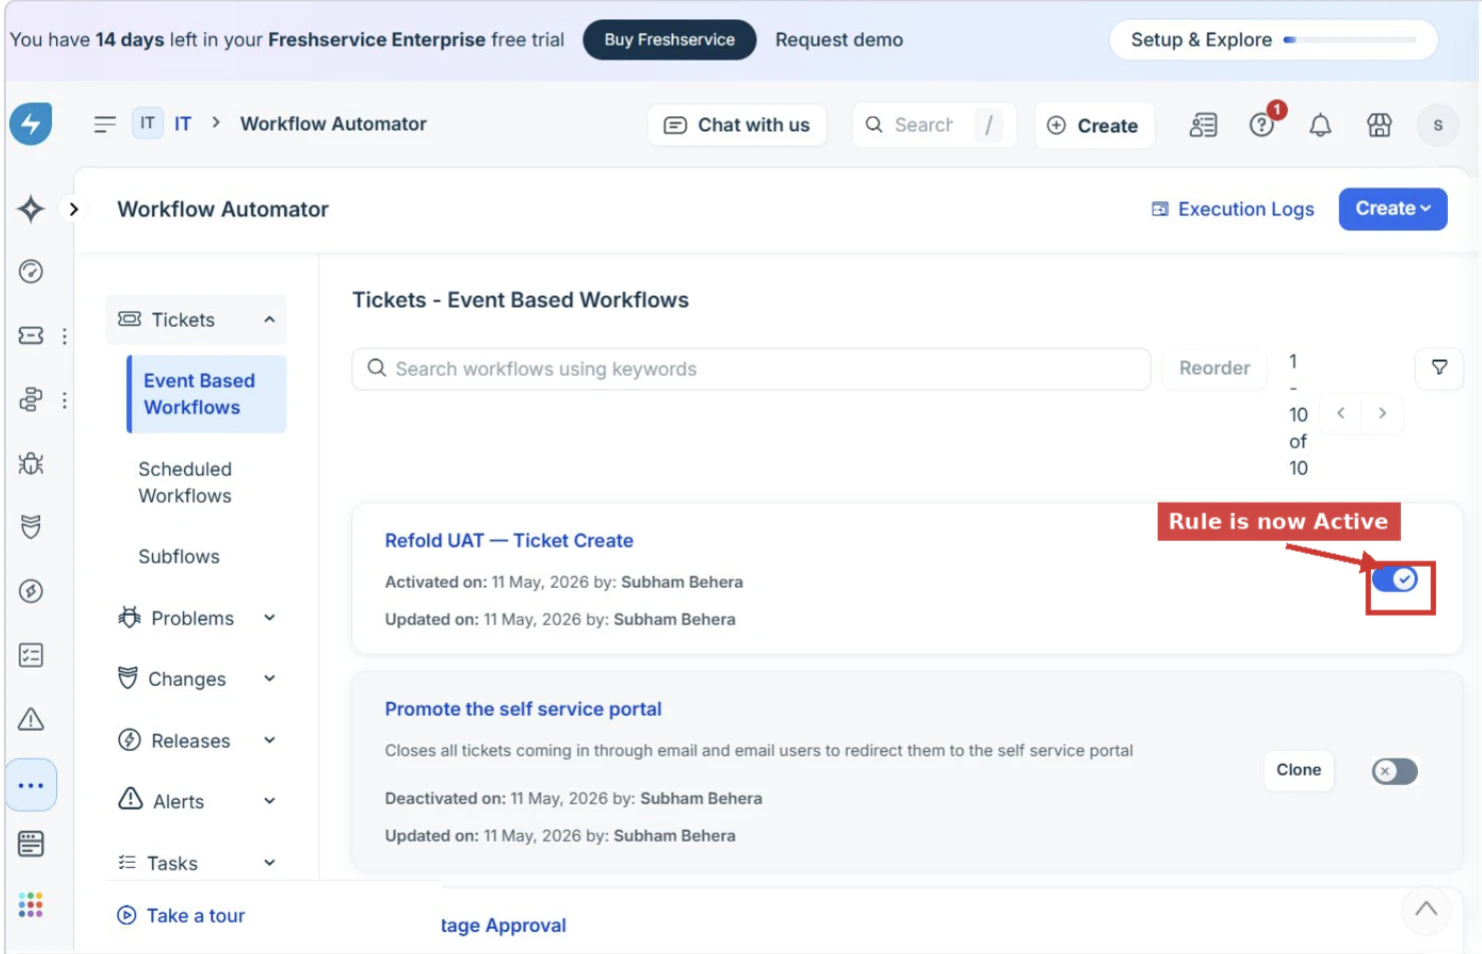
Step 7 — Save and activate
Click Done on the action panel, then click Activate at the top right of the canvas. Confirm in the dialog that appears.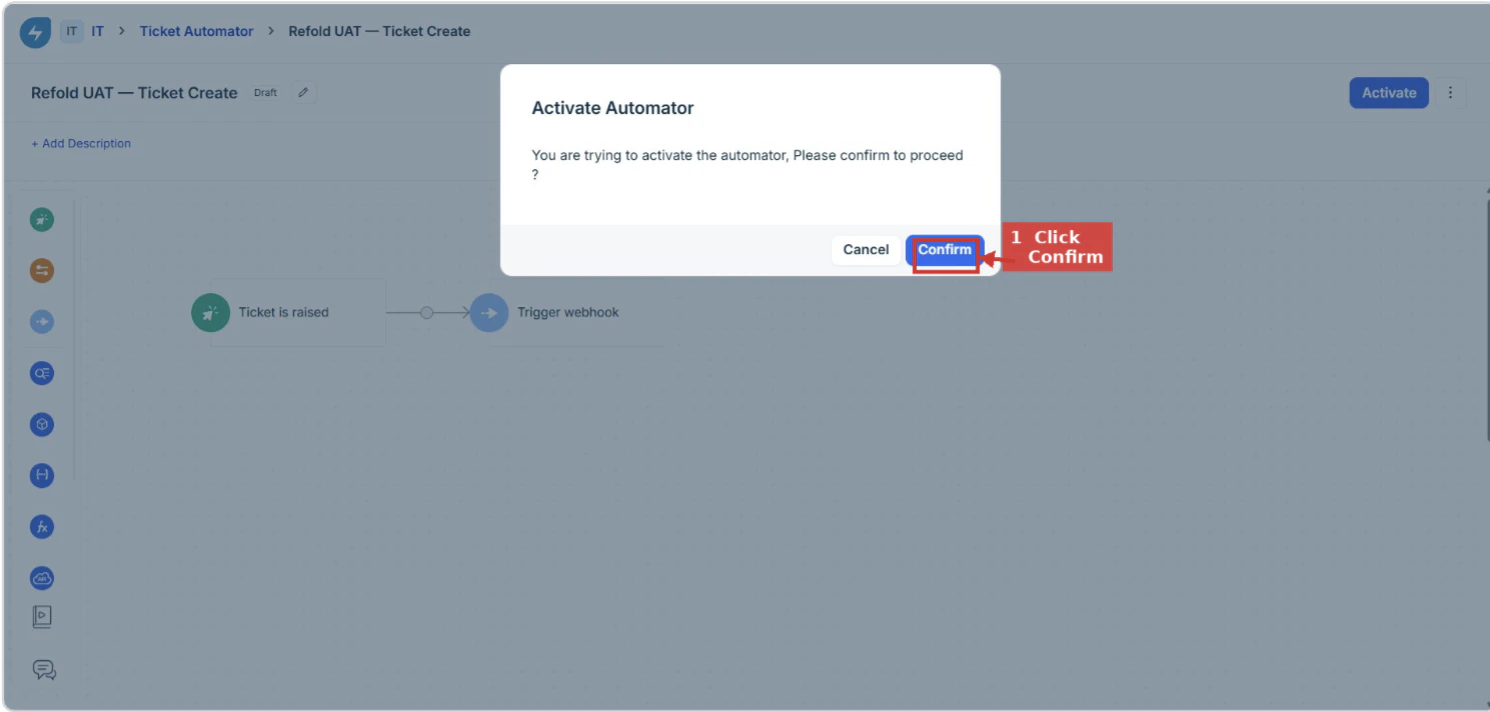
Setting up additional event types
Freshservice fires one webhook per Workflow Automator rule. For each additional event you want to send to Refold, create a separate rule and update theevent_type value in the JSON body accordingly.
| Freshservice event | event_type value |
|---|---|
| Ticket is Raised | ticket_created |
| Ticket Updated (any change) | ticket_updated |
| Status changed | ticket_status_changed |
| Priority changed | ticket_priority_changed |
| Assignee changed | ticket_assignee_changed |
| Other ticket field changed | ticket_field_updated |
| Note / comment added | ticket_note_created |
Verifying the connection
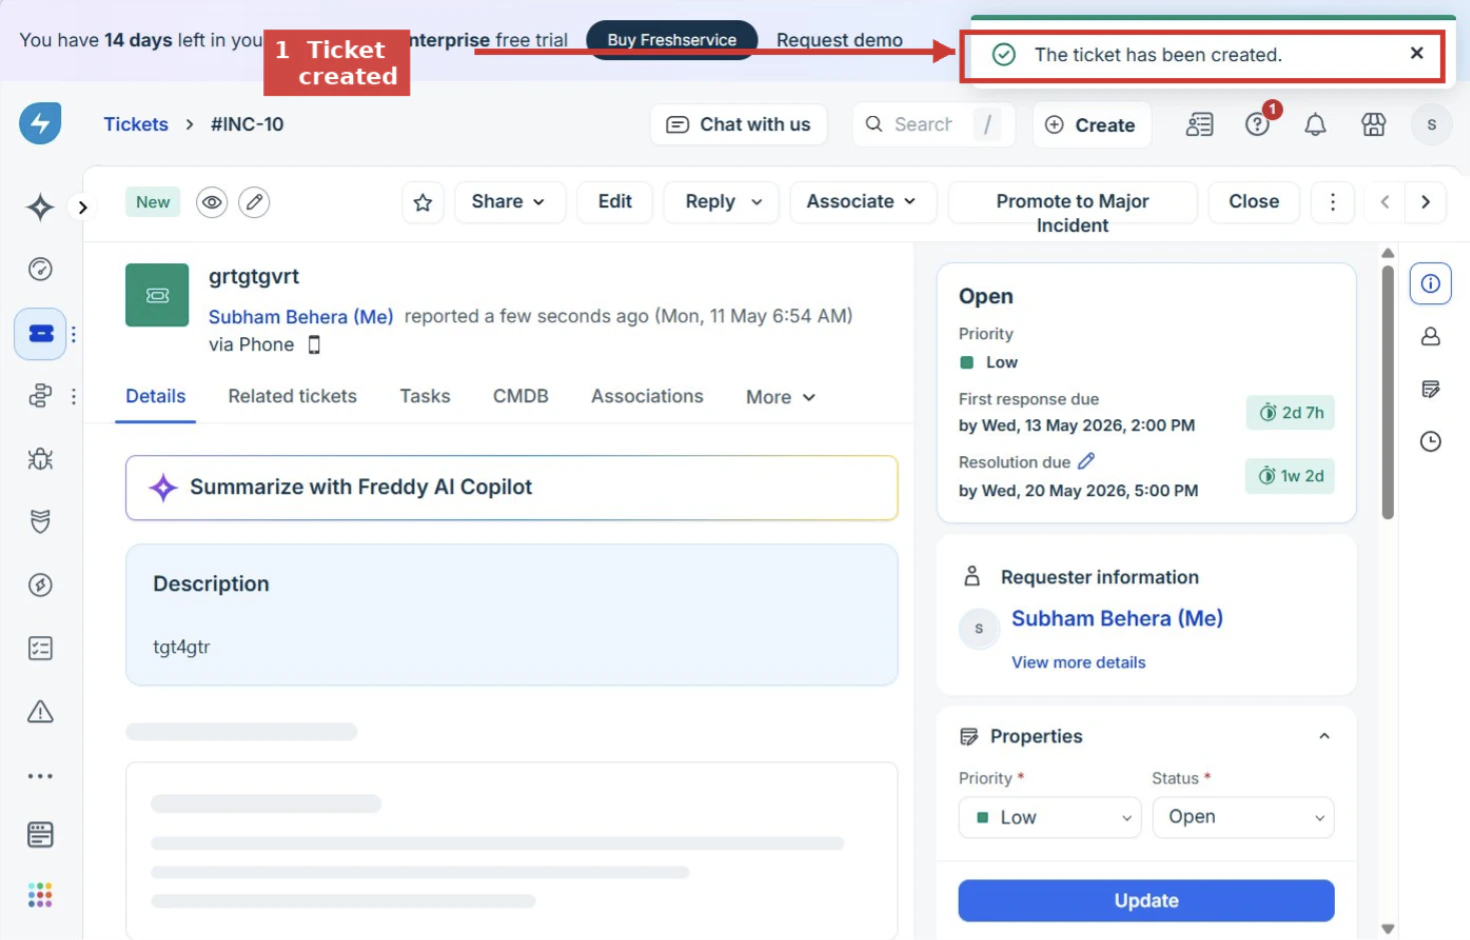
- Make sure the corresponding Refold workflow is Published.
- In Freshservice, go to Tickets → New Ticket, fill in a subject and requester, then click Create.
- Within a few seconds, the rule should fire. Open the ticket → Activities tab to confirm the webhook fired with a
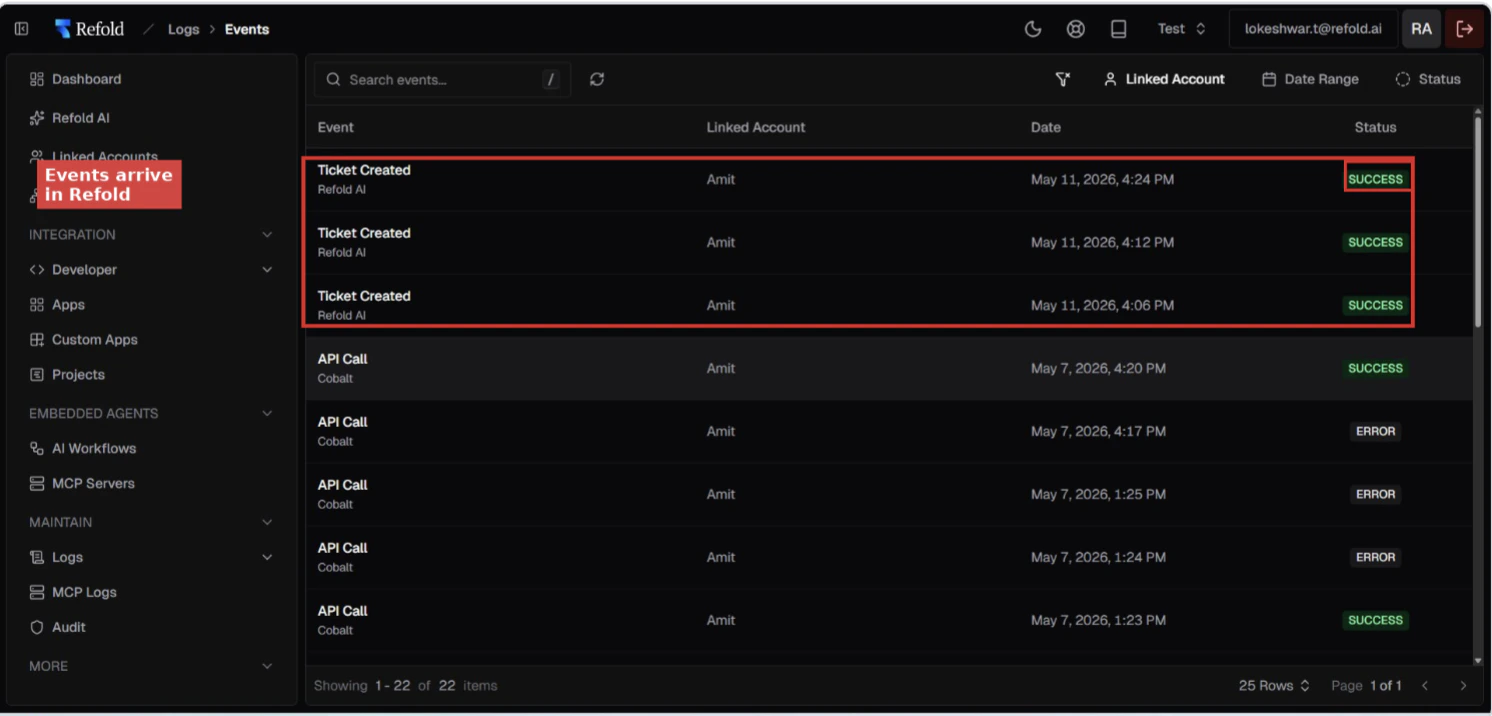
200response. - In Refold, open your workflow → Executions tab — a new run should appear.
Troubleshooting
| Symptom | Likely cause | Fix |
|---|---|---|
| Webhook shows non-2xx in Activities | URL malformed or Refold endpoint unreachable | Re-check URL spelling, all three path parameters, and that there is no trailing slash |
| Webhook returns 200 but no Refold execution appears | environment segment doesn’t match where the workflow is published | Confirm the workflow is published in the workspace that matches test or production in the URL |
Test Webhook button shows literal {{ticket.id}} text | Freshservice does not expand placeholders during the in-UI test flow | Fire a real ticket — placeholders expand correctly on real events |
| Activities log shows unexpected field values | Placeholder names mismatched | Cross-check field names with the Freshservice Workflow Automator placeholder reference |
| Multiple workflow runs triggered per ticket | Multiple matching Automator rules all firing | Make rules mutually exclusive using conditions, or consolidate into one rule |
Security notes
Actions and triggers
Once the above setup is completed, you can create orchestrations of your use-cases using Freshservice actions and triggers. Following are the set of Freshservice actions and triggers supported by Refold.- Actions
- Triggers
Agent
Agent
- List Agents - List all agents in Freshservice.
- Get Agent By ID - Get an agent by ID in Freshservice.
- Create Agent - Creates an agent in Freshservice.
- Update Agent - Updates an agent in Freshservice.
- Delete Agent - Deletes an agent in Freshservice.
Ticket
Ticket
- Create Ticket - Creates a ticket in Freshservice.
- List Tickets - Get all tickets in Freshservice.
- Update Ticket - Updates a ticket in Freshservice.
- List Conversations of a Ticket - Gets all conversations of a ticket in Freshservice.
- Update Conversation - Updates a conversation on a ticket in Freshservice.
Others
Others
- HTTP Request - Make HTTP API calls to any Freshservice documented REST APIs.
- Incremental Sync - Check for new data in the endpoint.